
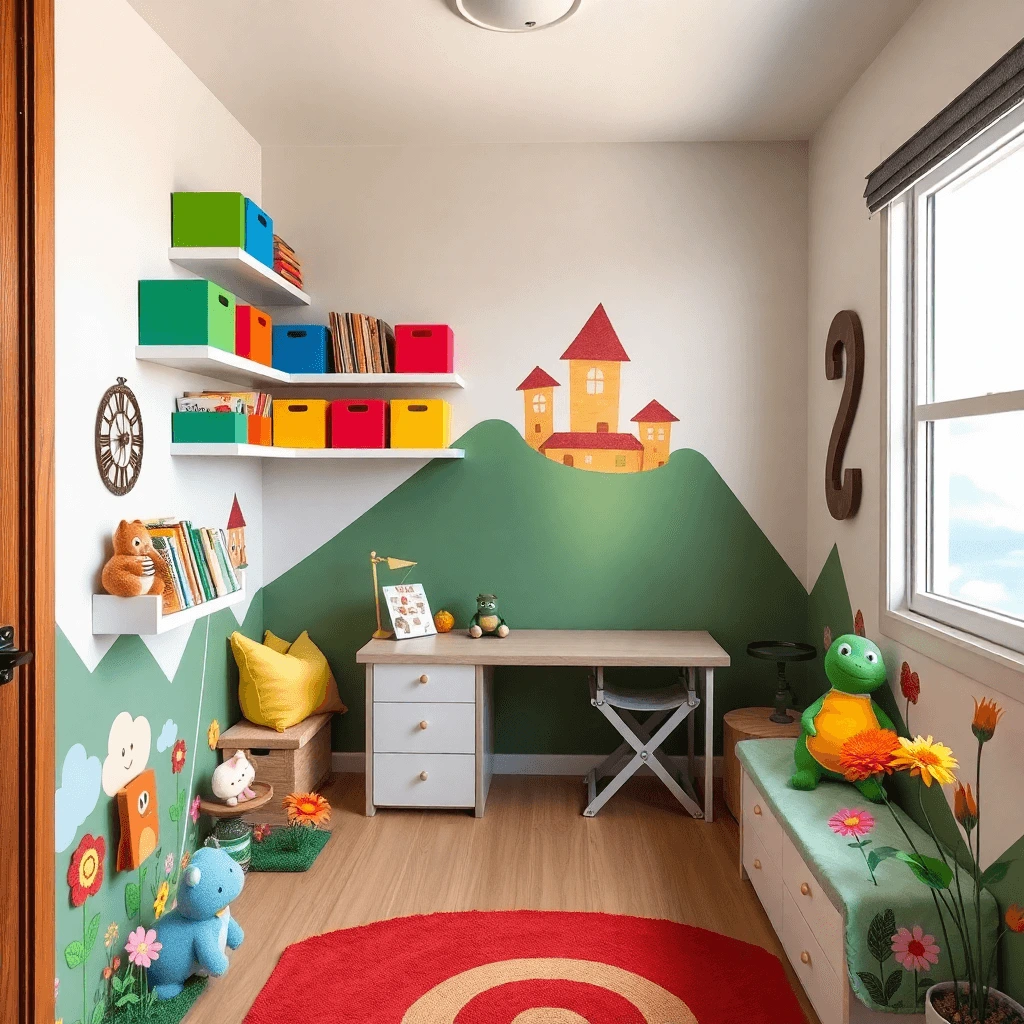
Children’s room ideas for small rooms don’t have to mean compromising on style, creativity, or fun. Designing a cozy yet functional space for your little ones in a compact area can feel like a puzzle, but with the right tricks, even the tiniest room can transform into a magical haven that sparks joy and grows with them. Whether you’re working with a snug nursery, a shared bedroom, or a quirky attic nook, the key lies in smart layouts, vertical ingenuity, and playful design choices that prioritize both storage and imagination.
In this guide, you’ll discover how to turn cramped corners into vibrant zones for sleep, play, and learning. From multifunctional furniture that moonlights as secret toy hideouts to light-filled color palettes that visually expand walls, we’ll unpack actionable tips to maximize every square inch. Plus, we’ll share themed decor hacks and budget-friendly DIY projects that prove big style doesn’t require big space—just big creativity. Let’s reimagine your child’s room as a place where small meets spectacular!
Multifunctional Furniture to Maximize Space

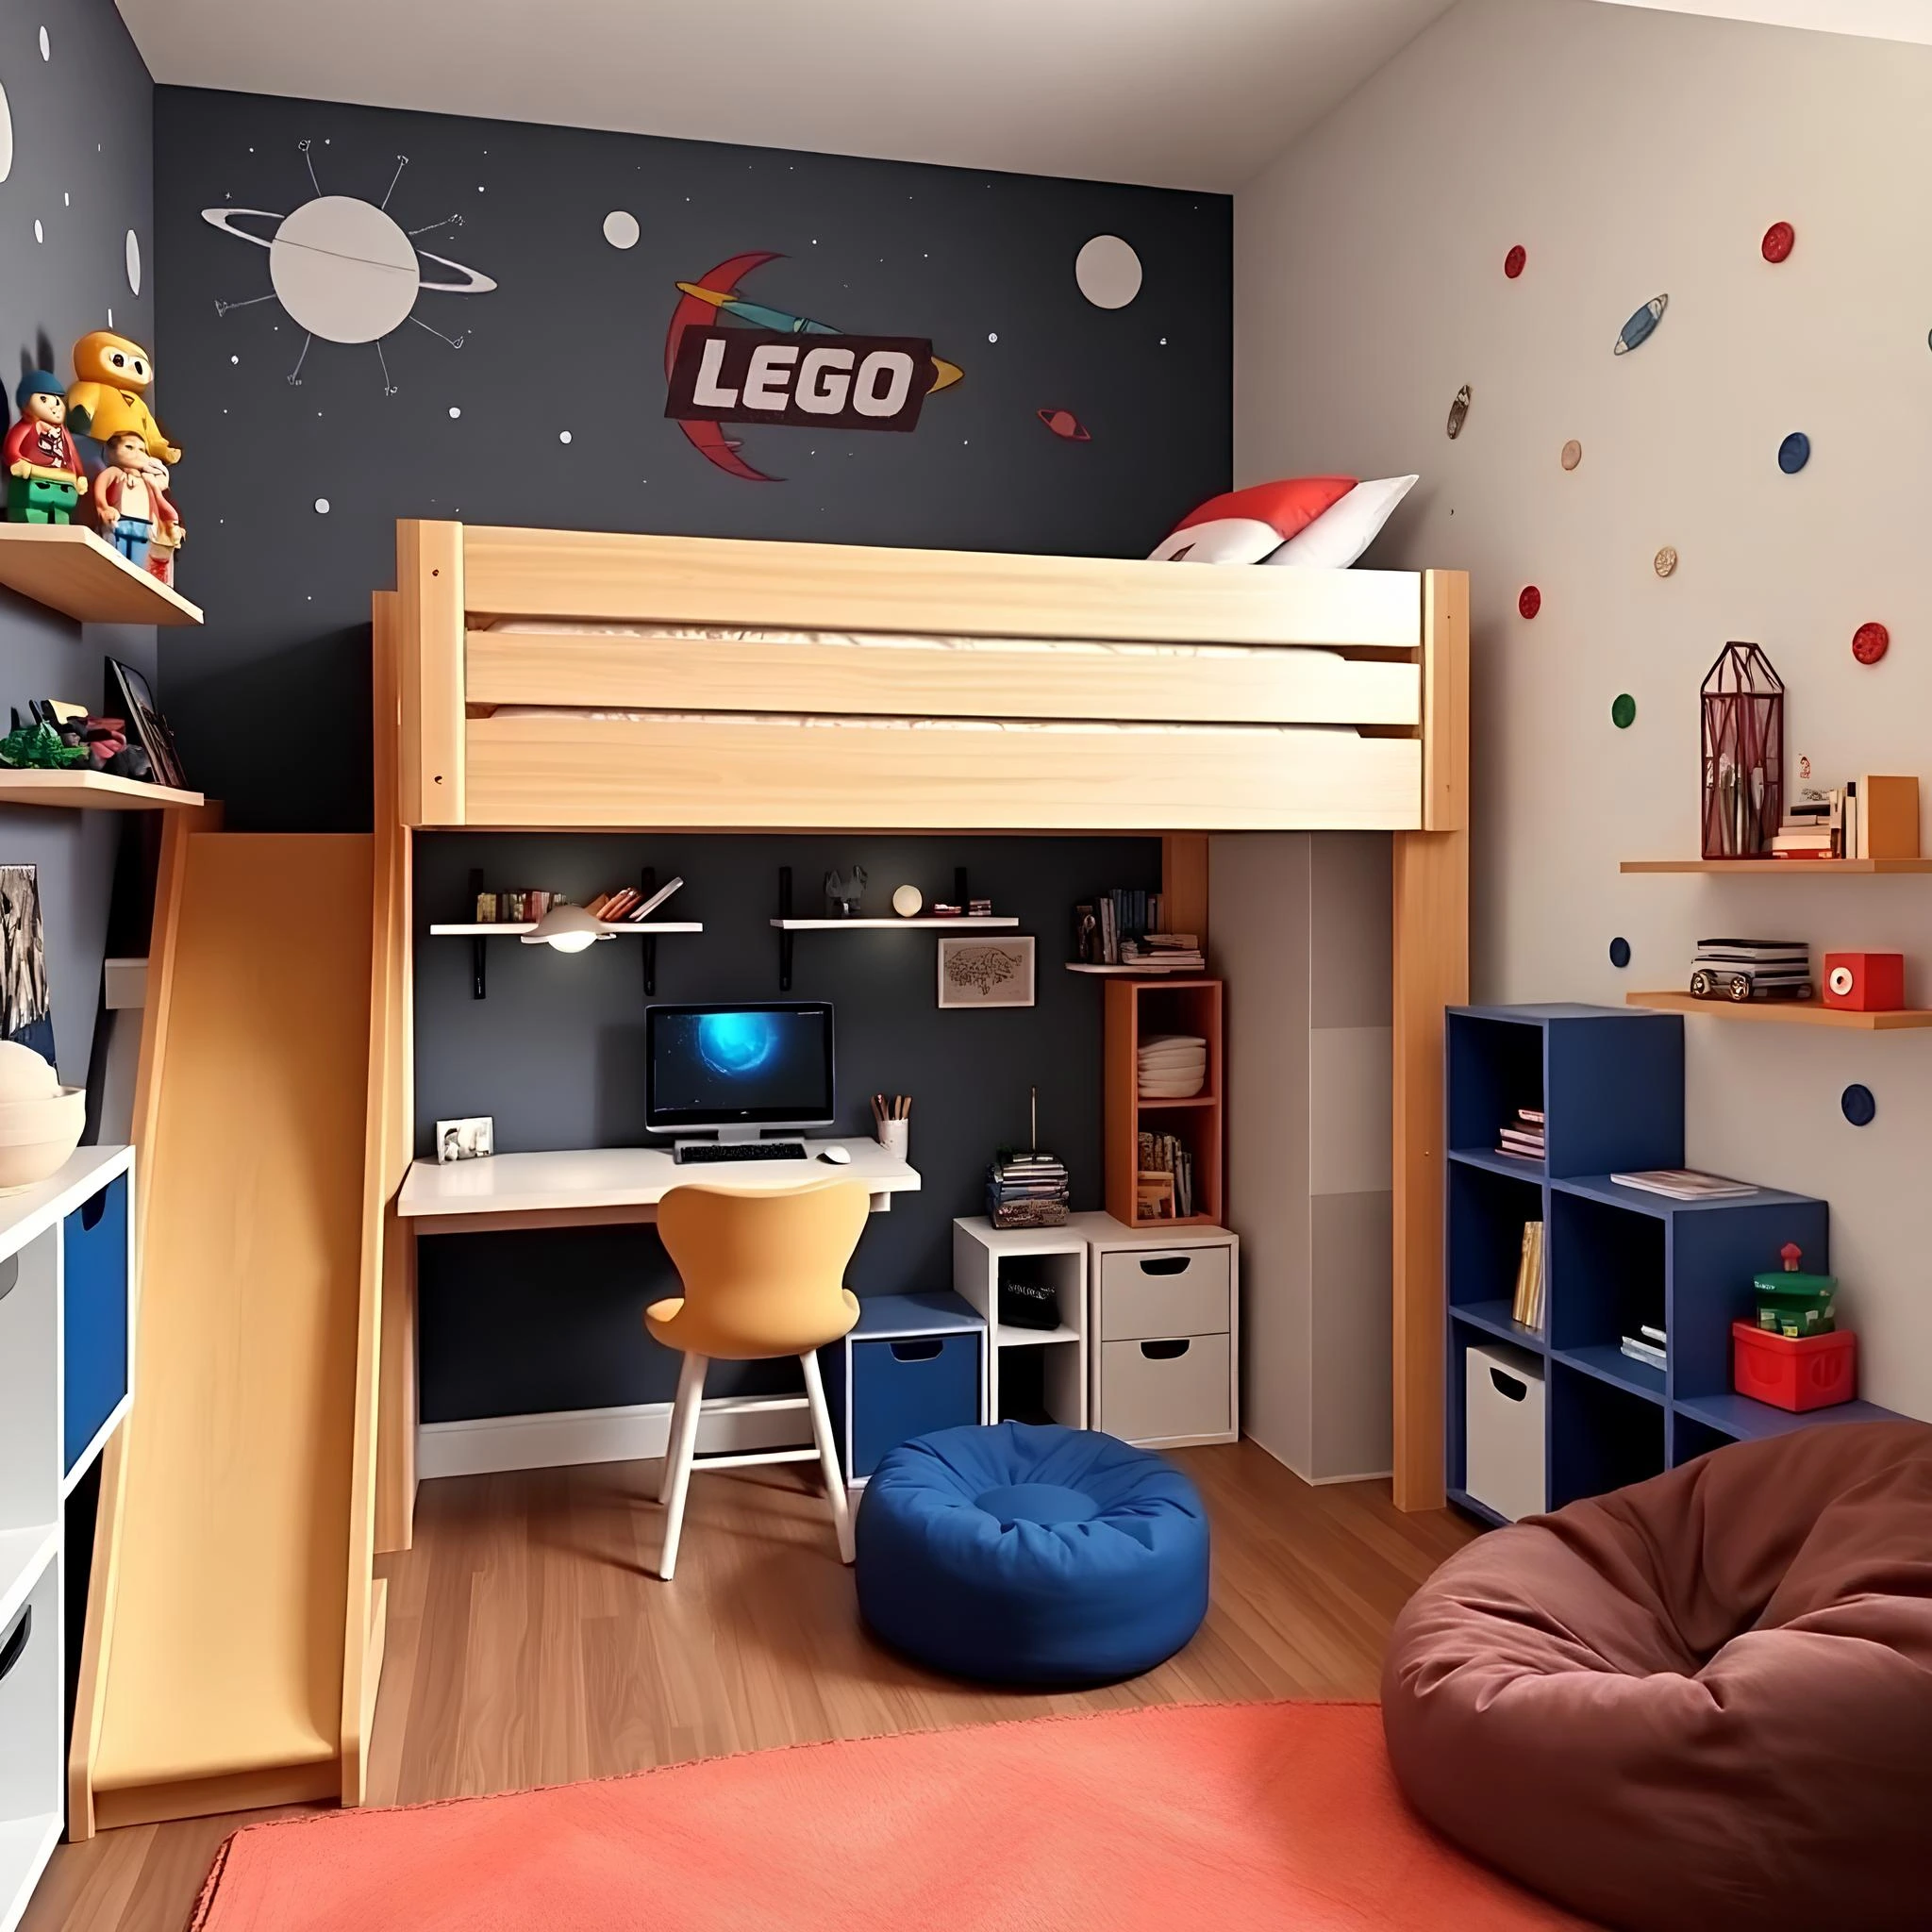
Discover space-saving solutions like IKEA’s STUVA loft beds.
Loft Beds with Built-In Desks
When working with limited square footage, loft beds with built-in desks are a game-changer. These elevated sleep stations free up precious floor space by tucking a functional study nook, play area, or even storage compartments underneath. Perfect for school-aged kids, this design trick transforms a cramped room into a multi-zone wonderland.
Why They Work:
- Vertical Efficiency: By lifting the bed, you instantly double the usable area below.
- All-in-One Functionality: Combines a sleeping zone, homework station, and storage (e.g., shelves or drawers under the stairs).
- Kid-Friendly Adventure: Lofts add a “treehouse” vibe that kids adore, making bedtime feel like an exciting escape.
Top Picks & Tips:
- IKEA STUVA Loft Bed
- Features an integrated desk, shelves, and a pull-out drawer.
- Pair with a rolling chair to save space when not in use.
- Pro Tip: Add fairy lights or a small wall-mounted lamp above the desk for cozy task lighting.
- Dorel Living Midtown Loft Bed
- Sturdy metal frame with a spacious desk and open shelving.
- Ideal for teens or shared rooms—style with pegboards for school supplies or artwork.
- DIY Customizable Loft Bed
- Use modular components like a basic loft frame (e.g., Wayfair’s Twin Loft Bed) and add a floating desk beneath.
- Paint the desk area in a bold accent color to define the study zone.
Safety & Styling Notes:
- Ensure the bed has guardrails and a secure ladder (angled ladders are safer for younger kids).
- Keep the desk clutter-free with wall-mounted organizers or under-desk rolling carts.
- Soften the look with a curtain or canopy around the bed for a cozy, private feel.
By integrating a loft bed with a built-in desk, you’re not just saving space—you’re crafting a dynamic, personalized corner that grows with your child’s needs.
Convertible Cribs to Toddler Beds (e.g., Babyletto Hudson)
In small rooms, every piece of furniture needs to pull double duty—and nothing does this better than a convertible crib. These genius designs evolve with your child, transitioning seamlessly from a cozy infant crib to a toddler bed (and sometimes even a full-sized bed!), saving you money, space, and the hassle of frequent furniture swaps. The Babyletto Hudson, a parent-favorite, epitomizes this versatility with its sleek, modern design and non-toxic finishes, making it a staple for space-savvy nurseries.
Why They Work for Small Spaces:
- Long-Term Value: Avoid replacing furniture every few years—convertible cribs adapt through multiple growth stages.
- Space-Saving Footprint: Compact designs (like the Hudson’s narrow profile) fit snugly in tight corners.
- Aesthetic Flexibility: Neutral styles blend with any theme, from minimalist to whimsical.
Top Convertible Crib Picks & Styling Hacks
1. Babyletto Hudson 3-in-1 Convertible Crib
- Features: Converts to a toddler bed (with included conversion kit) and later to a daybed or full-sized bed (with additional kits).
- Small-Space Perks: Clean lines and rounded edges maximize safety in tight layouts.
- Styling Tip: Pair with a wall-mounted shelf above the crib for books/stuffed animals, freeing up floor space.
2. Babyletto Gelato 4-in-1 Convertible Crib
- Features: Converts to a toddler bed, daybed, or full bed; available in soft pastel hues.
- Small-Space Perks: Slim silhouette and open design create an airy feel.
- Styling Tip: Use a low-profile toddler mattress to maintain a safe height during transitions.
3. Storkcraft Caribou 5-in-1 Convertible Crib
- Features: Budget-friendly option that converts to a toddler bed, daybed, twin bed, or full bed.
- Small-Space Perks: Built-in storage drawer under the crib for bedding or toys.
- Styling Tip: Add removable decals to the wall behind the crib for a themed accent that’s easy to update.
Safety & Transition Tips
- Secure the Toddler Bed: Use bed rails during the transition phase to prevent falls.
- Opt for Non-Toxic Materials: Ensure cribs meet ASTM/JPMA safety standards (like the Babyletto Hudson’s Greenguard Gold certification).
- Keep It Minimal: Avoid bulky crib skirts or oversized mobiles that clutter small rooms.
Bonus Hack: Pair with Modular Decor
- Use a convertible crib alongside other space-saving pieces, like a compact dresser that doubles as a changing table.
- Add wall-mounted lighting (e.g., plug-in sconces) to free up surface space on nightstands.
By investing in a convertible crib like the Babyletto Hudson, you’re not just furnishing a nursery—you’re crafting a flexible, future-proof space that grows with your child, all while keeping your small room clutter-free and chic.
Storage Ottomans with Playful Prints
In a small children’s room, every inch counts—and storage ottomans with playful prints are the ultimate triple threat. These compact gems combine hidden storage, cozy seating, and eye-catching decor, making them perfect for stashing toys, books, or extra bedding while adding a pop of personality. Whether tucked under a loft bed or serving as a mini coffee table in a play corner, they’re a must-have for parents juggling form and function in tight spaces.
Why They’re a Small-Space Superstar
- Dual-Duty Design: Acts as a seat, footrest, and hidden storage bin.
- Kid-Friendly Aesthetics: Bold prints (think dinosaurs, florals, or geometric patterns) inject whimsy without overwhelming the room.
- Portability: Lightweight and easy to move, ideal for flexible layouts.
Top Picks for Playful Storage Ottomans
1. IKEA FLISAT Storage Ottoman
- Features: Lift-top lid with room for toys, cushioned seat, and customizable panels for drawing or attaching fabric prints.
- Small-Space Perks: Neutral base with interchangeable decals lets you update the look as your child’s tastes evolve.
- Styling Tip: Use two FLISAT ottomans side-by-side as a mini sofa in a reading nook.
2. Pottery Barn Kids Anywhere Chair Ottoman
- Features: Matching ottoman for PB’s iconic Anywhere Chair, available in prints like constellations, unicorns, or safari animals.
- Small-Space Perks: Doubles as a table for snacks or art supplies when paired with a tray.
- Styling Tip: Choose a print that complements your room’s theme (e.g., “woodland creatures” for a nature-inspired space).
3. Skip Hop Zoo Storage Ottoman
- Features: Adorable animal-shaped designs (owl, elephant, or whale) with removable lids and soft, wipeable fabric.
- Small-Space Perks: Rounded edges for safety and compact sizing perfect for toddlers.
- Styling Tip: Cluster two ottomans in different animal prints for a playful “zoo” vibe.
Styling & Safety Tips
- Maximize Vertical Space: Stack smaller ottomans under a wall-mounted desk or foldable table.
- Mix-and-Match Prints: Pair a patterned ottoman with solid-colored bedding or rugs to balance boldness.
- Secure Lids: Opt for ottomans with magnetic or Velcro closures to prevent little fingers from getting pinched.
Bonus Hack: DIY No-Sew Storage Ottoman
Transform a basic cube storage bin into a custom ottoman:
- Step 1: Line the inside with fabric bins for organized toy storage.
- Step 2: Glue foam padding to the lid and wrap it in playful, durable fabric (e.g., oilcloth or canvas).
- Step 3: Add adhesive Velcro strips to keep the lid secure.
Why Parents Love Them
- Quick Cleanup: Toss toys inside before naptime—no bulky bins required.
- Grows with Kids: Transition from nursery (storing diapers) to big-kid room (holding LEGO collections).
- Affordable Style: High impact for a fraction of the cost of large furniture.
By incorporating storage ottomans with playful prints, you’re not just decluttering—you’re adding a functional, fun centerpiece that sparks joy (and keeps tiny rooms tidy!).
Vertical Storage Solutions for Tiny Rooms
Floating Shelves with Colorful Bins
In small children’s rooms, floating shelves with colorful bins are a dynamic duo for taming clutter while adding a burst of joy to the walls. This combo maximizes vertical space, keeps toys and books within easy reach, and lets you customize the look with bins that match your child’s personality—all without eating into precious floor area. Whether you’re organizing art supplies, stuffed animals, or bedtime stories, this solution turns chaos into curated charm.
Why They’re Perfect for Small Spaces
- Vertical Efficiency: Free up floor space for play or furniture by lifting storage to the walls.
- Modular Flexibility: Mix shelf sizes and bin colors to fit any layout or theme.
- Kid-Friendly Access: Low-mounted shelves let toddlers grab toys independently (and tidy up!).
- Visual Appeal: Bright bins turn everyday storage into a design feature.
Top Product Picks & Styling Hacks
1. IKEA FLISAT Wall Shelf + DJUNGELSKOG Bins
- Features: The FLISAT shelf’s deep design pairs perfectly with IKEA’s woven DJUNGELSKOG bins in muted tones.
- Small-Space Hack: Label bins with chalkboard tags or picture labels for easy toy sorting (e.g., “Blocks,” “Cars”).
- Theme Pairing: Use safari-themed bins for a jungle-inspired room.
2. Pottery Barn Kids Cameron Storage Bins
- Features: Durable, washable fabric bins in bold prints (stripes, polka dots, or clouds).
- Small-Space Hack: Pair with floating shelves in contrasting colors (e.g., white shelves + navy bins) for a crisp look.
- Theme Pairing: Match bin patterns to wall decals (e.g., cloud bins with a sky-themed mural).
3. 3 Sprouts Fabric Storage Bins
- Features: Adorable animal-shaped bins (owl, fox, or whale) with fold-down handles.
- Small-Space Hack: Use staggered floating shelves to create a “staircase” display for smaller bins.
- Theme Pairing: Pair whale bins with ocean wall decals for a coastal vibe.
Styling Tips for Maximum Function & Fun
- Color-Coordinate: Group bins by color (e.g., red for books, blue for toys) to teach organization skills.
- Mix Open and Closed Storage: Leave some shelves open for displaying favorite toys or plants.
- Layer Heights: Install shelves at varying heights to fit different bin sizes and add visual interest.
- Safety First: Secure shelves to wall studs and opt for lightweight, shatterproof bins.
DIY Floating Shelf & Bin Hacks
- Custom Painted Shelves:
- Paint basic wooden shelves in rainbow stripes or ombré hues to match your bins.
- Upcycled Bins:
- Transform dollar-store baskets by spray-painting them in metallic gold or neon shades.
- Magnetic Bin Labels:
- Print clipart icons (dinosaurs, stars) and attach them to bins with adhesive magnets for easy swaps.
How to Organize Like a Pro
- Rotate Toys: Store off-season toys in bins on higher shelves, swapping them out monthly to keep the room fresh.
- Daily Cleanup Routine: Use bins as part of a “cleanup game” (e.g., “Race to fill the blue bin with Legos!”).
- Growth-Proof Design: As your child ages, transition bins from toys to school supplies or hobby storage (crafts, sports gear).
Safety & Practical Notes
- Weight Limits: Avoid overloading shelves—check manufacturer guidelines (most hold 10–15 lbs).
- Soft-Close Bins: Choose bins with padded edges or silicone grips for tiny hands.
- Non-Toxic Materials: Opt for bins made with OEKO-TEX certified fabrics or BPA-free plastics.
Budget-Friendly Bonus
Use over-the-door shoe organizers as mini floating shelves:
- Hang them on the wall and slot small bins or baskets into the pockets for ultra-affordable storage.
With floating shelves and colorful bins, you’re not just organizing—you’re creating a vibrant, adaptable storage system that grows with your child and keeps their small room tidy, cheerful, and full of personality.
Wall-Mounted Foldable Desks
In a small children’s room, wall-mounted foldable desks are the ultimate space-saving hack for creating a dedicated homework, art, or gaming zone without sacrificing play area. These desks tuck neatly against the wall when folded, freeing up floor space for toys or activities, then easily drop down to provide a sturdy surface for creativity and learning. Ideal for tight corners, shared rooms, or loft bed setups, they’re a smart solution for parents balancing functionality and square footage.
Why They’re a Small-Space Must-Have
- Zero Footprint: Fold flat against the wall when not in use, perfect for tiny rooms.
- Adjustable Heights: Many models grow with your child, adapting from toddler crafts to teen study sessions.
- Multipurpose Design: Use as a writing desk, art station, or even a snack table during playdates.
- Stylish Integration: Sleek finishes (wood, white, or bold colors) blend with any decor theme.
Top Wall-Mounted Desk Picks
1. IKEA NÄVLINGEN Drop-Leaf Table
- Features: A minimalist fold-down desk with a white finish and metal brackets.
- Small-Space Hack: Pair with a wall-mounted pegboard above for supplies (pens, rulers, cups).
- Styling Tip: Add peel-and-stick chalkboard paper to the wall behind it for doodling or reminders.
2. Prepac Wall-Mounted Floating Desk
- Features: Solid wood construction with a built-in storage ledge for books or art supplies.
- Small-Space Hack: Install under a loft bed or high shelf to create a cozy “nook.”
- Theme Pairing: Decorate the ledge with themed figurines (dinosaurs, robots) for playful flair.
3. HOMFA Folding Wall Desk with Shelves
- Features: Fold-down desk + two floating shelves for books or plants.
- Small-Space Hack: Use magnetic containers on the shelves to hold paper clips or crayons.
- DIY Upgrade: Paint the shelves in contrasting colors (e.g., mint desk + coral shelves).
Styling Tips for Function & Fun
- Personalize the Surface: Let your child decorate the desk with stickers, washi tape, or stencils.
- Add Foldable Seating: Pair with a lightweight stool or floor cushion that tucks under the desk when folded.
- Light It Up: Install a swing-arm wall lamp or adhesive LED strips for task lighting.
- Go Vertical: Hang a corkboard or wire grid above the desk for displaying art, schedules, or photos.
Installation & Safety Tips
- Secure Mounting: Anchor desks to wall studs or use heavy-duty drywall anchors to prevent tipping.
- Weight Limits: Most desks hold 25–50 lbs—avoid overloading with bulky items.
- Child-Proof Edges: Opt for rounded corners or add silicone edge guards for safety.
- Foldable Locks: Choose desks with a locking mechanism to keep them stable during use.
DIY Foldable Desk Hacks
- Upcycled Floating Shelf Desk:
- Attach hinges to a sturdy wooden shelf (e.g., IKEA EKBY) and add foldable legs for support.
- Chalkboard Desk Surface:
- Paint the desk with chalkboard paint for doodling or homework notes.
- Magnetic Organizer Wall:
- Glue magnetic sheets to the wall behind the desk to hold metal tins for supplies.
Growth-Proof Design Ideas
- Toddlers: Use the desk as a coloring station with washable crayons and paper rolls.
- School-Age Kids: Add a clip-on desk organizer for homework supplies.
- Teens: Swap playful decor for a minimalist vibe with a laptop stand and wireless charger.
Budget-Friendly Bonus
Check thrift stores or Facebook Marketplace for used wall-mounted desks, then sand and repaint them in a fresh hue (e.g., pastel yellow or navy) to match your child’s room.
With wall-mounted foldable desks, you’re not just adding a workspace—you’re crafting a flexible, clutter-free zone that adapts to your child’s needs and keeps their small room feeling open, organized, and inspiring.
Over-the-Door Organizers
In a small children’s room, over-the-door organizers are a stealthy storage superhero, transforming unused door space into a treasure trove for toys, art supplies, shoes, and more. These versatile organizers keep essentials within reach while freeing up floor, shelf, and closet space—making them ideal for parents battling tight quarters. Plus, their lightweight design and easy installation mean you can adapt them as your child’s needs evolve, from diaper caddies to craft supply hubs.
Why They Shine in Small Spaces
- Zero Floor Space Used: Leverage vertical real estate on the back of doors or closet doors.
- Adjustable Compartments: Customize pockets for tiny toys, books, or stuffed animals.
- Portable & Affordable: Most cost under $30 and can move with you to new homes.
- Kid-Friendly Accessibility: Low-hung organizers let toddlers grab toys independently.
Top Over-the-Door Organizer Picks
1. SimpleHouseware Mesh Door Organizer
- Features: 24 clear mesh pockets, metal hooks, and a durable frame.
- Small-Space Hack: Use for small toys (LEGO, action figures) or art supplies—label pockets with clipart icons.
- Theme Pairing: Fill pockets with themed toys (e.g., ocean animals for a nautical room).
2. MDesign Closet Door Shoe Organizer
- Features: 12 fabric pockets, perfect for shoes, stuffed animals, or bulkier items.
- Small-Space Hack: Store off-season clothes in vacuum-sealed bags inside pockets.
- Styling Tip: Spray-paint the frame a bold color (e.g., teal) to match the room’s palette.
3. Honey-Can-Do Kids’ Toy Organizer
- Features: 8 clear PVC-free pockets with reinforced stitching.
- Small-Space Hack: Dedicate each row to a category (e.g., top for books, middle for dolls, bottom for puzzles).
- DIY Upgrade: Add adhesive chalkboard labels to each pocket for easy rotation.
Styling & Functional Tips
- Create Zones: Hang one organizer on the closet door for clothes and another on the room door for toys.
- Mix Open and Closed Storage: Use mesh pockets for visibility and fabric pockets for hiding messier items.
- Add Hooks: Attach adhesive hooks to the organizer’s frame for hanging costumes, hats, or reusable tote bags.
- Themed Organization: Match the organizer’s color or pattern to the room’s theme (e.g., starry pockets for a space-themed room).
DIY Over-the-Door Organizer Hacks
- Repurposed Tension Rod + Baskets:
- Install a tension rod across the door and hang small baskets with S-hooks for stuffed animals or shoes.
- Fabric Pocket Panels:
- Sew or glue fabric pockets onto a canvas panel and hang it with over-the-door hooks.
- Chalkboard Door Organizer:
- Paint the door with chalkboard paint and draw labeled “zones” for toys, then hang matching baskets.
Safety & Practical Considerations
- Secure Mounting: Ensure the organizer’s hooks grip the door tightly to prevent slipping or tipping.
- Weight Limits: Avoid overloading pockets—stick to lightweight items (under 2 lbs per pocket).
- Non-Toxic Materials: Choose PVC-free, BPA-free organizers (like Honey-Can-Do) for baby-safe storage.
- Smooth Edges: Opt for organizers with rounded corners or add foam tape to sharp edges.
Growth-Proof Uses
- Infants: Store diapers, wipes, and burp cloths in low pockets for quick access.
- Toddlers: Organize puzzles, play food, or small toys they can grab during solo play.
- School-Age Kids: Dedicate pockets to homework supplies, craft kits, or sports gear.
Budget-Friendly Bonus
Turn an over-the-door jewelry organizer into a tiny toy display:
- Hang one with clear pockets to showcase collectibles (rocks, figurines) or hair accessories.
With over-the-door organizers, you’re not just taming clutter—you’re transforming every inch of your child’s room into a functional, fun, and accessible space that adapts to their growing needs.
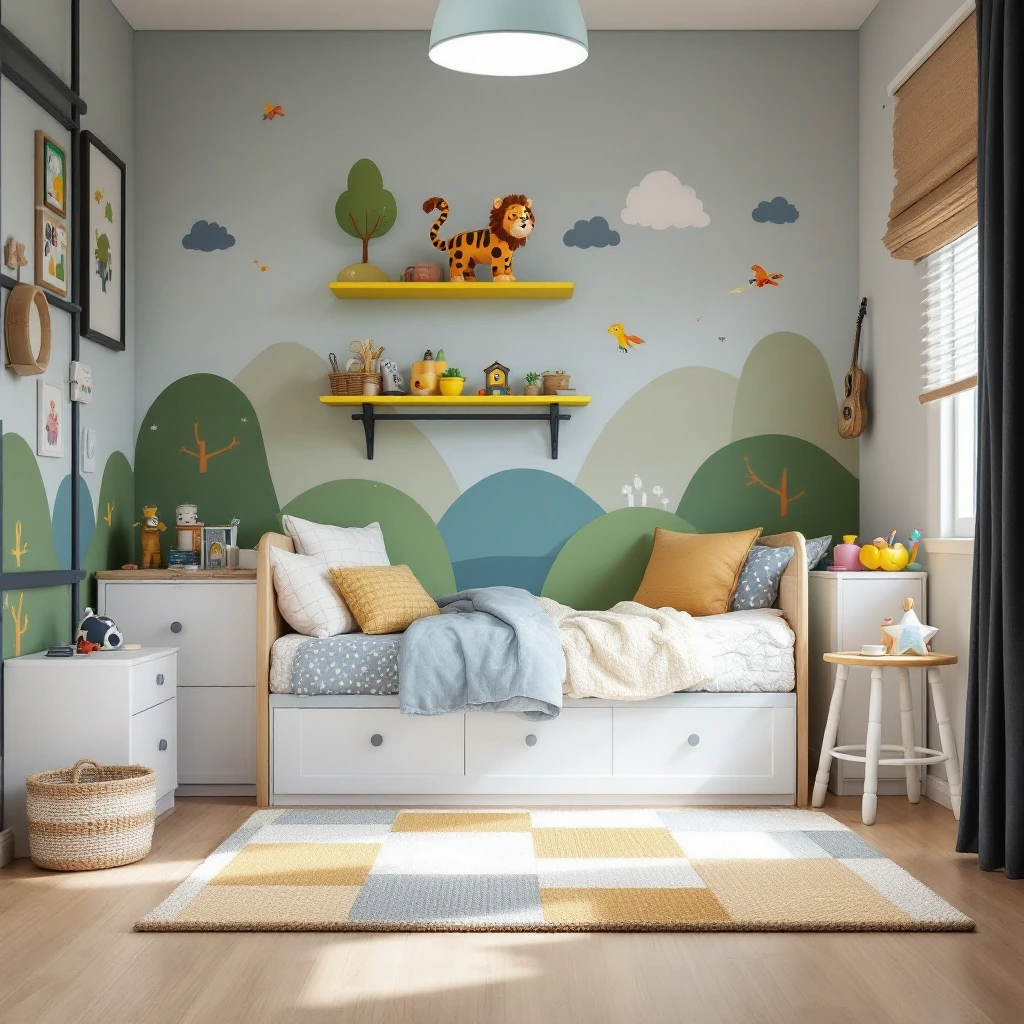
Light & Bright Color Schemes to Expand Space
Pastel Peel-and-Stick Wallpaper
In a compact children’s room, pastel peel-and-stick wallpaper is a game-changer for adding charm, depth, and personality without overwhelming the space. These gentle hues—think blush pinks, mint greens, and sky blues—reflect light beautifully, creating an airy, open feel, while the removable adhesive makes it perfect for renters or parents who love to refresh decor as their child grows. From whimsical patterns to subtle textures, this wallpaper transforms plain walls into dreamy backdrops that inspire creativity and calm.
Why Pastel Peel-and-Stick Works Wonders in Small Rooms
- Light-Enhancing: Soft pastels amplify natural light, making cramped rooms feel larger and brighter.
- Low-Commitment Flexibility: Easily removable and repositionable for quick updates or moves.
- Pattern Play: Subtle designs (clouds, stars, or geometrics) add interest without visual clutter.
- Renter-Friendly: No damage to walls, ideal for temporary spaces.
Top Pastel Peel-and-Stick Wallpaper Picks
1. Spoonflower Pastel Cloud Wallpaper
- Features: Customizable, hand-drawn cloud patterns in soothing lavender or peach tones.
- Small-Space Hack: Use on a single accent wall behind the bed to create a focal point.
- Theme Pairing: Pair with fluffy white rugs and hanging paper lanterns for a “sky-inspired” nursery.
2. RoomMates Nursery Blooms Peel & Stick
- Features: Delicate floral patterns in blush and sage, designed for nurseries and toddler rooms.
- Small-Space Hack: Apply vertically on narrow walls to “lift” low ceilings visually.
- Styling Tip: Match bedding to the wallpaper’s accent colors (e.g., sage curtains or blush pillows).
3. Tempaper Sweet Surrender Ombre Wallpaper
- Features: A gradient ombre effect from soft peach to cream, adding subtle dimension.
- Small-Space Hack: Line the back of open shelves with the wallpaper for a pop of hidden color.
- DIY Upgrade: Add gold foil star decals over the ombre for a celestial vibe.
Styling Tips for Maximum Impact
- Accent Walls: Cover one wall to avoid overwhelming the room—ideal behind cribs, desks, or reading nooks.
- Mix Textures: Pair smooth pastel wallpaper with tactile elements like knitted throws or woven baskets.
- Coordinate with Furniture: Choose white or light wood furniture to keep the palette cohesive and airy.
- Layer with Decals: Add removable animal or plant decals over solid pastel walls for interactive fun.
DIY Pastel Wallpaper Hacks
- Frame Wallpaper as Art:
- Cut wallpaper into shapes (hearts, circles) and frame them for budget-friendly wall art.
- Line Closet Interiors:
- Apply pastel paper inside closets or bookshelves for a surprise burst of color when opened.
- Create a Headboard Effect:
- Use wallpaper to outline a faux headboard shape above the bed, flanked by string lights.
Safety & Practical Considerations
- Non-Toxic Materials: Ensure wallpaper is VOC-free and certified kid-safe (e.g., Spoonflower’s GREENGUARD Gold options).
- Test First: Stick a small sample to check adhesion and color in different lighting.
- Smooth Surfaces: Apply to clean, dry walls—avoid textured surfaces for best results.
- Easy Removal: Warm the wallpaper gently with a hairdryer to loosen adhesive without residue.
Growth-Proof Design Ideas
- Infants: Opt for soothing abstract patterns (waves, dots) to stimulate without overstimulating.
- Toddlers: Choose interactive designs (chalkboard-pastel blends) for doodling.
- Teens: Transition to muted pastel stripes or watercolor murals for a mature yet playful vibe.
Budget-Friendly Bonus
Use wallpaper samples (sold cheaply by many brands) to decorate small areas:
- Line the back of a floating shelf.
- Cover a bland dresser drawer front.
- Create a mini accent zone around a light switch.
Why Parents Love It
- Quick Refresh: Swap patterns for holidays or birthdays (e.g., pastel balloons for a party).
- Hide Flaws: Camouflage scuffs or uneven walls in older homes.
- Stimulate Calm: Pastels promote relaxation, perfect for nap times or bedtime routines.
With pastel peel-and-stick wallpaper, you’re not just decorating walls—you’re crafting a serene, adaptable canvas that grows with your child and turns even the tiniest room into a sweet, stylish sanctuary.
Mirrors with Fun Frames
In small children’s rooms, mirrors with fun frames do double duty: they create the illusion of more space by reflecting light and views, while their whimsical designs add a splash of personality to walls. These aren’t just functional pieces—they’re interactive decor that sparks imagination, whether your child is practicing ballet poses, hosting a “tea party” with stuffed animals, or simply admiring their superhero cape. From animal-shaped frames to rainbow borders, these mirrors turn a practical necessity into a playful focal point.
Why Mirrors with Fun Frames Belong in Small Kids’ Rooms
- Expand Visual Space: Mirrors reflect light and scenery, making cramped rooms feel airy and open.
- Encourage Play & Creativity: Frames shaped like clouds, stars, or animals inspire imaginative adventures.
- Grow with the Room: Swap out frames as your child’s tastes evolve (toddler-friendly animals → tween-geometric designs).
- Multipurpose Use: Double as a vanity, dress-up station, or art display (attach clips to the frame for drawings).
Top Picks for Playful Mirrors
1. IKEA SUNNERSTA Mirror with Wooden Frame
- Features: Circular mirror with a minimalist wooden frame, customizable with paint or stickers.
- Small-Space Hack: Mount it horizontally above a dresser to widen the room visually.
- DIY Upgrade: Let your child decorate the frame with washi tape, pom-poms, or acrylic gems.
2. Pottery Barn Kids Cloud Mirror
- Features: A fluffy cloud-shaped frame in soft white, perfect for nurseries or whimsical rooms.
- Small-Space Hack: Hang near a window to reflect outdoor light and greenery.
- Theme Pairing: Pair with a “sky” wall decal or hanging felt clouds for a dreamy vibe.
3. Etsy Custom Animal-Shaped Mirror
- Features: Handmade frames in shapes like elephants, butterflies, or dinosaurs (shatterproof acrylic options available).
- Small-Space Hack: Use as part of a themed corner (e.g., dinosaur mirror + Jurassic wall decals).
- Styling Tip: Add adhesive LED string lights around the frame for a magical glow.
Styling Tips for Maximum Impact
- Reflect the Right Views: Position mirrors opposite windows, artwork, or colorful play areas to amplify light and decor.
- Mix Sizes & Shapes: Cluster small round and star-shaped mirrors for a gallery wall effect.
- Functional Placement: Hang a full-length mirror on the back of the door for dress-up sessions without hogging wall space.
- Frame as Art: Choose a bold, sculptural frame (e.g., a sunburst or rainbow) to act as standalone wall art.
DIY Fun Frame Hacks
- Upcycle a Thrifted Mirror:
- Paint a plain frame with pastel chalk paint and add 3D felt shapes (stars, hearts) for texture.
- Stencil Magic:
- Use stencils to create patterns (polka dots, stripes) on a basic frame with acrylic paint.
- Nature-Inspired Frame:
- Glue faux leaves, seashells, or wooden beads around the edges for a rustic look.
Safety & Practical Considerations
- Shatterproof Materials: Opt for acrylic mirrors (instead of glass) for toddlers’ rooms.
- Secure Mounting: Use heavy-duty hooks or anchors to prevent tipping—ensure frames are lightweight.
- Rounded Edges: Avoid sharp corners; choose oval or circular shapes for safer play areas.
- Height Matters: Hang mirrors low enough for kids to see themselves but high enough to avoid collisions.
Growth-Proof Design Ideas
- Toddlers: Choose unbreakable mirrors with chunky, tactile frames (e.g., rope-wrapped edges).
- School-Age Kids: Opt for frames that double as bulletin boards (attach notes or art with clips).
- Teens: Upgrade to sleek, geometric frames in metallic tones for a mature yet playful vibe.
Budget-Friendly Bonus
Turn a plain dollar-store mirror into a fun piece:
- Frame It with Pool Noodles:
- Slice pool noodles lengthwise, glue them around the mirror edges, and paint them bright colors.
- Decoupage Magic:
- Cover the frame with comic book pages, maps, or leftover wallpaper scraps.
Why Kids (and Parents) Love Them
- Self-Expression: Mirrors help kids build confidence and creativity through imaginative play.
- Educational Tool: Use alphabet or number decals around the frame for casual learning.
- Photogenic Spaces: Fun frames add charm to birthday photos or video calls with grandparents!
With mirrors with fun frames, you’re not just decorating a wall—you’re creating an interactive, space-savvy feature that inspires play, fosters independence, and makes even the smallest room feel bright, bold, and boundless.
Clear Acrylic Furniture
In small children’s rooms, clear acrylic furniture is a stealthy superhero—offering practicality, durability, and style without visually cluttering the space. Transparent tables, chairs, and shelves create an illusion of openness, making cramped areas feel larger while blending seamlessly with any theme or color scheme. From toddler-friendly play tables to sleek storage solutions, acrylic furniture is a modern, versatile choice for parents prioritizing safety, simplicity, and small-space savvy.
Why Clear Acrylic Works in Tiny Rooms
- Visual Lightness: Transparent pieces “disappear” into the room, avoiding the heaviness of wood or metal.
- Durability: Scratch-resistant and easy to clean (perfect for sticky fingers and art projects).
- Versatility: Complements any decor style, from minimalist Scandi to bold, colorful themes.
- Safety: Rounded edges, lightweight construction, and no sharp corners (ideal for toddlers).
Top Acrylic Furniture Picks for Kids’ Rooms
1. IKEA LÄTT Table and Chairs Set
- Features: A lightweight, stackable table and chair duo in clear acrylic.
- Small-Space Hack: Use as a snack station, art desk, or LEGO-building hub—tuck under a loft bed when not in use.
- Styling Tip: Add colorful seat cushions or placemats to inject personality without permanence.
2. Pottery Barn Kids Cameron Acrylic Bookcase
- Features: A sturdy, transparent shelf unit for displaying books, toys, or collectibles.
- Small-Space Hack: Place against a pastel wall to let the wall color “shine through” the shelves.
- Theme Pairing: Style with themed bookends (dinosaurs, rockets) for playful organization.
3. Etsy Custom Acrylic Nameplate Shelves
- Features: Floating shelves cut into fun shapes (clouds, stars) with a child’s name etched in.
- Small-Space Hack: Mount near a reading nook to hold bedtime books or stuffed animals.
- DIY Upgrade: Line the back of shelves with removable wallpaper for hidden pops of color.
Styling Tips for Seamless Integration
- Mix with Bold Colors: Pair acrylic furniture with vibrant rugs, bedding, or wall art to balance transparency.
- Layer Textures: Add cozy elements like knit poufs or plush rugs to soften the modern look.
- Reflective Surfaces: Place near mirrors or metallic decor to amplify light and spaciousness.
- Functional Zones: Use an acrylic desk as a homework station or a clear toy bin as a “floating” bedside table.
DIY Acrylic Furniture Hacks
- Upcycled Toy Storage:
- Convert a clear acrylic magazine holder into a vertical art supply organizer.
- Customized Tabletop:
- Adhesive vinyl decals (stars, dinosaurs) to the surface of an acrylic table for themed fun.
- Floiling Nightstand:
- Apply peel-and-stick frosted film to one side of an acrylic cube for a semi-opaque bedside table.
Safety & Practical Considerations
- Non-Toxic Materials: Ensure acrylic is BPA-free and certified kid-safe (e.g., meets ASTM standards).
- Anti-Tip Straps: Secure shelves or dressers to walls, even if lightweight.
- Avoid Harsh Cleaners: Use mild soap and water to prevent clouding or scratches.
- UV Resistance: For rooms with direct sunlight, opt for UV-stable acrylic to prevent yellowing.
Growth-Proof Design Ideas
- Toddlers: Use low acrylic shelves for toy displays they can access independently.
- School-Age Kids: Swap a play table for an acrylic desk with a clear organizer tray.
- Teens: Upgrade to a sleek acrylic vanity or floating desk for a mature, airy vibe.
Budget-Friendly Bonus
Repurpose clear acrylic storage bins (designed for closets) as under-bed toy storage or window-seat cubbies. Add adhesive chalkboard labels for easy categorization.
Why Parents Love Clear Acrylic
- Easy to Rearrange: Lightweight pieces let you experiment with layouts as your child grows.
- Timeless Appeal: Never goes out of style, ensuring longevity through decor changes.
- Showcase Favorites: Transparent shelves and tables put toys, books, and art on display like a curated gallery.
With clear acrylic furniture, you’re not just furnishing a room—you’re crafting a clutter-free, light-filled sanctuary where imagination takes center stage, and every inch feels intentional, open, and magical.
Themed Decor That Doesn’t Sacrifice Space
Space-Saving Wall Decals
When square footage is limited, space-saving wall decals are your secret weapon for infusing personality, color, and whimsy into a child’s room—without sacrificing an inch of floor or storage space. These removable, adhesive designs let you create themed worlds, educational accents, or playful focal points that grow and evolve with your child’s interests. Best of all, they’re renter-friendly and easy to swap out as tastes change!
Why Wall Decals Work Magic in Small Rooms
- Clutter-Free Customization: Add visual interest without bulky shelves or decor.
- Illusion of Depth: Large-scale decals (like forests or cityscapes) make walls feel farther away.
- Educational & Interactive: Alphabet decals, world maps, or growth charts double as learning tools.
- Themed Zones: Define areas (e.g., a “reading nook” under a tree decal) in open layouts.
Top Wall Decal Picks for Small Spaces
1. RoomMates Peel & Stick Giant Tree Decal
- Features: A sprawling tree with branches that stretch across walls, perfect for creating a “nature corner.”
- Small-Space Hack: Add adhesive LED firefly lights to the branches for a magical nighttime glow.
- Theme Pairing: Pair with woodland animal decals or a leafy rug for a cohesive look.
2. Urban Walls Space Adventure Wall Decals
- Features: Planets, rockets, and stars that inspire cosmic daydreams.
- Small-Space Hack: Apply decals vertically (floor to ceiling) to draw the eye upward, making low ceilings feel taller.
- Theme Pairing: Use glow-in-the-dark decals for a bedtime “star map” effect.
3. OhMyGosh! Alphabet Wall Decals
- Features: Colorful, removable letters and numbers for a playful educational accent.
- Small-Space Hack: Spell your child’s name above their bed or create a mini “learning wall” near a desk.
- Theme Pairing: Mix with animal-shaped decals for a safari-themed ABC corner.
Styling Tips for Maximum Impact
- Go Big or Go Home: Use oversized decals (e.g., a giant hot air balloon) as a focal point in place of large artwork.
- Create “Fake” Architecture: Apply decals that mimic shelves, windows, or doorframes to add depth.
- Layer with Lighting: Place decals near wall sconces or string lights to cast playful shadows.
- Mix & Match: Combine small decals (butterflies, stars) with larger designs for dynamic contrast.
DIY Wall Decal Hacks
- Custom Chalkboard Decals:
- Cut chalkboard-contact paper into shapes (clouds, speech bubbles) for doodle-friendly walls.
- Glow-in-the-Dark Constellations:
- Use glow paint to hand-draw star patterns, then seal with clear removable adhesive.
- Interactive Growth Chart:
- Apply a ruler decal alongside seasonal themed stickers (e.g., pumpkins for fall) to track height.
Safety & Practical Considerations
- Removable & Non-Toxic: Ensure decals are PVC-free and won’t damage paint (e.g., RoomMates or WallPops brands).
- Avoid Overcrowding: Stick to 1-2 feature walls to prevent visual chaos in tiny rooms.
- Kid-Proof Placement: Keep decals higher up if toddlers are prone to peeling.
Budget-Friendly Bonus
Swap out decals seasonally for fresh vibes:
- Winter: Snowflakes and polar bears.
- Spring: Flowers and butterflies.
- Halloween: Friendly ghosts and pumpkins.
With space-saving wall decals, you’re not just decorating walls—you’re crafting an ever-changing, imaginative backdrop that adapts to your child’s world, all while keeping their small room airy and uncluttered.
Bunk Beds with Built-In Tents
In small children’s rooms, bunk beds with built-in tents are a triple win: they maximize vertical space, create a cozy sleep-play hybrid zone, and fuel imaginative adventures—all while keeping floor space free for daytime activities. These beds transform bedtime into a camping trip, a jungle expedition, or a secret fort, making them ideal for siblings sharing a room or solo sleepers craving a playful retreat. With options ranging from whimsical teepees to space-themed pods, these beds turn cramped quarters into magical hideouts.
Why Bunk Beds with Tents Shine in Small Spaces
- Vertical Efficiency: Stack sleeping areas to free up floor space for play or storage.
- Themed Fun: Built-in tents add immersive decor without cluttering walls with extra accessories.
- Privacy & Zones: Creates distinct “rooms within a room,” perfect for shared spaces.
- All-Day Use: Tents double as reading nooks or play areas during waking hours.
Top Bunk Bed & Tent Combos
1. IKEA SVARTA Loft Bed with Canopy
- Features: A minimalist pine loft bed with a detachable fabric canopy for tent vibes.
- Small-Space Hack: Add fairy lights and sheer curtains to the canopy for a dreamy glow.
- Theme Pairing: Pair with a faux grass rug and plush animal toys for a “safari under the stars.”
2. Pottery Barn Kids Cameron Canopy Bunk Bed
- Features: Sturdy twin-over-twin bunk with a linen canopy and optional curtain panels.
- Small-Space Hack: Use the lower bunk as a play tent with floor cushions and a foldable table.
- Styling Tip: Choose curtains in a theme (e.g., navy for a nautical look, green for a forest).
3. Donco Twin-Over-Twin Tent Bunk Bed
- Features: Includes a removable tent cover with a roll-up window and mesh panels for airflow.
- Small-Space Hack: Attach a wall-mounted shelf inside the tent for bedtime books or a flashlight.
- DIY Upgrade: Paint the bed frame in a metallic finish (e.g., gold or silver) for a “space capsule” vibe.
Styling Tips for Maximum Adventure
- Layer Textures: Add faux fur throws, knit pillows, or woven baskets to the tent for a cozy campout feel.
- Themed Bedding: Use patterned sheets (stars, dinosaurs, or florals) to amplify the tent’s theme.
- Interactive Lighting: Hang battery-powered LED string lights or lanterns inside the tent for nighttime magic.
- Under-Bed Storage: Utilize the space below the bunk with rolling bins for toys or seasonal clothes.
DIY Tent Bunk Bed Hacks
- Canopy Upgrade:
- Drape a twin-size tapestry or patterned bedsheet over the top bunk’s frame and secure with clips.
- PVC Pipe Tent Frame:
- Build a lightweight frame with PVC pipes and wrap it in fabric to create a custom tent shape.
- Glow-in-the-Dark Stars:
- Stick glow-in-the-dark decals on the tent ceiling for a bedtime “starry sky.”
Safety & Practical Considerations
- Guardrails & Ladders: Ensure the top bunk has sturdy guardrails and a secure, angled ladder.
- Fire Safety: Use flame-retardant fabrics for DIY tents and avoid open-flame lighting.
- Ventilation: Opt for tents with mesh panels or breathable fabrics to prevent overheating.
- Weight Limits: Confirm the bed’s maximum capacity (typically 150–200 lbs per bunk).
Growth-Proof Design Ideas
- Toddlers: Use the lower bunk as a play tent and the upper bunk for storage (add a safety rail).
- School-Age Kids: Convert the tent into a study nook with a clip-on desk and task lighting.
- Teens: Swap playful tents for bohemian macramé curtains or minimalist geometric canopies.
Budget-Friendly Bonus
Transform a basic bunk bed with a DIY tent kit:
- Tension Rod Curtains: Hang curtains from tension rods mounted on the upper bunk’s frame.
- Hula Hoop Canopy: Suspend a hula hoop from the ceiling above the bunk and drape fabric over it.
Why Kids (and Parents) Love Them
- Imaginative Play: Encourages storytelling, role-playing, and creative independence.
- Space-Smart Sleepovers: Host friends without needing extra floor space.
- Easy Theme Updates: Swap tent fabrics or decals to refresh the room’s look as interests evolve.
With bunk beds and built-in tents, you’re not just saving space—you’re creating a dynamic, multifunctional zone where bedtime becomes an adventure and small rooms feel limitless.
Modular Rug Tiles
In small children’s rooms, modular rug tiles are a game-changer for parents seeking flexible, durable, and playful flooring solutions. These interlocking or mix-and-match tiles allow you to create custom shapes, patterns, and zones that adapt to your child’s evolving needs—whether it’s a soft play mat for tummy time, a vibrant activity zone for LEGO building, or a cozy reading nook. Easy to clean, replace, and rearrange, modular rugs add warmth, color, and functionality to tight spaces without the commitment of wall-to-wall carpeting.
Why Modular Rug Tiles Belong in Small Kids’ Rooms
- Customizable Layouts: Resize or reshape the rug as the room’s purpose changes (e.g., crib → big-kid bed).
- Easy Maintenance: Replace individual stained/damaged tiles instead of the entire rug.
- Safety First: Non-slip backing, cushioned foam, and rounded edges protect against falls.
- Educational & Playful: Use alphabet, number, or road-map tiles for learning through play.
Top Modular Rug Tile Picks
1. Flor Carpet Tiles (Kid-Friendly Collection)
- Features: Durable, stain-resistant tiles in bold colors and patterns (dots, stripes, or clouds).
- Small-Space Hack: Create a checkerboard pattern with contrasting colors to visually expand the floor.
- Theme Pairing: Pair “Flor Cloud Tiles” with a sky-themed mural for a cohesive look.
2. Ruggable Playful Patterns Rug Tiles
- Features: Machine-washable, peel-and-stick tiles with whimsical designs (dinosaurs, stars, or rainbows).
- Small-Space Hack: Use a few tiles to define a play zone under a loft bed or desk.
- DIY Upgrade: Cut tiles into shapes (hearts, circles) for a custom rug mosaic.
3. Little Nomad Playtime Foam Tiles
- Features: Soft, cushioned foam tiles with puzzle-like edges and educational graphics (ABCs, animals).
- Small-Space Hack: Layer tiles near the crib or changing table for a safe, comfy landing spot.
- Theme Pairing: Mix animal-print tiles with a jungle-themed wall decal.
Styling Tips for Small Spaces
- Zone Definition: Use contrasting tile colors to separate play, sleep, and study areas in one room.
- Layer with Rugs: Place modular tiles over a larger neutral rug for texture and visual depth.
- Seasonal Swaps: Rotate tile patterns for holidays (e.g., pastels for spring, red/green for Christmas).
- Wall Art Trick: Mount a few leftover tiles vertically as playful wall decor.
DIY Modular Rug Hacks
- Upcycled Puzzle Mat Rug:
- Spray-paint old foam puzzle mats with stenciled designs (stars, geometric shapes).
- Faux Moroccan Tile Floor:
- Arrange square tiles in a diamond pattern and add adhesive “fringe” to the edges for a boho vibe.
- Interactive Roadway Rug:
- Use black tiles as “roads” and add white duct tape lines, then pair with toy cars and wooden trees.
Safety & Practical Considerations
- Non-Toxic Materials: Choose tiles certified free of VOCs, phthalates, and formaldehyde (e.g., Flor’s GreenGuard Gold line).
- Non-Slip Backing: Ensure tiles have grip pads or adhesive to prevent slips, especially on hardwood.
- Easy Cleaning: Opt for machine-washable (Ruggable) or wipeable (Flor) options for messy play.
- Edge Security: Use double-sided tape on tile borders to prevent tripping hazards.
Growth-Proof Uses
- Infants: Soft foam tiles for crawl-friendly floors and tummy time.
- Toddlers: Alphabet tiles for early learning and spill-proof play zones.
- School-Age Kids: Roadway or cityscape tiles for imaginative play with toy cars.
- Teens: Swap playful designs for abstract or geometric patterns in muted tones.
Budget-Friendly Bonus
Repurpose IKEA TOSTERUP bath mats as modular tiles:
- Cut into squares, add non-slip backing, and arrange in a patchwork design.
Why Parents Love Modular Rug Tiles
- Adaptability: Grow the rug as your child’s needs change—no need to buy new flooring every few years.
- Mess-Friendly: Spill juice or paint? Just pop out the tile and wash it.
- Creative Expression: Let kids rearrange tiles to design their own play spaces.
With modular rug tiles, you’re not just covering the floor—you’re crafting a dynamic, interactive foundation that fuels creativity, keeps small rooms organized, and grows alongside your child’s imagination.
DIY Hacks for Budget-Friendly Big Style
Repurposed Bookshelves as Toy Display Units
In small children’s rooms, repurposed bookshelves as toy display units offer a brilliant blend of nostalgia, functionality, and creativity. Instead of relegating old or basic shelves to storage purgatory, reimagining them as toy organizers adds character, saves money, and maximizes vertical space—turning everyday clutter into a charming, accessible showcase. Whether styled as a rainbow LEGO gallery, a plush animal zoo, or a rotating art exhibit, these shelves keep toys tidy, visible, and part of the decor in tight quarters.
Why Repurposed Bookshelves Work in Small Spaces
- Cost-Effective: Breathe new life into existing furniture or thrift-store finds.
- Vertical Storage: Utilize wall space instead of bulky toy bins on the floor.
- Customizable Displays: Rotate toys seasonally or as interests change.
- Educational Value: Teach organization skills by categorizing toys (e.g., “Building Zone,” “Dress-Up Corner”).
Top Bookshelf Repurposing Ideas
1. Open Shelving for Rotating Displays
- Example: IKEA KALLAX Shelf (horizontal or vertical orientation).
- Small-Space Hack: Assign each cube to a category (books, puzzles, action figures) and label with picture icons.
- Styling Tip: Paint the back panels of cubes in contrasting pastels for a pop of color.
2. Baskets + Bins Combo
- Example: Target Room Essentials Fabric Bins in IKEA BILLY Shelves.
- Small-Space Hack: Use lower shelves for kid-accessible bins (toys) and upper shelves for display-only items (keepsakes).
- Theme Pairing: Match bin colors to the room’s accent wall or bedding.
3. Floating Shelves as “Mini Galleries”
- Example: Pottery Barn Kids Cameron Floating Shelves.
- Small-Space Hack: Stagger shelves at varying heights to showcase collectibles (rocks, figurines) or small stuffed animals.
- DIY Upgrade: Add LED strip lights under shelves for a museum-like glow.
Styling Tips for Functional Playfulness
- Color-Code Toys: Group toys by color on shelves for a cohesive, Insta-worthy look (e.g., all-red toys on one shelf).
- Mix Open and Closed Storage: Use bins for messy items (Legos) and open shelves for decorative toys (vintage trains, dolls).
- Create Themes: Dedicate a shelf to seasonal decor (e.g., Halloween plushies, holiday books).
- Interactive Labels: Use chalkboard labels or Velcro-backed cards so kids can “name” their displays.
DIY Bookshelf Makeover Hacks
- Chalkboard Backing:
- Paint the back panel of a bookshelf with chalkboard paint. Let kids doodle or label shelves.
- PVC Pipe Roll-Out Bins:
- Cut PVC pipes into short segments, mount them horizontally on shelves, and slide small toys (cars, crayons) inside.
- Lego Display Shelf:
- Glue LEGO baseplates to shelves for building and displaying creations.
- Hanging Curtain Rods:
- Install thin tension rods across shelf openings to hang dress-up costumes or small bags.
Safety & Practical Considerations
- Anchor Shelves: Secure to wall studs with anti-tip straps (especially for top-heavy units).
- Lightweight Materials: Opt for foam or plastic bins to reduce weight on shelves.
- Rounded Edges: Sand sharp corners or add edge guards if repurposing older shelves.
- Non-Toxic Paint: Use low-VOC paint for DIY projects (e.g., Benjamin Moore Natura).
Growth-Proof Design Ideas
- Toddlers: Keep lower shelves stocked with soft toys and board books for easy access.
- School-Age Kids: Convert a shelf into a “homework station” with supplies in labeled jars.
- Teens: Transition to displaying trophies, hobby kits, or vinyl records.
Budget-Friendly Bonus
Thrift an old ladder shelf and:
- Lean It Horizontally: Secure to the wall as a low toy display “stairs.”
- Add Hooks: Hang small buckets or baskets from the rungs for tiny toys.
Why Parents Love Repurposed Bookshelves
- Eco-Friendly: Reduces waste by upcycling instead of buying new.
- Encourages Responsibility: Kids learn to curate and tidy their own displays.
- Adaptable Aesthetics: Shift from nursery whimsy to tween chic with paint and accessories.
With repurposed bookshelves as toy display units, you’re not just organizing—you’re crafting a dynamic, ever-evolving showcase that celebrates your child’s personality, saves space, and turns everyday chaos into curated joy.
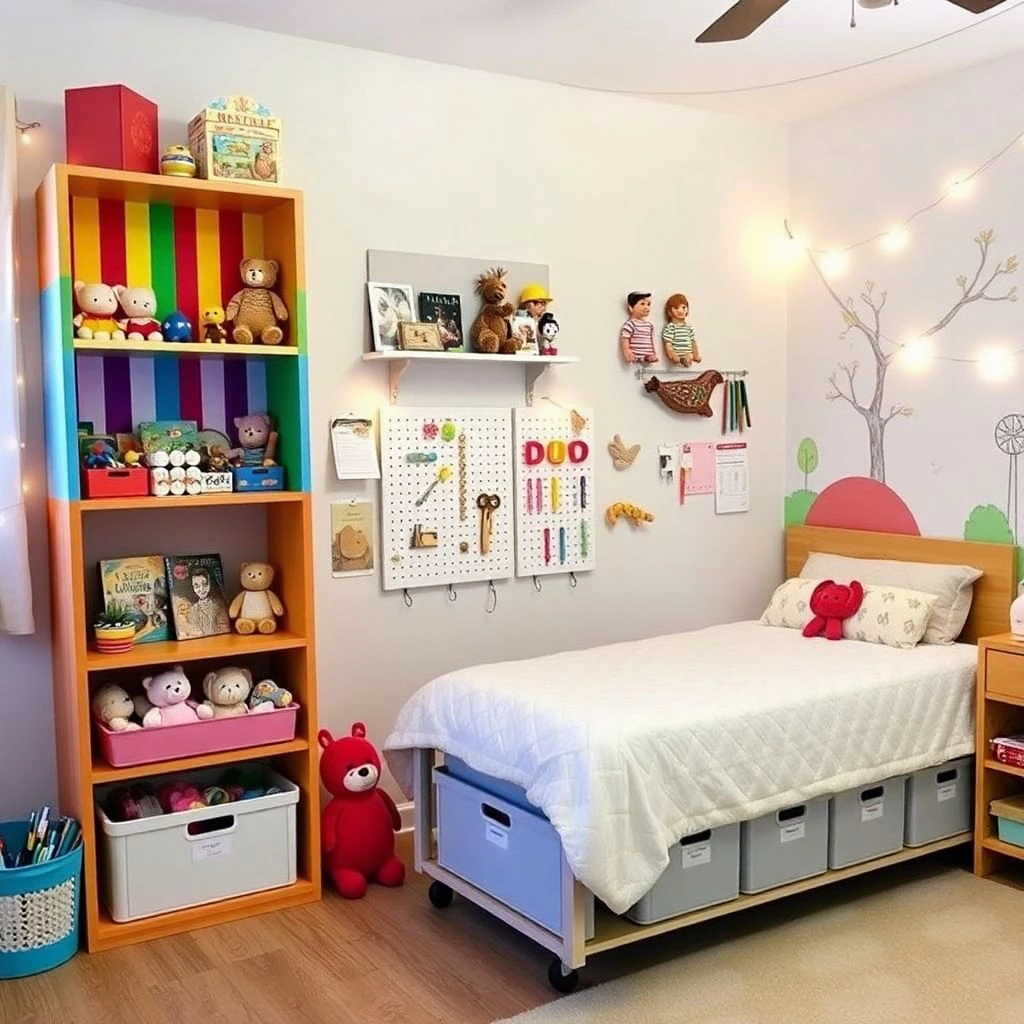
DIY Pegboard Organizers
In small children’s rooms, DIY pegboard organizers are a versatile, budget-friendly solution for maximizing vertical space while fostering creativity and independence. These customizable boards turn blank walls into dynamic storage hubs for toys, art supplies, books, and decor, all while encouraging kids to tidy up and access their favorite items easily. With endless configurations and a playful aesthetic, pegboards adapt to your child’s evolving interests—from toddlerhood to the teen years—making them a timeless addition to compact spaces.
Why DIY Pegboards Are Perfect for Small Rooms
- Vertical Space Savior: Free up floor area by lifting storage to the walls.
- Fully Customizable: Rearrange hooks, shelves, and bins as needs change.
- Kid-Friendly Accessibility: Position frequently used items at your child’s eye level.
- Affordable & Eco-Friendly: Repurpose old materials (pallet wood, thrifted boards) for a sustainable project.
Step-by-Step DIY Pegboard Guide
1. Choose Your Board
- Material Options:
- Plywood Pegboard: Sand and seal unfinished wood for a rustic look.
- Metal Pegboard: Durable for heavy items (e.g., bikes,乐器).
- Plastic Pegboard: Lightweight and easy to clean (ideal for nurseries).
- Size: Measure your wall space—common sizes are 2’x4’ or 4’x8’.
2. Prep & Paint
- Prime & Paint: Use non-toxic, low-VOC paint in bold colors (e.g., mint, coral) or chalkboard paint for writable surfaces.
- Patterns: Add stenciled shapes (stars, clouds) or masking tape geometric designs before painting.
3. Install Securely
- Mounting: Use French cleats or heavy-duty anchors to keep the board stable.
- Spacing: Leave 1–2” between the board and wall for hook insertion.
4. Add Accessories
- Hooks & Shelves: Use a mix of small hooks (for crayons, keys) and wide shelves (for books, plants).
- Baskets & Buckets: Hang wire baskets or fabric bins for stuffed animals or LEGO bricks.
- Custom Add-Ons: Clip-on LED lights, mini chalkboards, or magnetic strips for small metal toys.
Top DIY Pegboard Ideas for Kids’ Rooms
1. Art Supply Station
- Features: Paintbrush holders, cup hooks for scissors, and shelves for sketchpads.
- Small-Space Hack: Add a fold-down desk beneath the pegboard for a compact creative zone.
2. Costume & Dress-Up Display
- Features: Use S-hooks for hanging costumes, hats, and reusable tote bags.
- Styling Tip: Label hooks with pictures (e.g., “Princess Crowns,” “Superhero Capes”).
3. Rotating Toy Gallery
- Features: Display action figures, dolls, or collectibles on mini floating shelves attached to the pegboard.
- DIY Upgrade: Clip tiny clothespins to the board to hang your child’s artwork or photos.
Styling Tips for Function & Fun
- Color-Code Zones: Assign sections by color (e.g., blue for books, yellow for toys).
- Mix Open & Closed Storage: Pair see-through jars (for beads) with fabric bins (for messier items).
- Interactive Elements: Add a small chalkboard or whiteboard panel for notes or doodles.
- Seasonal Themes: Swap accessories for holidays (e.g., pumpkin baskets in fall, fairy lights in winter).
Kid-Safe Materials & Tools
- Non-Toxic Paint: Brands like ECOS Paints or Benjamin Moore Natura.
- Rounded Edges: Sand wooden boards thoroughly or add silicone edge guards.
- Lightweight Accessories: Avoid heavy hooks or shelves that could loosen over time.
Budget-Friendly Hacks
- Repurpose Old Frames: Turn a thrifted picture frame into a mini pegboard for jewelry or hair accessories.
- Dollar Store Finds: Use plastic baskets, binder clips, or silicone cupcake molds as quirky holders.
- Pallet Wood Pegboard: Sand and stain free pallet wood for a rustic, industrial look.
Growth-Proof Adaptations
- Toddlers: Focus on soft, lightweight bins and rounded hooks for safety.
- School-Age Kids: Add a homework station with pencil cups and a wall-mounted timer.
- Teens: Convert to a vanity with jewelry organizers, mirrors, and skincare shelves.
Why Parents & Kids Love DIY Pegboards
- Empowers Independence: Kids learn to organize and access toys themselves.
- Encourages Creativity: Let them design their own layouts or paint patterns.
- Easy Updates: Swap out hooks or bins in minutes as interests evolve.
Pro Tips for Longevity
- Regular Maintenance: Tighten hooks monthly and wipe down with a damp cloth.
- Weight Limits: Distribute heavy items evenly to avoid sagging (max 10–15 lbs per hook).
- Wall Protection: Use felt pads behind the board to prevent scuffing.
With DIY pegboard organizers, you’re not just building storage—you’re crafting a functional, ever-evolving canvas that reflects your child’s personality, keeps small rooms clutter-free, and turns everyday organization into a playful adventure.
Under-Bed Rolling Carts
In small children’s rooms, under-bed rolling carts are a stealthy, space-saving solution for stashing everything from toys and clothes to art supplies and seasonal gear. These slim, wheeled organizers slide effortlessly under beds, cribs, or lofted furniture, turning “dead space” into a functional storage zone that’s easy for kids to access independently. With compartments for categorization and smooth-gliding wheels for portability, they’re a must-have for parents battling clutter in tight quarters.
Why Under-Bed Rolling Carts Are a Small-Space Game-Changer
- Maximize “Lost” Space: Utilize the often-overlooked area beneath beds for hidden storage.
- Kid-Friendly Accessibility: Low-profile design lets toddlers and kids pull out carts themselves.
- Versatile Organization: Use for toys, books, shoes, linens, or even homework supplies.
- Portable & Flexible: Roll carts to other rooms for playdates, laundry, or quick cleanups.
Top Under-Bed Rolling Cart Picks
1. IKEA RÅSKOG Utility Cart
- Features: Three-tier metal cart with durable wheels and a slim profile (fits most bed heights).
- Small-Space Hack: Assign each tier to a category (e.g., bottom for stuffed animals, middle for puzzles, top for art supplies).
- Styling Tip: Spray-paint the cart in a bold color (teal, gold) to match the room’s palette.
2. The Container Store Rolling Underbed Storage Bin
- Features: Clear plastic bin with a hinged lid and wheels, ideal for bulky seasonal clothes or blankets.
- Small-Space Hack: Add dividers inside to separate toys or shoes.
- DIY Upgrade: Line the lid with adhesive chalkboard paper for labels or doodles.
3. mDesign Slim Plastic Rolling Cart
- Features: Ultra-narrow design (6″ tall) with two tiers, perfect for shallow under-bed spaces.
- Small-Space Hack: Use for small toys (LEGO, action figures) in labeled bins or mesh bags.
- Theme Pairing: Add themed stickers (dinosaurs, unicorns) to the cart’s sides.
Styling & Organization Tips
- Label Everything: Use picture labels (clip art or photos) for pre-readers to identify cart contents.
- Color-Code Bins: Assign colors to categories (red = toys, blue = books) for easy sorting.
- Soft-Close Wheels: Opt for carts with locking wheels to prevent accidental rolling or tipping.
- Multi-Purpose Use: Roll the cart to the bathroom for bath toys or to the living room for family game nights.
DIY Under-Bed Cart Hacks
- Repurposed Dresser Drawers:
- Attach casters to old drawers, line with fabric or contact paper, and add handles for easy pulling.
- Shoe Organizer Cart:
- Mount a hanging shoe organizer to a rolling kitchen cart for small toy storage.
- Magnetic Cart Upgrade:
- Glue magnetic sheets to the cart’s sides to hold metal tins (for crayons, hair clips) or toy cars.
Safety & Practical Considerations
- Smooth Edges: Sand wooden DIY carts or choose plastic/rubber-edged options to prevent scrapes.
- Weight Limits: Avoid overloading—most carts hold 20–50 lbs.
- Non-Toxic Materials: Ensure plastic carts are BPA-free (e.g., The Container Store’s bins).
- Locking Wheels: Critical for safety if storing heavy items like books or blankets.
Growth-Proof Uses
- Toddlers: Store diapering essentials, soft toys, or board books within easy reach.
- School-Age Kids: Organize craft kits, school projects, or sports gear (soccer balls, dance shoes).
- Teens: Convert into a beauty station with skincare, jewelry, or tech accessories.
Budget-Friendly Bonus
Repurpose a vinyl window planter box as a rolling cart:
- Attach wheels to the base.
- Add dividers with cardboard or foam board.
- Label sections for toys or art supplies.
Why Parents Love Under-Bed Rolling Carts
- Quick Cleanup: Teach kids to “sweep” toys into the cart and slide it under the bed.
- Space-Smart Design: Frees up closets, shelves, and floor space for play.
- Adaptable Storage: Swap contents seasonally (e.g., summer toys → winter holiday decor).
Pro Tips for Small Rooms
- Measure Twice: Confirm bed height and cart dimensions before buying.
- Opt for Slim Handles: Ensure handles don’t protrude to avoid tripping hazards.
- Use Vacuum Bags: Compress bulky items (stuffed animals, winter pajamas) to save space.
With under-bed rolling carts, you’re not just organizing clutter—you’re empowering kids to take charge of their space while keeping small rooms tidy, functional, and magically uncluttered.
Creating Magic in Small Spaces with Smart Children’s Room Ideas
Designing a functional, playful, and stylish children’s room in a small space isn’t just possible—it’s an opportunity to unleash creativity and prioritize what truly matters. Children’s room ideas for small rooms prove that limited square footage can still foster imagination, independence, and joy when approached with clever solutions like multifunctional furniture, vertical storage, and adaptable decor.
By embracing strategies such as loft beds with built-in desks, modular rug tiles, and under-bed rolling carts, you transform every inch into a purposeful zone for sleep, play, and learning. Meanwhile, playful touches like space-saving wall decals and mirrors with fun frames add personality without clutter, ensuring the room feels both whimsical and uncluttered.
Remember, the best small-space designs grow with your child. Convertible cribs, DIY pegboards, and repurposed bookshelves evolve alongside their changing needs, offering long-term value and flexibility. And with budget-friendly hacks like pastel peel-and-stick wallpaper or thrifted storage upgrades, you don’t need a big budget—just big creativity.
Ultimately, a small children’s room isn’t a limitation; it’s a blank canvas for innovation. By focusing on smart layouts, light-enhancing colors, and kid-friendly organization, you create a space that feels expansive, safe, and uniquely theirs. So, roll up your sleeves, involve your little ones in the process, and watch as their tiny room becomes a world of big adventures.