
If you’ve noticed tiny flying insects hovering around your beloved houseplants, chances are you’re dealing with gnats in houseplants. These pesky little bugs, often referred to as fungus gnats, are a common nuisance for indoor gardeners. While they may seem harmless at first glance, gnats can quickly multiply and wreak havoc on your plants by damaging their roots and spreading to other areas of your home. Understanding what causes these gnats to infest your plants—and how to effectively eliminate them—is key to keeping your indoor garden healthy and thriving. In this guide, we’ll explore the reasons behind gnat infestations, signs to watch for, and proven solutions to get rid of gnats in houseplants once and for all.
What Are Fungus Gnats and Why Do They Infest Houseplants?
What Are Fungus Gnats?
Fungus gnats are small, dark-colored flying insects that invade houseplants and disrupt their health. These pests, often mistaken for fruit flies, target the moist soil of indoor plants, making them a common frustration for plant enthusiasts. Belonging to the family Sciaridae , fungus gnats thrive in environments with damp soil, decaying organic matter, and poor drainage. If you’ve spotted tiny bugs buzzing around your plants, chances are you’re dealing with these troublesome invaders.
How Do Fungus Gnats Look and Behave?
Adult fungus gnats measure about 1/8 inch long, with delicate wings, long legs, and a weak flying pattern. They flit erratically around plants or gather near windows, often annoying homeowners but rarely causing direct harm. However, their larvae are the real culprits. These worm-like creatures live in the top layer of the soil, where they feed on organic material and tender plant roots. Their translucent bodies and distinct black heads make them easy to identify if you inspect the soil closely.
Why Do Fungus Gnats Infest Houseplants?
Fungus gnats invade houseplants because they seek out moist environments rich in organic matter. Overwatered plants provide the perfect breeding ground, as damp soil creates ideal conditions for their eggs to hatch and larvae to thrive. Decaying leaves, excess potting mix, and stagnant water further attract these pests. Essentially, when you overwater your plants or use poorly draining soil, you invite fungus gnats into your home.
What Damage Do Fungus Gnats Cause?
While adult fungus gnats annoy homeowners by flying around, their larvae actively damage plants. Larvae feed on the roots, disrupting the plant’s ability to absorb water and nutrients. This feeding weakens the plant, causing symptoms like yellowing leaves, wilting, and stunted growth. For young seedlings or sensitive plants, this root damage can be devastating. Additionally, a severe infestation spreads quickly to nearby plants, turning a minor issue into a widespread problem.
Why Should You Act Quickly?
If you ignore fungus gnats, they multiply rapidly and wreak havoc on your indoor garden. Their lifecycle—from egg to adult—takes only about three weeks, so populations grow fast. By targeting both adult gnats and their larvae, you stop the cycle and protect your plants from further harm. The following sections will show you how to identify an infestation and eliminate these pests effectively, ensuring your houseplants stay healthy and thriving.
By understanding what fungus gnats are and how they operate, you take the first step toward solving the problem. Armed with this knowledge, you can now tackle the issue head-on and reclaim your indoor garden.
Why Are Your Houseplants Attracting Gnats?
Your houseplants attract gnats because they provide the perfect environment for these pests to thrive. Fungus gnats actively seek out moist soil, organic material, and stagnant conditions—factors that are often present in indoor gardening setups. Understanding what draws gnats to your plants allows you to address the root causes and prevent future infestations.
Overwatering Creates a Breeding Ground
When you overwater your houseplants, you create an ideal habitat for fungus gnats. These pests love damp soil because their eggs and larvae require constant moisture to survive. Overwatered soil stays wet for extended periods, giving fungus gnats the perfect opportunity to lay eggs and multiply. If you notice gnats buzzing around your plants, check whether the soil feels soggy or waterlogged—it’s likely the primary culprit.
Organic Matter Feeds the Larvae
Fungus gnat larvae feed on decaying organic material found in the soil, such as dead roots, leaf debris, or excess potting mix. When you use rich, peat-based soils or fail to remove fallen leaves from the soil surface, you inadvertently supply food for these pests. The more organic matter your soil contains, the more attractive it becomes to fungus gnats. By keeping your soil clean and minimalistic, you reduce the risk of an infestation.
Poor Drainage Encourages Moisture Retention
Pots without proper drainage holes trap excess water, creating a swampy environment that fungus gnats love. Even if you water your plants correctly, poor drainage keeps the soil wet longer than necessary, inviting gnats to settle in. Similarly, compacted or heavy soils that don’t allow water to drain effectively also contribute to the problem. To combat this, choose well-draining soil mixes and ensure all pots have adequate drainage holes.
Indoor Conditions Favor Gnat Activity
The warm, humid conditions of most homes actively encourage fungus gnats to thrive. Indoor environments often lack natural predators like birds or beneficial insects that would otherwise control gnat populations outdoors. Additionally, indoor plants rarely experience the drying winds or sunlight that would naturally dry out soil. This combination of warmth, humidity, and protection makes your houseplants an irresistible target for gnats.
Neglecting Plant Care Increases Risk
When you neglect basic plant care practices, you unintentionally invite gnats into your home. For example, failing to check the soil’s moisture level before watering leads to overwatering. Similarly, ignoring signs of decay or leaving dead leaves on the soil provides food for larvae. By staying proactive with plant maintenance, you actively reduce the chances of attracting gnats.
What Can You Do About It?
To stop your houseplants from attracting gnats, take action by addressing these factors. Allow the top inch of soil to dry out between waterings, remove organic debris from the soil surface, and use pots with proper drainage. Choosing the right soil mix and monitoring your watering habits will also make your plants less appealing to fungus gnats. In the next sections, we’ll explore how to identify an infestation and eliminate these pests once and for all.
By understanding why your houseplants attract gnats, you gain the knowledge needed to break the cycle. Take control of your indoor garden today, and keep these pesky invaders at bay!
Signs of a Gnat Infestation
If fungus gnats have invaded your houseplants, they leave behind clear signs that signal their presence. These pests actively make themselves known through visible behaviors, plant damage, and soil disturbances. Recognizing these signs early allows you to act quickly and prevent further harm to your plants.
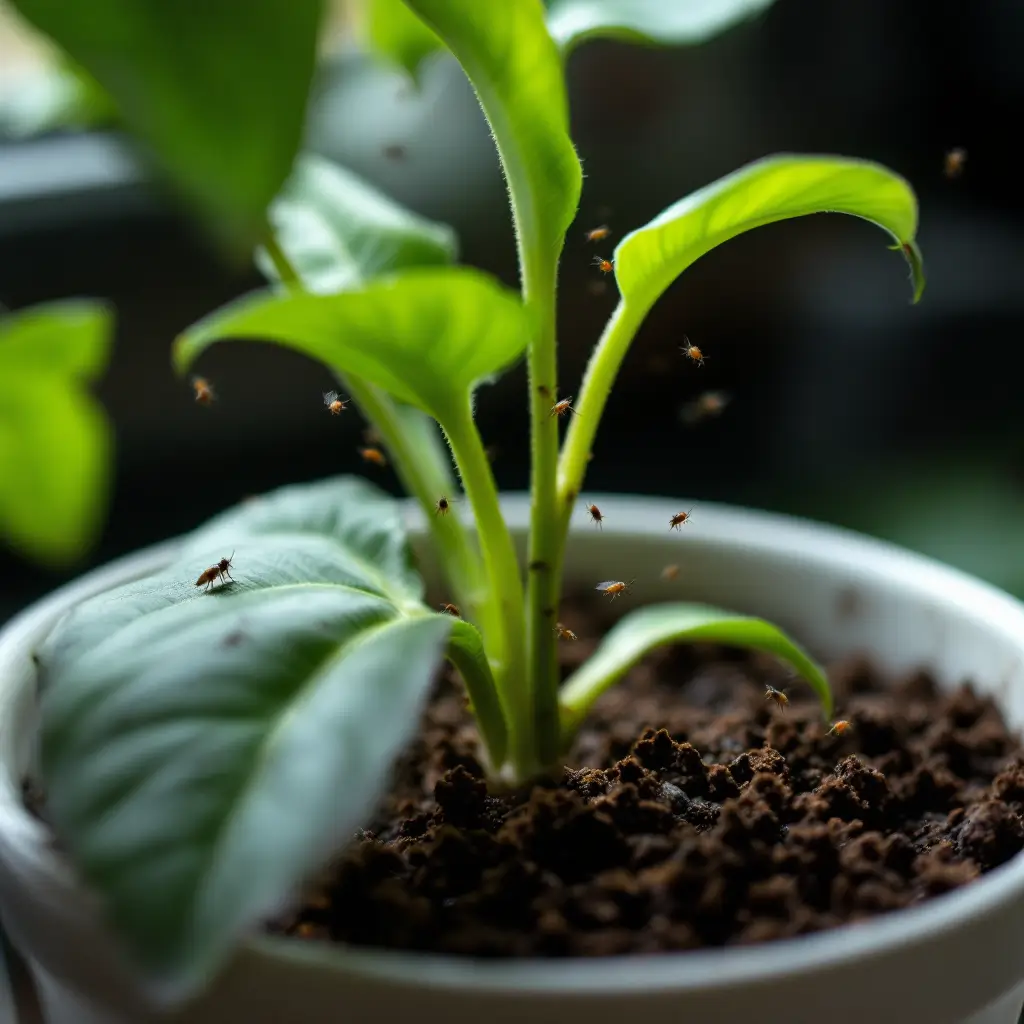
Tiny Flying Insects Swarm Around Your Plants
The most obvious sign of a gnat infestation is the presence of small, dark flying insects hovering around your houseplants. Adult fungus gnats are weak fliers but often gather near the soil surface or fly erratically around the plant’s leaves and stems. You may also notice them near windowsills or light sources, as they’re attracted to brightness. If you see these bugs repeatedly, it’s a strong indication that your plants are hosting a gnat problem.
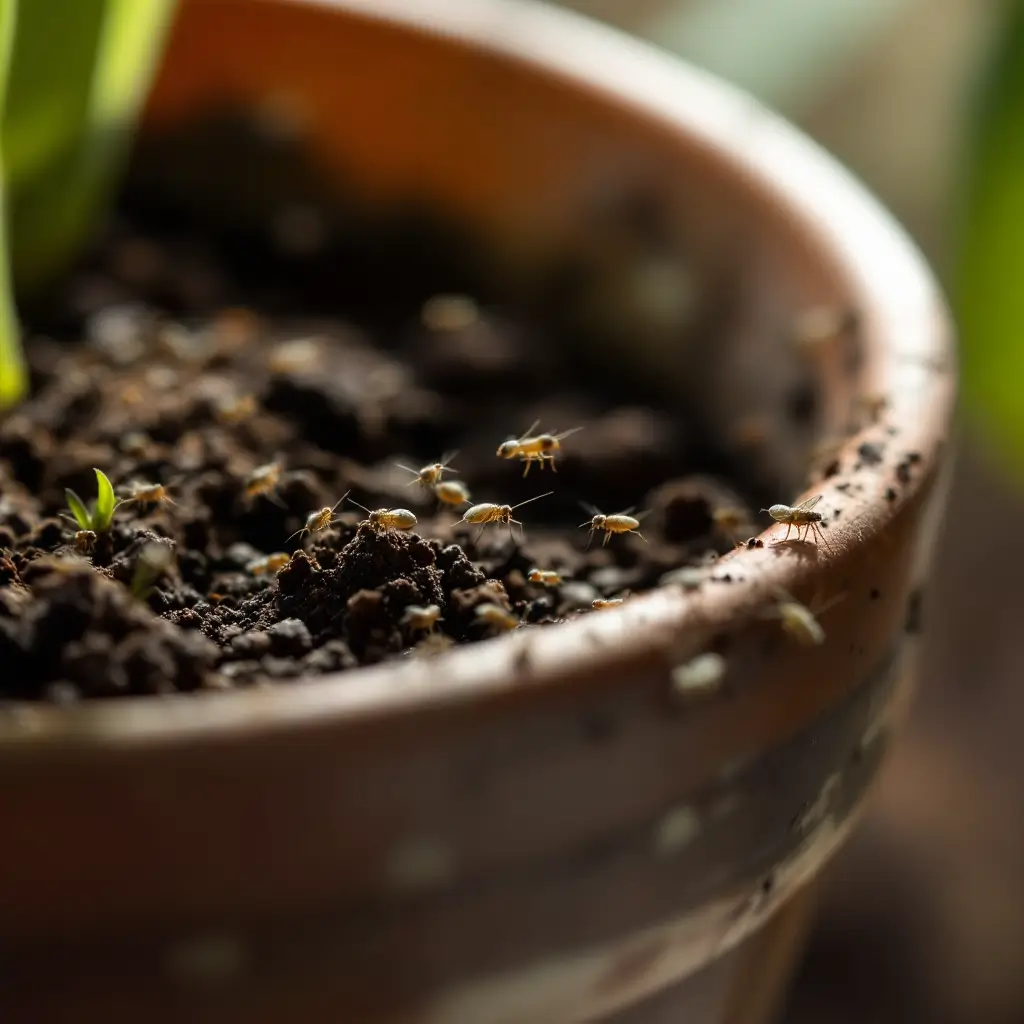
Larvae Live in the Soil
Fungus gnat larvae actively live and feed in the top layer of your plant’s soil. To confirm their presence, inspect the soil closely. Look for tiny, worm-like creatures with translucent bodies and black heads wriggling just beneath the surface. You can also dig gently into the top inch of soil to uncover them. If you spot larvae, you’re dealing with an active infestation that requires immediate attention.
Plants Show Signs of Root Damage
Fungus gnat larvae feed on the roots of your plants, causing noticeable damage over time. As they chew on tender roots, your plants struggle to absorb water and nutrients, leading to symptoms like wilting, yellowing leaves, or stunted growth. If your plants suddenly appear unhealthy despite proper care, check the roots for signs of damage. Root systems that look weak, discolored, or overly slimy may indicate a gnat infestation.
Soil Remains Constantly Damp
A gnat infestation often coincides with consistently damp soil, as these pests thrive in moist environments. If the soil in your pots feels soggy or takes too long to dry out—even after reducing watering—it could be a sign that gnats are present. Their larvae actively contribute to this issue by thriving in wet conditions and perpetuating the cycle of moisture retention.
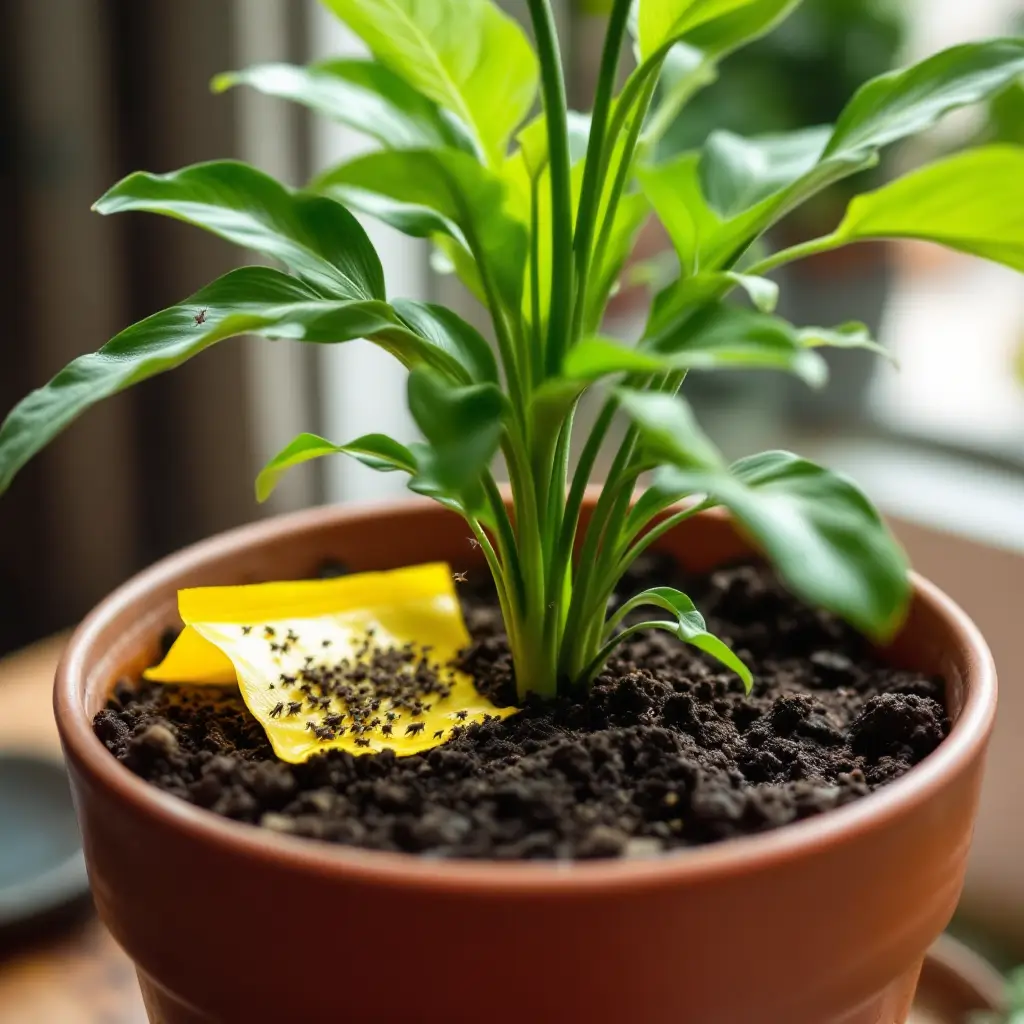
Yellow Sticky Traps Catch Adult Gnats
To confirm an infestation, place yellow sticky traps near your plants. These traps actively attract and catch adult fungus gnats, providing visual proof of their presence. If the traps fill up quickly with small, dark insects, you’re likely dealing with a significant gnat population. This simple test not only confirms the problem but also helps reduce the number of adult gnats in your home.
Unpleasant Odors Emanate from the Soil
In severe infestations, fungus gnats and their larvae actively contribute to the breakdown of organic matter in the soil. This process can produce unpleasant, musty odors that signal decay. If you notice a strange smell coming from your plant’s pot, investigate the soil immediately—it could be a sign of a gnat problem.
What Should You Do Next?
Once you’ve identified the signs of a gnat infestation, take action to address the issue. Start by inspecting all your houseplants, as gnats spread easily from one plant to another. Use the strategies outlined in the following sections to eliminate adult gnats, target larvae, and prevent future infestations. By acting quickly, you’ll protect your plants and restore their health.
By staying vigilant and recognizing these signs early, you actively stop fungus gnats from taking over your indoor garden. Keep an eye out for these red flags, and take control of your houseplant care routine today!
Common Houseplants Prone to Gnats
Certain houseplants actively attract fungus gnats more than others due to their growing conditions, soil preferences, and care requirements. These plants often thrive in moist environments or require rich, organic soil—conditions that fungus gnats love. By understanding which plants are most vulnerable, you can take extra precautions to protect them from infestations.
Pothos (Epipremnum aureum)
Pothos plants are popular for their hardiness and ability to tolerate low light, but they’re also prone to gnat infestations. These plants often grow in peat-based potting mixes that retain moisture, creating the damp conditions fungus gnats actively seek out. Additionally, pothos owners may overwater their plants, thinking they need more hydration than they actually do. This combination of wet soil and organic material makes pothos a frequent target for gnats.
Snake Plants (Sansevieria trifasciata)
Snake plants are known for their drought tolerance, but ironically, they often fall victim to gnats when overwatered. Their thick, fleshy leaves store water, so they don’t need frequent watering. However, if you accidentally keep the soil too moist, fungus gnats will quickly invade. Snake plants also tend to grow in dense soil mixes, which can trap excess moisture and provide an ideal breeding ground for larvae.
Peace Lilies (Spathiphyllum spp.)
Peace lilies love humidity and moist soil, making them a magnet for fungus gnats. These plants actively thrive in environments where the soil remains consistently damp, but this same trait attracts gnats. Peace lily owners often struggle with finding the right balance between keeping the plant hydrated and avoiding waterlogged soil. Overwatering or using heavy, water-retentive potting mixes increases the risk of a gnat infestation.
African Violets (Saintpaulia spp.)
African violets require specific care, including well-draining soil and careful watering practices. However, their preference for slightly moist soil and their placement in warm, humid environments make them susceptible to gnats. If the soil stays too wet or if dead leaves accumulate on the surface, fungus gnats will actively move in and lay eggs. African violet enthusiasts must stay vigilant to prevent these pests from damaging their delicate plants.
Ferns (Various Species)
Ferns, such as Boston ferns or maidenhair ferns, actively thrive in high-humidity environments and consistently moist soil. While these conditions are essential for their health, they also create the perfect habitat for fungus gnats. Ferns often grow in rich, organic potting mixes that retain water, providing both food and shelter for gnat larvae. Owners of ferns should monitor their watering habits closely to avoid attracting these pests.
How Can You Protect These Plants?
To reduce the risk of gnats targeting these common houseplants, take proactive steps:
- Allow the top inch of soil to dry out between waterings, even for moisture-loving plants like peace lilies and ferns.
- Use well-draining potting mixes and ensure pots have drainage holes to prevent water from pooling.
- Remove dead leaves or debris from the soil surface to eliminate food sources for larvae.
- Regularly inspect these plants for signs of gnats, especially if they’re located near other infested plants.
By understanding which houseplants are most prone to gnats, you actively minimize the chances of an infestation. Focus on proper care and maintenance to keep these beloved plants healthy and pest-free!
How to Identify and Confirm a Gnat Problem
Check for Adult Gnats Flying Around Plants
One of the easiest and most reliable ways to confirm a gnat infestation is by actively observing adult gnats flying around your houseplants. These tiny insects are often the first visible sign that your plants are under attack. By paying close attention to their behavior and appearance, you can quickly identify the problem and take action.
Look for Tiny Flying Insects Near Your Plants
Adult fungus gnats are small, dark-colored insects that hover around the base of your plants or near the soil surface. They’re about 1/8 inch long with delicate wings and long legs, making them easy to spot if you know what to look for. Stand near your plants and observe carefully—gnats often fly erratically in short bursts, staying close to the plant or pot. If you notice these pests repeatedly, it’s a clear indication that an infestation is present.
Check Near Windows and Light Sources
Fungus gnats are attracted to light, so they often gather near windowsills, lamps, or other bright areas in your home. If you see tiny flying insects congregating in these spots, especially during the day, they’re likely adult gnats from your houseplants. This behavior confirms that the gnats are actively breeding in your indoor garden and spreading throughout your living space.
Observe How They React to Disturbances
When you approach your plants or gently disturb the soil, adult gnats will often scatter or fly away. This reaction is a telltale sign that they’re actively using your plants as a habitat. Unlike fruit flies, which are more focused on food sources like ripening fruit, fungus gnats stay close to the soil and plants, where they lay their eggs. Their persistent presence near your plants is a strong indicator of an ongoing infestation.
Monitor Frequency and Numbers
Pay attention to how many gnats you see and how frequently they appear. A few gnats may indicate a minor issue, but if you notice large numbers or see them daily, the infestation is likely severe. Adult gnats actively reproduce quickly, laying up to 200 eggs in their short lifespan. If left unchecked, their population can explode, leading to widespread damage to your plants and increased nuisance in your home.
Use Yellow Sticky Traps for Confirmation
To confirm the presence of adult gnats, place yellow sticky traps near your plants. These traps actively attract and catch gnats, providing visual proof of their activity. Position the traps at soil level or slightly above the plant, and check them daily. If the traps capture numerous small, dark insects, you’re dealing with a gnat infestation that requires immediate attention.
What Should You Do Next?
Once you’ve confirmed the presence of adult gnats, take steps to address both the adults and their larvae. Adult gnats are just the tip of the iceberg—the real damage comes from their larvae feeding on your plant roots. Use the strategies outlined in later sections to eliminate the entire gnat population, including adjusting watering habits, improving soil drainage, and applying natural remedies like neem oil or hydrogen peroxide.
By actively checking for adult gnats flying around your plants, you catch the problem early and prevent it from escalating. Stay observant, and take swift action to protect your houseplants from these persistent pests!
Inspect the Soil for Larvae
To effectively combat a gnat infestation, you must actively inspect the soil for larvae—the root cause of the problem. Fungus gnat larvae live and feed in the top layer of your plant’s soil, causing damage to roots and perpetuating the infestation. By identifying their presence early, you can take targeted action to eliminate them before they mature into adult gnats.
Focus on the Top Layer of Soil
Fungus gnat larvae thrive in the top 1-2 inches of soil, where they feed on organic matter and tender roots. To check for larvae, start by examining the surface of the soil closely. Look for tiny, worm-like creatures with translucent bodies and distinct black heads. These larvae are small—about 1/4 inch long—but visible if you inspect carefully. If the soil appears overly damp or has a slimy texture, it’s more likely to harbor larvae.
Dig Gently to Uncover Hidden Larvae
If you don’t see larvae on the surface, gently dig into the top inch of soil using a small tool or your fingers. Be careful not to damage the plant’s roots as you investigate. Larvae often burrow just beneath the surface, so digging slightly will help you uncover them. If you find wriggling larvae, it confirms that your plant is actively hosting a gnat infestation. The more larvae you discover, the more urgent it is to act.
Look for Signs of Root Damage
As you inspect the soil, pay attention to the condition of your plant’s roots. Fungus gnat larvae actively chew on roots, leaving them weak, discolored, or slimy. Healthy roots should be firm and white, so any signs of decay or damage indicate that larvae are feeding on them. Damaged roots reduce the plant’s ability to absorb water and nutrients, leading to symptoms like wilting, yellowing leaves, or stunted growth. Identifying root damage helps confirm the severity of the infestation.
Check for Excess Moisture and Organic Matter
While inspecting the soil, note whether it feels excessively wet or contains decaying organic material. Larvae thrive in moist environments and feed on decomposing plant matter, such as dead leaves or old potting mix. If the soil is soggy or littered with debris, it’s creating the perfect habitat for fungus gnats. Removing this organic matter and allowing the soil to dry out can help disrupt their lifecycle.
Use Potato Slices as a Detection Tool
A simple and effective way to detect larvae is by using raw potato slices. Place a thin slice of potato on the soil surface, cut side down, and leave it for a day or two. Fungus gnat larvae are attracted to the starch in the potato and will actively crawl onto it to feed. After a couple of days, lift the slice and inspect it closely. If you see larvae clinging to the potato, you’ve confirmed their presence and can proceed with treatment.
What Should You Do Next?
Once you’ve identified larvae in the soil, take immediate steps to eliminate them. Treat the soil with natural remedies like hydrogen peroxide or beneficial nematodes , which target larvae without harming your plants. Adjust your watering habits to let the soil dry out between waterings, and remove any excess organic debris from the surface. Combining these actions will actively break the gnat lifecycle and protect your plants from further damage.
By thoroughly inspecting the soil for larvae, you gain valuable insight into the extent of the infestation and can address the problem at its source. Stay proactive, and take swift action to ensure your houseplants remain healthy and pest-free!
Use Yellow Sticky Traps to Monitor Activity
Yellow sticky traps are a simple yet highly effective tool for actively monitoring and controlling fungus gnat activity in your houseplants. These traps attract adult gnats, helping you confirm the presence of an infestation and track its severity over time. By incorporating yellow sticky traps into your pest management strategy, you gain valuable insights into the problem while reducing the adult gnat population.
Why Yellow Sticky Traps Work
Fungus gnats are naturally drawn to the color yellow, which mimics the appearance of plants and flowers. When you place yellow sticky traps near your houseplants, adult gnats actively fly toward them and become trapped on the adhesive surface. This makes the traps an excellent way to both monitor gnat activity and reduce their numbers. Unlike chemical treatments, sticky traps are non-toxic and safe to use around pets, children, and indoor spaces.
How to Use Yellow Sticky Traps Effectively
To maximize the effectiveness of yellow sticky traps, follow these steps:
- Position Traps Near Infested Plants : Place the traps at soil level or slightly above the plant to target adult gnats where they’re most active. You can also hang the traps nearby if your plants are on shelves or windowsills.
- Monitor Daily for Results : Check the traps daily to see how many gnats they’ve caught. A high number of trapped gnats indicates a significant infestation that requires immediate attention.
- Replace Traps as Needed : Over time, the adhesive surface of the traps will fill up with insects. Replace them regularly to ensure continuous monitoring and control.
Track the Severity of the Infestation
Yellow sticky traps actively help you gauge the severity of a gnat problem. For example:
- If only a few gnats appear on the traps, the infestation may be minor and easier to manage.
- If the traps quickly fill up with dozens of gnats, it’s a sign that the population is large and spreading. In this case, you’ll need to take more aggressive measures to eliminate larvae and break the lifecycle.
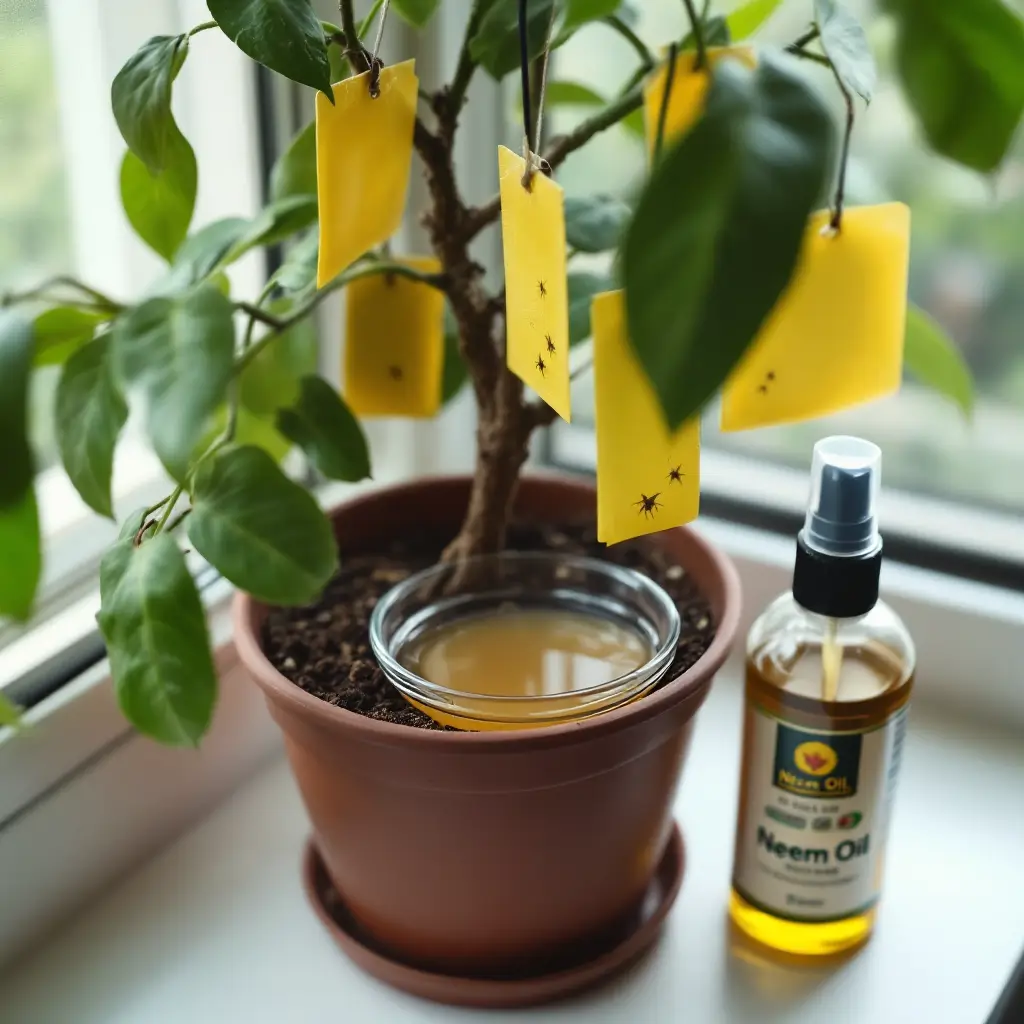
Combine Sticky Traps with Other Solutions
While yellow sticky traps effectively reduce the number of adult gnats, they don’t address the larvae living in the soil. To fully combat the infestation, combine sticky traps with other methods, such as:
- Applying neem oil or hydrogen peroxide to the soil to kill larvae.
- Introducing beneficial nematodes , which actively hunt and destroy gnat larvae.
- Adjusting your watering habits to let the soil dry out between waterings, making it less hospitable for larvae.
Place Traps Strategically Around Your Home
If you suspect gnats have spread beyond your houseplants, place sticky traps in other areas of your home where gnats might gather, such as near windows, doors, or light sources. This helps you identify whether the infestation is isolated to your plants or has spread to other parts of your living space. By actively monitoring activity in multiple locations, you can prevent gnats from becoming a widespread nuisance.
What Should You Do Next?
Once you’ve used yellow sticky traps to confirm the presence of gnats, take action to address both adult gnats and larvae. Continue using the traps as part of your ongoing pest management routine, even after the infestation appears under control. This ensures that any remaining adults are caught before they can lay eggs and restart the cycle.
By actively using yellow sticky traps to monitor gnat activity, you gain a clear understanding of the problem and take meaningful steps toward eliminating it. Combine this tool with other strategies to protect your houseplants and keep your indoor garden thriving!
Assess Plant Health for Root Damage
Root damage caused by fungus gnat larvae is one of the most serious consequences of a gnat infestation. To determine whether your plants are suffering from this hidden threat, you must actively assess their overall health and inspect their root systems. By identifying signs of damage early, you can take corrective action to save your plants and prevent further harm.
Look for Visible Symptoms Above Ground
Fungus gnat larvae feed on the roots of your plants, disrupting their ability to absorb water and nutrients. This damage often manifests in visible symptoms above the soil. Actively check your plants for the following signs:
- Wilting Leaves : Even if the soil feels moist, wilting leaves may indicate that the roots are too damaged to transport water effectively.
- Yellowing or Browning Leaves : Discoloration is a common sign of nutrient deficiency, which occurs when damaged roots can’t absorb essential minerals.
- Stunted Growth : Plants with compromised root systems struggle to grow properly, resulting in smaller leaves, shorter stems, or a general lack of vigor.
- Drooping or Weak Stems : If your plant looks limp or unstable, it could be a sign that the roots are no longer strong enough to support it.
Inspect the Roots Directly
To confirm root damage, carefully remove the plant from its pot and examine the root system. Healthy roots should be firm, white, and flexible, while damaged roots will appear brown, mushy, or slimy. Fungus gnat larvae actively chew on tender roots, leaving them weakened and prone to decay. If you notice significant root damage, it’s a clear indication that larvae are present in the soil and need to be addressed immediately.
Check for Soil Odors
Damaged roots and decaying organic matter in the soil can produce unpleasant odors, such as a musty or rotten smell. If you notice an unusual scent coming from the soil, it’s a sign that fungus gnat larvae are actively feeding and contributing to the breakdown of organic material. This odor not only signals root damage but also indicates that the soil environment is overly wet and conducive to pest activity.
Compare Affected Plants to Healthy Ones
If you’re unsure whether root damage is occurring, compare the affected plant to others in your collection. Healthy houseplants typically have vibrant foliage, steady growth, and firm stems. In contrast, plants with root damage caused by gnats will look sickly and may exhibit multiple stress symptoms. This comparison helps you identify which plants are most severely impacted and prioritize treatment.
Monitor Plant Recovery After Treatment
Once you’ve identified root damage, take steps to treat the infestation and improve plant health. After applying remedies like neem oil , hydrogen peroxide , or beneficial nematodes , actively monitor your plants for signs of recovery. Look for new growth, improved leaf color, and overall vitality. If the plant doesn’t show improvement after several weeks, it may be too damaged to recover, and you’ll need to consider replacing it.
Prevent Future Root Damage
To protect your plants from future root damage, implement preventative measures:
- Allow the top inch of soil to dry out between waterings to discourage larvae from thriving.
- Remove dead leaves or debris from the soil surface to eliminate food sources for larvae.
- Use well-draining potting mixes and ensure pots have drainage holes to prevent waterlogged conditions.
- Regularly inspect your plants for early signs of infestations, including adult gnats or larvae in the soil.
What Should You Do Next?
If your assessment reveals root damage, act quickly to address the infestation. Treat the soil to eliminate larvae, adjust your plant care routine, and provide extra care to help your plants recover. By actively assessing plant health and addressing root damage, you can restore your houseplants to their full potential and prevent gnats from causing further harm.
By staying vigilant and regularly assessing your plants for root damage, you actively protect them from the destructive effects of fungus gnats. Combine this practice with other strategies to create a healthy, pest-free environment for your indoor garden!
Effective Solutions to Get Rid of Gnats in Houseplants
Natural Remedies for Gnats
If you’re dealing with a gnat infestation, natural remedies offer safe and effective ways to eliminate these pests without resorting to harsh chemicals. By actively using ingredients you may already have at home, you can target both adult gnats and their larvae while keeping your houseplants healthy. Here are some of the best natural solutions to combat fungus gnats.
Use Neem Oil to Repel and Kill Gnats
Neem oil is a powerful natural pesticide that actively disrupts the lifecycle of fungus gnats. It works by repelling adult gnats, inhibiting their ability to lay eggs, and killing larvae in the soil. To use neem oil:
- Mix 1-2 teaspoons of pure neem oil with 1 quart of water and a few drops of dish soap (to help the solution stick to the soil).
- Spray the mixture directly onto the soil surface, ensuring it penetrates the top layer where larvae live.
- Repeat the treatment every 7-10 days until the infestation is under control.
Neem oil not only targets gnats but also provides additional benefits like preventing fungal diseases, making it a versatile tool for plant care.
Apply Hydrogen Peroxide to Kill Larvae
Hydrogen peroxide is an excellent natural remedy for eliminating fungus gnat larvae in the soil. When applied, it releases oxygen bubbles that kill larvae on contact while leaving your plants unharmed. To use hydrogen peroxide:
- Mix 1 part 3% hydrogen peroxide with 4 parts water.
- Water your plants with the solution, focusing on the soil surface where larvae are most active.
- Allow the soil to dry out slightly between treatments to prevent overwatering.
This method is particularly effective because it directly targets larvae without harming beneficial microorganisms in the soil.
Introduce Beneficial Nematodes to Hunt Larvae
Beneficial nematodes are microscopic worms that actively seek out and destroy fungus gnat larvae in the soil. These natural predators are safe for plants, pets, and humans, making them an eco-friendly solution. To use beneficial nematodes:
- Purchase a nematode product designed for indoor use.
- Mix the nematodes with water according to the package instructions.
- Apply the solution to the soil, ensuring it reaches the areas where larvae are present.
- Keep the soil slightly moist for a few days to help the nematodes thrive and hunt effectively.
Beneficial nematodes provide long-term protection by continuously targeting pests in the soil.
Create a DIY Apple Cider Vinegar Trap for Adult Gnats
Apple cider vinegar is a simple and effective way to trap adult gnats and reduce their population. The sweet, tangy scent attracts gnats, luring them into the trap where they become trapped. To make an apple cider vinegar trap:
- Fill a small bowl or jar with apple cider vinegar.
- Add a few drops of liquid dish soap to break the surface tension, causing gnats to sink when they land.
- Cover the container with plastic wrap and poke small holes in the top to allow gnats to enter.
- Place the trap near infested plants and replace it as needed.
This method actively reduces the number of adult gnats, preventing them from laying more eggs and perpetuating the infestation.
Sprinkle Cinnamon on the Soil Surface
Cinnamon acts as a natural fungicide and repellent, actively discouraging fungus gnats from laying eggs in the soil. Its antimicrobial properties also help prevent fungal growth, which gnats are attracted to. To use cinnamon:
- Sprinkle a thin, even layer of ground cinnamon over the soil surface.
- Avoid applying too much, as excessive amounts can form a crust that prevents water from penetrating the soil.
- Reapply after watering or disturbing the soil.
Cinnamon is a gentle yet effective way to create an inhospitable environment for gnats.
What Should You Do Next?
Once you’ve chosen a natural remedy—or a combination of remedies—actively monitor your plants for improvement. Continue treatments until the gnat population is eliminated, and take preventative measures to avoid future infestations. By incorporating these natural solutions into your plant care routine, you protect your houseplants while maintaining a safe and eco-friendly home environment.
By actively using these natural remedies, you can effectively combat fungus gnats and restore health to your indoor garden. Combine these methods with proper watering habits and soil management to keep your plants thriving and pest-free!
Improve Soil Drainage and Aeration
Improving soil drainage and aeration is one of the most effective ways to actively prevent and combat fungus gnats in your houseplants. These pests thrive in moist, compacted soil, so creating a drier, airier environment makes it difficult for them to survive and reproduce. By taking steps to enhance drainage and aeration, you not only address the root cause of the infestation but also promote healthier plant growth.
Choose Well-Draining Potting Mixes
The type of soil you use plays a critical role in preventing gnat infestations. Fungus gnats are attracted to dense, water-retentive soils that stay wet for long periods. To discourage them, actively switch to a well-draining potting mix designed for indoor plants. Look for mixes that include ingredients like:
- Perlite : Lightweight volcanic glass that improves drainage and prevents soil compaction.
- Coarse Sand : Adds structure to the soil and allows excess water to flow through quickly.
- Coco Coir or Pine Bark : Organic materials that retain some moisture while promoting airflow.
Avoid using heavy garden soil or peat-based mixes that trap water and create soggy conditions. A well-draining mix ensures that the top layer of soil dries out faster, making it less appealing to gnats.
Ensure Pots Have Proper Drainage Holes
Proper drainage is essential for preventing water from pooling at the bottom of the pot, which creates an ideal breeding ground for fungus gnats. Actively inspect your pots to ensure they have adequate drainage holes. If a pot lacks holes, either drill them yourself or repot the plant into a container with proper drainage. Additionally:
- Use saucers under pots to catch excess water, but empty them promptly after watering to avoid standing water.
- Avoid decorative pots without drainage holes, as they can trap moisture and exacerbate the problem.
Add Perlite or Sand to Existing Soil
If repotting isn’t an option, you can improve drainage and aeration by amending your current soil. Actively mix in perlite, coarse sand, or small stones to loosen the soil and allow better airflow. For example:
- Add a 1:1 ratio of perlite to soil to lighten its texture and improve water flow.
- Incorporate coarse sand to create larger gaps between soil particles, reducing compaction.
These amendments help the soil dry out more quickly and make it harder for larvae to survive.
Avoid Overwatering Your Plants
Overwatering is one of the main reasons why houseplants attract fungus gnats. To actively prevent this, adjust your watering habits and let the top inch of soil dry out between waterings. Here’s how:
- Check the soil moisture by sticking your finger into the soil up to the first knuckle. If it feels dry, it’s time to water.
- Use a moisture meter for a more accurate reading, especially for plants with specific watering needs.
- Water deeply but infrequently, ensuring excess water drains out of the pot completely.
By allowing the soil to dry out, you disrupt the lifecycle of fungus gnats and reduce their ability to breed.
Loosen Compacted Soil Regularly
Compacted soil restricts airflow and traps moisture, creating the perfect environment for gnats. Actively aerate the soil by gently loosening it with a fork or chopstick, being careful not to damage the roots. This process introduces air pockets and helps water drain more efficiently. You can also:
- Remove any crust or hard layers on the soil surface that may form after repeated watering.
- Fluff the soil lightly after watering to encourage evaporation and prevent stagnation.
What Should You Do Next?
Once you’ve improved soil drainage and aeration, actively monitor your plants for signs of improvement. Continue practicing good watering habits and periodically check the soil to ensure it’s not staying too wet. If you’re still dealing with gnats, combine these measures with other natural remedies like neem oil or beneficial nematodes to eliminate the infestation entirely.
By actively improving soil drainage and aeration, you create an environment that discourages fungus gnats and supports healthy plant growth. Take these steps today to protect your houseplants and keep them thriving!
Adjust Your Watering Schedule
One of the most effective ways to actively combat and prevent fungus gnats is by adjusting your watering schedule. Overwatering creates the damp conditions that fungus gnats thrive in, so fine-tuning how and when you water your houseplants can make a significant difference. By adopting smarter watering habits, you actively reduce moisture levels in the soil, making it less hospitable for gnats and their larvae.
Let the Soil Dry Out Between Waterings
Fungus gnats are attracted to consistently moist soil, so allowing the top inch of soil to dry out between waterings is crucial. Actively check the soil moisture before watering by sticking your finger into the soil up to the first knuckle. If the soil feels dry at this depth, it’s time to water; if it’s still damp, wait a day or two before checking again. This simple practice disrupts the gnat lifecycle by depriving larvae of the wet environment they need to survive.
Water Deeply but Infrequently
Instead of giving your plants small amounts of water frequently, actively water them deeply but less often. This method encourages roots to grow deeper into the soil, improving plant health and reducing surface moisture where fungus gnat larvae live. When you water:
- Ensure excess water drains out of the pot completely to prevent pooling at the bottom.
- Avoid leaving standing water in saucers or trays, as this creates additional breeding grounds for gnats.
Tailor Your Schedule to Each Plant’s Needs
Not all houseplants have the same watering requirements, so actively tailor your schedule to match the specific needs of each plant. For example:
- Succulents and Cacti : These drought-tolerant plants require infrequent watering, allowing the soil to dry out almost completely between sessions.
- Tropical Plants : While tropical plants like peace lilies and ferns prefer slightly moist soil, they still benefit from letting the top layer dry out before the next watering.
- Seedlings and Young Plants : These may need more frequent watering, but ensure the soil isn’t staying soggy for extended periods.
By understanding your plants’ unique needs, you avoid overwatering while keeping them healthy and pest-free.
Use a Moisture Meter for Accuracy
If you’re unsure whether your plants need water, actively use a moisture meter to measure soil moisture levels accurately. Insert the meter into the soil near the root zone and check the reading:
- A low reading indicates dry soil, signaling it’s time to water.
- A high reading means the soil is still too wet, so hold off on watering until the reading decreases.
This tool takes the guesswork out of watering and helps you maintain optimal soil conditions.
Improve Air Circulation Around Plants
In addition to adjusting your watering schedule, actively improve air circulation around your plants to speed up soil drying. Place fans near your indoor garden (but not directly on the plants) to increase airflow, which helps evaporate excess moisture. You can also space out your plants to prevent humidity from building up in one area, as high humidity exacerbates gnat problems.
What Should You Do Next?
Once you’ve adjusted your watering schedule, actively monitor your plants for signs of improvement. Look for fewer adult gnats flying around and healthier plant growth. Continue practicing these new habits consistently, even after the infestation is under control, to prevent future outbreaks. Pair this strategy with other solutions, such as introducing beneficial nematodes or using yellow sticky traps, for comprehensive gnat management.
By actively adjusting your watering schedule, you take a proactive step toward eliminating fungus gnats and creating a healthier environment for your houseplants. Smarter watering not only protects your plants but also ensures they thrive in the long term!
Preventing Future Gnat Infestations
Choose the Right Potting Mix
Selecting the right potting mix is one of the most proactive steps you can take to actively prevent fungus gnats and keep your houseplants healthy. The type of soil you use directly impacts moisture retention, aeration, and drainage—all critical factors in deterring these pests. By choosing a potting mix that discourages damp conditions, you create an environment where fungus gnats cannot thrive.
Avoid Water-Retentive Peat-Based Soils
Many commercial potting mixes contain peat moss, which retains water for long periods. While this can be beneficial for moisture-loving plants, it creates the soggy conditions that fungus gnats actively seek out. To reduce the risk of infestations:
- Actively look for potting mixes labeled as “well-draining” or “lightweight.”
- Avoid mixes with high peat content unless your plant specifically requires it (e.g., acid-loving plants like azaleas).
- If you must use peat-based soil, amend it with materials like perlite or coarse sand to improve drainage.
By switching to a less water-retentive mix, you make it harder for gnats to establish themselves in your plants’ soil.
Opt for Well-Draining Ingredients
The best potting mixes for preventing fungus gnats actively incorporate ingredients that promote drainage and aeration. These materials allow excess water to flow through quickly while keeping the soil loose and airy. Look for mixes that include:
- Perlite : Lightweight volcanic glass that improves drainage and prevents compaction.
- Coarse Sand : Adds structure to the soil and helps water drain faster.
- Coco Coir : A sustainable alternative to peat moss that retains some moisture but allows better airflow.
- Pine Bark or Orchid Bark : Chunky materials that create air pockets and reduce soil density.
These ingredients actively discourage the damp, compacted conditions that fungus gnats love.
Use Soil Specifically Designed for Indoor Plants
Not all soils are created equal, and outdoor garden soil is not suitable for houseplants. Garden soil is often too dense and retains too much moisture, making it a magnet for fungus gnats. Instead, actively choose potting mixes specifically formulated for indoor plants. These mixes are designed to balance moisture retention and drainage, ensuring your plants stay healthy without attracting pests.
For plants prone to gnat infestations, consider using cactus or succulent soil, which is extremely well-draining and inhospitable to gnats. You can also customize these mixes by adding extra perlite or bark for even better drainage.
Amend Existing Soil to Improve Drainage
If repotting isn’t an option, you can actively amend your current soil to make it less appealing to fungus gnats. For example:
- Mix in perlite or coarse sand to lighten the soil and improve airflow.
- Add a layer of fine gravel or stones at the bottom of the pot to enhance drainage.
- Remove any compacted or crusty layers from the soil surface, as these trap moisture and organic debris.
These simple adjustments actively reduce the likelihood of gnats laying eggs in your soil.
Avoid Overfilling Pots with Soil
Overfilling pots with soil can lead to poor drainage and waterlogged conditions near the base. To prevent this, actively leave about an inch of space between the soil surface and the rim of the pot. This gap allows for better evaporation and reduces the risk of standing water. Additionally, avoid packing the soil too tightly when planting, as compacted soil restricts airflow and traps moisture.
What Should You Do Next?
Once you’ve chosen the right potting mix or amended your existing soil, actively monitor your plants for signs of improvement. Check the soil regularly to ensure it’s not staying too wet, and adjust your watering habits to complement the new mix. If you’re still dealing with gnats, combine this strategy with other solutions like introducing beneficial nematodes or applying neem oil to eliminate larvae and adult gnats.
By actively choosing the right potting mix, you take a crucial step toward preventing fungus gnats and promoting healthier plant growth. A well-draining, aerated soil mix not only deters pests but also ensures your houseplants thrive in their environment!
Avoid Overwatering Your Plants
Overwatering is one of the most common mistakes plant owners make, and it’s also one of the primary reasons why fungus gnats infest houseplants. By actively avoiding overwatering, you can significantly reduce the risk of attracting these pests and create a healthier environment for your plants. Overwatered soil stays consistently damp, providing the perfect breeding ground for fungus gnats and their larvae. Here’s how to break this cycle and protect your indoor garden.
Understand Your Plant’s Watering Needs
Every plant has unique watering requirements, and understanding these needs is key to avoiding overwatering. Actively research the specific preferences of each plant in your collection:
- Succulents and Cacti : These plants thrive in dry conditions and require infrequent watering. Let the soil dry out completely between waterings.
- Tropical Plants : While tropical plants like peace lilies and ferns prefer slightly moist soil, they still need time to dry out between waterings.
- Herbs and Seedlings : Young or delicate plants may need more frequent watering, but even they don’t tolerate soggy soil.
By tailoring your watering routine to each plant’s needs, you actively prevent waterlogged conditions that attract gnats.
Check Soil Moisture Before Watering
Instead of watering on a fixed schedule, actively check the soil moisture before adding water. Use the “finger test” by inserting your finger into the soil up to the first knuckle:
- If the soil feels dry at this depth, it’s time to water.
- If the soil is still damp, wait another day or two before checking again.
For more accuracy, use a moisture meter to measure the soil’s moisture levels near the root zone. This tool helps you avoid overwatering by providing precise readings and ensuring you only water when necessary.
Water Deeply but Less Frequently
When you do water your plants, actively water deeply but less frequently. This method encourages roots to grow deeper into the soil, improving plant health and reducing surface moisture where fungus gnat larvae live. To water effectively:
- Pour water evenly over the soil until it begins to drain from the bottom of the pot.
- Allow excess water to drain completely and empty any saucers or trays to prevent standing water.
This approach ensures your plants receive adequate hydration without creating soggy conditions.
Recognize the Signs of Overwatering
Overwatered plants often show visible signs of stress, which can help you identify and correct the problem early. Actively look for these symptoms:
- Yellowing Leaves : A common sign of overwatering, as roots struggle to absorb oxygen.
- Wilting Despite Wet Soil : Indicates root rot or suffocation caused by waterlogged soil.
- Mold or Fungus on the Soil Surface : A clear sign that the soil is too wet and conducive to pests like fungus gnats.
- Foul Odors : Smelly soil suggests decay and anaerobic conditions, which attract gnats.
If you notice these signs, immediately adjust your watering habits and improve drainage to save your plants.
Improve Drainage to Prevent Waterlogging
Even with careful watering, poor drainage can lead to overwatering. Actively take steps to ensure your pots and soil allow excess water to escape:
- Use pots with drainage holes to prevent water from pooling at the bottom.
- Add a layer of small stones or gravel at the base of the pot to enhance drainage.
- Avoid decorative pots without drainage holes, as they trap water and create soggy conditions.
These measures actively reduce the risk of overwatering and make your plants less appealing to fungus gnats.
Educate Yourself on Seasonal Changes
Plants’ watering needs change with the seasons, and failing to adjust your routine can lead to overwatering. Actively adapt your watering schedule based on environmental factors:
- Winter : Indoor heating reduces humidity, but plants also grow more slowly, requiring less water.
- Summer : Increased sunlight and warmth may cause soil to dry out faster, requiring more frequent watering.
By staying mindful of seasonal changes, you actively prevent overwatering and maintain optimal soil conditions year-round.
What Should You Do Next?
Once you’ve adjusted your watering habits to avoid overwatering, actively monitor your plants for improvement. Check the soil regularly to ensure it’s not staying too wet, and look for fewer signs of gnats flying around. Pair this strategy with other solutions, such as using yellow sticky traps or introducing beneficial nematodes, for comprehensive pest control.
By actively avoiding overwatering, you take a critical step toward eliminating fungus gnats and promoting healthier plant growth. Proper watering not only protects your plants but also ensures they thrive in a balanced, pest-free environment!
Regularly Inspect Plants for Early Signs of Pests
Actively inspecting your houseplants on a regular basis is one of the most effective ways to catch pest problems, including fungus gnats, before they escalate. Early detection allows you to address infestations promptly, minimizing damage to your plants and preventing pests from spreading to other areas of your home. By making plant inspections a routine part of your care regimen, you actively protect your indoor garden and keep it thriving.
Set a Consistent Inspection Schedule
To stay ahead of potential pest issues, actively establish a regular inspection routine. Aim to check your plants at least once a week, or more frequently if you’ve had pest problems in the past. Choose a specific day or time to make it a habit, such as during your weekly watering session. During inspections:
- Examine the leaves, stems, and soil surface for any signs of pests or damage.
- Look closely at the undersides of leaves, where pests like to hide.
- Check for unusual changes in plant appearance, such as discoloration, wilting, or sticky residue.
By staying consistent, you actively ensure that no problem goes unnoticed for long.
Look for Visible Signs of Gnats
During your inspections, actively look for the telltale signs of fungus gnats. These include:
- Tiny Flying Insects : Adult gnats hovering around the soil or near the plant.
- Larvae in the Soil : Small, worm-like creatures with black heads wriggling in the top layer of soil.
- Yellow Sticky Traps : If you’ve placed traps near your plants, check them for trapped gnats.
Catching these signs early allows you to act quickly and prevent the infestation from worsening.
Check for Other Common Houseplant Pests
While focusing on fungus gnats, don’t overlook other pests that may also target your plants. Actively inspect for signs of common houseplant invaders, such as:
- Spider Mites : Look for fine webbing, yellow stippling, or tiny moving dots on leaves.
- Aphids : Check for small, soft-bodied insects clustering on new growth or stems.
- Mealybugs : Watch for cottony white masses or sticky honeydew on leaves and stems.
- Scale Insects : Look for small, shell-like bumps on stems or leaves.
By identifying multiple pests early, you can address all issues simultaneously and avoid compounding problems.
Inspect New Plants Before Bringing Them Indoors
New plants are often the source of pest infestations, so actively inspect them thoroughly before introducing them to your indoor garden. Isolate new additions for at least two weeks and monitor them closely for signs of pests. During this quarantine period:
- Check the soil for larvae or eggs.
- Look for adult insects flying around the plant.
- Inspect leaves and stems for damage or sticky residue.
This precautionary step actively prevents pests from spreading to your existing plants.
Monitor Plant Health for Indirect Signs of Pests
Sometimes, pests don’t immediately reveal themselves, but their impact on plant health becomes noticeable. Actively watch for these indirect signs of pest activity:
- Wilting or Yellowing Leaves : Could indicate root damage caused by gnat larvae or other pests feeding on the plant.
- Stunted Growth : A sign that the plant isn’t receiving enough nutrients due to pest interference.
- Holes or Chewed Edges on Leaves : Evidence of chewing insects like caterpillars or beetles.
- Sticky Residue (Honeydew) : A sugary substance left behind by sap-sucking pests like aphids or scale insects.
By connecting these symptoms to potential pest problems, you actively identify issues before they become severe.
Use Tools to Aid Your Inspections
To make your inspections more thorough, actively use tools that help you spot pests and damage more easily:
- Magnifying Glass : Use this to examine small pests or eggs that are hard to see with the naked eye.
- Flashlight : Shine light on the undersides of leaves and into crevices to expose hidden pests.
- White Paper Test : Shake a leaf or stem over a piece of white paper to dislodge tiny pests like spider mites or thrips.
These tools actively enhance your ability to detect problems early and take action.
What Should You Do Next?
Once you’ve completed your inspection, actively address any issues you find. For fungus gnats, adjust your watering habits, improve soil drainage, or apply natural remedies like neem oil or beneficial nematodes. For other pests, use targeted treatments such as insecticidal soap or horticultural oil. Continue inspecting your plants regularly to ensure the problem doesn’t return.
By actively inspecting your plants for early signs of pests, you take a proactive approach to plant care and pest management. Regular monitoring not only protects your houseplants but also ensures they remain healthy, vibrant, and free from infestations!
Keep Indoor Gardening Tools Clean
Keeping your indoor gardening tools clean is a simple yet powerful way to actively prevent the spread of pests like fungus gnats and other harmful organisms. Dirty tools can harbor eggs, larvae, bacteria, or fungi, which can easily transfer from one plant to another, exacerbating infestations or introducing new problems. By maintaining clean tools, you actively protect your houseplants and create a healthier environment for them to thrive.
Why Clean Tools Matter
Gardening tools, such as pruners, scissors, trowels, and watering cans, often come into direct contact with soil, leaves, and roots. If these tools are not cleaned regularly, they can actively carry pests, pathogens, or decaying organic matter that contribute to pest infestations. For example:
- Fungus Gnat Eggs or Larvae : Can cling to tools used in infested soil and spread to healthy plants.
- Fungal Spores : May transfer diseases like root rot or powdery mildew between plants.
- Bacteria : Can cause infections in damaged stems or leaves if tools are contaminated.
By cleaning your tools after each use, you actively break the chain of transmission and reduce the risk of spreading pests or diseases.
How to Clean Your Gardening Tools
Cleaning your tools is a straightforward process that requires minimal effort but yields significant benefits. Actively follow these steps to ensure your tools remain hygienic:
- Remove Visible Debris : After use, wipe off any soil, leaves, or plant residue with a dry cloth or brush. This prevents organic material from hardening on the tools.
- Wash with Soap and Water : Rinse tools under warm, soapy water to remove dirt and grime. Use a sponge or scrub brush to clean hard-to-reach areas.
- Disinfect with Rubbing Alcohol or Bleach Solution :
- Mix 1 part rubbing alcohol with 1 part water, or prepare a solution of 1 part bleach to 9 parts water.
- Dip the tools into the solution or wipe them down with a cloth soaked in the disinfectant.
- Pay special attention to blades, edges, and surfaces that come into contact with plants.
- Dry Thoroughly : After cleaning, dry your tools completely with a clean towel to prevent rust or corrosion. Store them in a dry, organized space.
This routine actively ensures your tools are free from contaminants and ready for their next use.
Clean Tools Between Plants
When working with multiple plants, especially those showing signs of pests or disease, actively clean your tools between each plant. This prevents cross-contamination and stops pests like fungus gnats from spreading to healthy plants. For example:
- If you prune an infested plant, disinfect your scissors before using them on another plant.
- After repotting a plant with gnat larvae in the soil, clean your trowel or gloves before handling other plants.
Taking this extra step actively safeguards your entire plant collection.
Pay Attention to Watering Cans and Saucers
Watering cans and saucers are often overlooked but can be major culprits in spreading pests. Fungus gnats are attracted to standing water, and larvae can survive in the residual moisture left in these items. To keep them clean:
- Empty saucers immediately after watering to prevent water from pooling.
- Rinse watering cans regularly to remove algae, soil particles, or debris that may harbor pests.
- Disinfect watering cans periodically, especially if you’ve used them on infested plants.
These actions actively eliminate potential breeding grounds for gnats and other pests.
Inspect Tools for Signs of Wear or Contamination
During your cleaning routine, actively inspect your tools for signs of wear or contamination that could affect their performance or hygiene. Look for:
- Rust or corrosion, which can harbor bacteria or make tools less effective.
- Cracks or crevices where soil or pests might get trapped.
- Residue buildup that indicates the need for deeper cleaning.
If you notice any issues, repair or replace the tools as needed to maintain a clean and efficient gardening setup.
What Should You Do Next?
Once you’ve established a tool-cleaning routine, actively incorporate it into your regular plant care schedule. Clean your tools after every use, and disinfect them whenever you suspect pest or disease issues. Pair this practice with other preventive measures, such as inspecting plants regularly and using clean potting soil, to create a comprehensive pest management strategy.
By actively keeping your indoor gardening tools clean, you take a proactive step toward preventing pest infestations and protecting your houseplants. Clean tools not only ensure better plant health but also demonstrate your commitment to maintaining a thriving, pest-free indoor garden!
Tools and Products to Combat Gnats in Houseplants
Yellow Sticky Traps
Yellow sticky traps are a simple yet highly effective tool for actively monitoring and controlling fungus gnats in your houseplants. These non-toxic, adhesive traps attract adult gnats, helping you identify the severity of an infestation while reducing their population. By incorporating yellow sticky traps into your pest management routine, you actively take control of the problem and protect your plants from further damage.
How Yellow Sticky Traps Work
Yellow sticky traps actively exploit the natural attraction fungus gnats have to the color yellow, which mimics the appearance of plants and flowers. When placed near infested plants, these traps lure adult gnats to their surface, where they become stuck on the adhesive coating. This process not only helps you monitor gnat activity but also reduces the number of adults capable of laying eggs, effectively breaking the lifecycle of the pests.
Place Traps Strategically for Maximum Effectiveness
To get the most out of yellow sticky traps, actively position them in locations where gnats are most active:
- Near Infested Plants : Place traps at soil level or slightly above the plant to target adult gnats as they emerge from the soil.
- Above Plant Pots : Hang traps using string or clips to catch gnats that fly upward.
- Near Windows or Light Sources : Gnats are attracted to light, so placing traps near windows or lamps can help capture wandering adults.
- In Multiple Locations : If you suspect gnats have spread beyond your plants, place traps in other areas of your home, such as kitchens, bathrooms, or entryways.
By strategically placing traps, you actively maximize their ability to catch gnats and prevent them from spreading.
Monitor Trap Activity to Assess Infestation Levels
Yellow sticky traps actively serve as a diagnostic tool, helping you gauge the severity of a gnat infestation. Regularly check the traps to see how many gnats they’ve caught:
- Low Numbers : A few trapped gnats may indicate a minor issue that can be managed with minimal intervention.
- High Numbers : If traps quickly fill up with dozens of gnats, it’s a sign of a significant infestation that requires immediate action.
- No Gnats : If no gnats are caught after several days, it may indicate that the infestation is under control or localized elsewhere.
This information allows you to tailor your pest control strategy based on the current level of activity.
Combine Sticky Traps with Other Solutions
While yellow sticky traps effectively reduce the adult gnat population, they don’t address larvae living in the soil. To achieve comprehensive control, actively combine sticky traps with other methods:
- Apply neem oil or hydrogen peroxide to the soil to kill larvae.
- Introduce beneficial nematodes to hunt and destroy larvae in the soil.
- Adjust your watering schedule and improve soil drainage to make the environment less hospitable for gnats.
By pairing sticky traps with these solutions, you actively target all stages of the gnat lifecycle and ensure long-term success.
Replace Traps Regularly for Continuous Control
Over time, yellow sticky traps lose their effectiveness as the adhesive surface becomes covered with insects and debris. Actively replace traps every 7-10 days, or sooner if they become full, to maintain continuous monitoring and control. Removing old traps and replacing them with fresh ones ensures that you’re always capturing the maximum number of gnats.
Choose Eco-Friendly and Safe Options
Yellow sticky traps are a safe and eco-friendly solution for indoor pest control. Unlike chemical pesticides, they pose no risk to pets, children, or beneficial insects like bees. Many traps are made from biodegradable materials, making them an environmentally responsible choice. Actively select high-quality traps designed for indoor use to ensure they’re effective and easy to handle.
What Should You Do Next?
Once you’ve set up yellow sticky traps, actively monitor them daily to assess the level of gnat activity. Use the data from the traps to guide your pest control efforts, combining them with other strategies like improving soil drainage, introducing beneficial nematodes, or applying natural remedies. Continue using sticky traps even after the infestation appears under control to catch any remaining adults and prevent future outbreaks.
By actively using yellow sticky traps, you gain valuable insight into the severity of a gnat infestation while actively reducing their population. This simple yet powerful tool is an essential part of any comprehensive pest management plan, helping you protect your houseplants and keep them thriving!
Neem Oil Spray
Neem oil spray is a powerful, natural solution that actively targets fungus gnats at multiple stages of their lifecycle. This organic pesticide not only repels adult gnats but also disrupts the growth and reproduction of larvae, making it an essential tool for eliminating infestations. By incorporating neem oil spray into your pest management routine, you actively protect your houseplants while maintaining a safe and eco-friendly environment.
How Neem Oil Spray Works
Neem oil actively interferes with the lifecycle of fungus gnats by targeting both adults and larvae. When sprayed on the soil or plant leaves, it:
- Repels Adult Gnats : The strong scent and taste of neem oil deter adult gnats from laying eggs in the soil.
- Disrupts Larval Development : Neem oil contains compounds like azadirachtin, which inhibit the growth and feeding behavior of larvae, ultimately killing them.
- Prevents Fungal Growth : Neem oil also acts as a fungicide, reducing the presence of mold and mildew in the soil—conditions that attract gnats in the first place.
This multi-faceted approach makes neem oil one of the most effective natural remedies for controlling fungus gnats.
Prepare Your Neem Oil Spray Solution
To use neem oil effectively, actively prepare a diluted spray solution to avoid harming your plants. Follow these steps:
- Choose High-Quality Neem Oil : Look for cold-pressed, pure neem oil labeled for use on plants.
- Mix the Solution :
- Combine 1-2 teaspoons of neem oil with 1 quart (4 cups) of water.
- Add a few drops of liquid dish soap or insecticidal soap to help the solution adhere to the soil and plant surfaces.
- Shake Well : Mix the solution thoroughly to ensure the oil emulsifies with the water.
Always test the spray on a small section of your plant first to ensure it doesn’t cause leaf burn or other adverse reactions.
Apply Neem Oil Spray to Target Gnats
To actively eliminate fungus gnats, apply the neem oil spray in the following ways:
- Spray the Soil Surface : Focus on the top layer of soil where larvae live and feed. Saturate the soil evenly to ensure the solution penetrates deeply.
- Mist Plant Leaves : Lightly spray the leaves, especially the undersides, to repel adult gnats and prevent them from landing.
- Repeat Regularly : Apply the spray every 5-7 days until the infestation is under control. Consistent application ensures you target newly hatched larvae and any remaining adults.
By systematically applying neem oil, you actively break the gnat lifecycle and prevent future infestations.
Enhance Effectiveness with Proper Timing
Timing is key to maximizing the effectiveness of neem oil spray. Actively apply the solution during the evening or early morning when plants are less exposed to direct sunlight. This prevents the oil from burning the leaves and ensures the spray remains effective. Additionally:
- Water your plants lightly before applying neem oil to ensure the soil absorbs the solution more effectively.
- Avoid spraying during extreme temperatures, as heat or cold can reduce the spray’s efficacy.
These practices actively enhance the impact of neem oil on fungus gnats.
Combine Neem Oil with Other Pest Control Methods
While neem oil is highly effective on its own, combining it with other strategies ensures comprehensive pest control. Actively pair neem oil spray with:
- Yellow Sticky Traps : Catch adult gnats to reduce egg-laying and complement the effects of neem oil.
- Beneficial Nematodes : Introduce nematodes to the soil to actively hunt and destroy larvae alongside the spray.
- Improved Watering Habits : Adjust your watering schedule to let the soil dry out, creating an inhospitable environment for gnats.
By integrating neem oil with these methods, you actively address all stages of the gnat lifecycle and achieve faster results.
Store and Handle Neem Oil Safely
To ensure the longevity and safety of your neem oil spray, actively follow these storage and handling tips:
- Store neem oil in a cool, dark place to prevent it from degrading.
- Label your spray bottle clearly to avoid confusion with other solutions.
- Wear gloves when handling neem oil to protect your skin, and avoid inhaling the mist while spraying.
Proper storage and handling actively maintain the quality of the product and ensure safe use around your home.
What Should You Do Next?
Once you’ve prepared and applied neem oil spray, actively monitor your plants for improvement. Check for fewer adult gnats flying around and healthier plant growth. Continue spraying regularly until the infestation is fully eliminated, and pair this treatment with other preventive measures like improving soil drainage or using sticky traps.
By actively using neem oil spray, you take a proactive step toward eliminating fungus gnats and protecting your houseplants. This natural, versatile solution not only targets pests but also promotes overall plant health, ensuring your indoor garden thrives in a pest-free environment!
Beneficial Nematodes
Beneficial nematodes are microscopic, worm-like organisms that actively hunt and destroy fungus gnat larvae in the soil. These natural predators are a safe, eco-friendly solution for eliminating gnats without harming your plants, pets, or the environment. By introducing beneficial nematodes into your houseplant care routine, you can effectively break the gnat lifecycle and protect your plants from root damage.
How Beneficial Nematodes Actively Work
Beneficial nematodes actively seek out fungus gnat larvae in the soil and invade their bodies. Once inside, they release bacteria that kill the larvae within 48 hours. The nematodes then feed on the decomposing larvae, multiplying and continuing their work. This process ensures that the gnat population is actively reduced at its source—the soil—preventing future infestations.
Choose the Right Type of Nematodes
Not all nematodes are created equal. For fungus gnat control, actively select species like Steinernema feltiae , which are specifically effective against gnat larvae. These nematodes thrive in the same moist environments as fungus gnats, making them ideal for targeting pests in houseplant soil. Purchase high-quality nematode products from reputable suppliers to ensure viability and effectiveness.
Apply Nematodes to Infested Soil
To introduce beneficial nematodes, follow these steps:
- Prepare the Soil : Water your plants lightly to ensure the soil is moist but not waterlogged. Nematodes require moisture to move through the soil and locate larvae.
- Mix the Solution : Follow the instructions on the nematode package to mix the nematodes with water. Typically, this involves dissolving the nematode powder in non-chlorinated water (e.g., distilled or rainwater).
- Apply Evenly : Pour the nematode solution directly onto the soil surface, ensuring it reaches all areas where larvae may be present. Focus on the top 2 inches of soil, where fungus gnat larvae live and feed.
- Keep the Soil Moist : After application, keep the soil slightly damp for the next 7-10 days to allow the nematodes to thrive and hunt effectively.
These steps actively ensure the nematodes can do their job efficiently.
When to Use Beneficial Nematodes
Timing is key to maximizing the effectiveness of beneficial nematodes. Actively apply them as soon as you notice signs of a gnat infestation, such as adult gnats flying around or larvae in the soil. Early intervention ensures that the nematodes can target larvae before they mature into adults and lay more eggs. You can also use nematodes preventatively if you’ve had gnat problems in the past or are bringing new plants into your home.
Benefits of Using Beneficial Nematodes
Beneficial nematodes offer several advantages over chemical treatments:
- Safe for Plants and Pets : Unlike pesticides, nematodes are non-toxic and pose no risk to humans, pets, or beneficial insects like bees.
- Long-Term Protection : Once introduced, nematodes can persist in the soil for weeks, providing ongoing pest control.
- Eco-Friendly : As a natural solution, nematodes help maintain a balanced ecosystem in your indoor garden without introducing harmful chemicals.
By actively using beneficial nematodes, you create a safer and healthier environment for your plants and household.
Combine Nematodes with Other Strategies
While beneficial nematodes are highly effective, combining them with other methods ensures comprehensive gnat control. For example:
- Use yellow sticky traps to catch adult gnats and reduce egg-laying.
- Apply neem oil or hydrogen peroxide to the soil to kill larvae and complement the nematodes’ work.
- Improve soil drainage and aeration to create an inhospitable environment for gnats.
This multi-pronged approach actively targets all stages of the gnat lifecycle, ensuring faster and more complete results.
Store and Handle Nematodes Properly
To ensure the nematodes remain viable and effective, actively follow these storage and handling tips:
- Store nematodes in a refrigerator (not a freezer) until you’re ready to use them, as they are living organisms that require cool temperatures.
- Avoid exposing nematodes to direct sunlight or extreme heat during application, as this can reduce their effectiveness.
- Use the nematodes as soon as possible after purchase to ensure maximum viability.
Proper handling actively ensures the nematodes perform at their best.
What Should You Do Next?
After applying beneficial nematodes, actively monitor your plants for signs of improvement. Check for fewer adult gnats flying around and healthier plant growth. Continue practicing good watering habits and inspect the soil regularly to ensure the infestation doesn’t return. If necessary, reapply nematodes every 2-3 weeks until the problem is fully resolved.
By actively introducing beneficial nematodes into your houseplant care routine, you take a proactive step toward eliminating fungus gnats and protecting your plants. This natural solution not only targets the root cause of the problem but also promotes a healthier, pest-free environment for your indoor garden.
Hydrogen Peroxide Solution
A hydrogen peroxide solution is a simple, natural, and highly effective way to actively kill fungus gnat larvae in your houseplant soil. This common household item breaks down into water and oxygen when applied, releasing bubbles that suffocate larvae on contact without harming your plants. By incorporating hydrogen peroxide into your pest management routine, you actively eliminate the root cause of the infestation while improving soil health.
How Hydrogen Peroxide Actively Works
When hydrogen peroxide comes into contact with organic material in the soil, it releases oxygen bubbles that actively kill fungus gnat larvae. The larvae, which live and feed in the top layer of soil, are unable to survive the sudden release of oxygen. Additionally:
- Safe for Plants : Once it breaks down, hydrogen peroxide leaves behind only water and oxygen, which are beneficial for plant roots.
- Improves Soil Health : The extra oxygen introduced into the soil can improve aeration and promote healthy root growth.
- Non-Toxic : Unlike chemical pesticides, hydrogen peroxide is safe to use around pets, children, and beneficial insects.
This makes hydrogen peroxide an ideal solution for indoor gardeners looking for eco-friendly pest control.
Prepare Your Hydrogen Peroxide Solution
To use hydrogen peroxide effectively, actively prepare a diluted solution to avoid damaging your plants. Follow these steps:
- Choose the Right Concentration : Use 3% hydrogen peroxide, which is the standard concentration available at most stores. Avoid higher concentrations unless specifically instructed.
- Mix the Solution :
- Combine 1 part hydrogen peroxide with 4 parts water (e.g., 1 cup of hydrogen peroxide to 4 cups of water).
- Stir gently to ensure the solution is evenly mixed.
- Test on a Small Area : Before applying it widely, test the solution on a small section of soil to ensure it doesn’t cause any adverse reactions.
By preparing the solution correctly, you actively ensure its safety and effectiveness.
Apply Hydrogen Peroxide to Target Larvae
To actively eliminate fungus gnat larvae, apply the hydrogen peroxide solution in the following ways:
- Water the Soil : Pour the solution directly onto the soil surface, focusing on areas where larvae are likely to be present. Ensure the solution penetrates the top 1-2 inches of soil, where larvae feed.
- Repeat Weekly : Apply the solution once a week until the infestation is under control. Consistent application ensures you target newly hatched larvae and prevent them from maturing.
- Avoid Overuse : While hydrogen peroxide is safe in moderation, overuse can disrupt beneficial microorganisms in the soil. Stick to the recommended dilution and frequency.
By systematically applying hydrogen peroxide, you actively break the gnat lifecycle and prevent future infestations.
Enhance Effectiveness with Proper Soil Conditions
For hydrogen peroxide to work effectively, actively ensure the soil conditions are optimal:
- Let the Soil Dry Out First : Apply the solution to slightly dry soil to maximize oxygen penetration and larval exposure.
- Improve Drainage : Use well-draining potting mix and pots with drainage holes to prevent waterlogged conditions that attract gnats.
- Remove Organic Debris : Clear away dead leaves or decaying matter from the soil surface to reduce food sources for larvae.
These practices actively enhance the impact of hydrogen peroxide on fungus gnats.
Combine Hydrogen Peroxide with Other Pest Control Methods
While hydrogen peroxide is highly effective on its own, combining it with other strategies ensures comprehensive pest control. Actively pair hydrogen peroxide with:
- Yellow Sticky Traps : Catch adult gnats to reduce egg-laying and complement the effects of the solution.
- Neem Oil Spray : Use neem oil to repel adult gnats and disrupt their lifecycle alongside hydrogen peroxide.
- Beneficial Nematodes : Introduce nematodes to the soil to actively hunt and destroy larvae in combination with the peroxide treatment.
By integrating hydrogen peroxide with these methods, you actively address all stages of the gnat lifecycle and achieve faster results.
Store and Handle Hydrogen Peroxide Safely
To ensure the longevity and safety of your hydrogen peroxide solution, actively follow these storage and handling tips:
- Store hydrogen peroxide in a cool, dark place to prevent it from breaking down prematurely.
- Label your spray bottle clearly to avoid confusion with other solutions.
- Wear gloves when handling concentrated hydrogen peroxide to protect your skin, and avoid inhaling the mist while spraying.
Proper storage and handling actively maintain the quality of the product and ensure safe use around your home.
What Should You Do Next?
Once you’ve prepared and applied the hydrogen peroxide solution, actively monitor your plants for improvement. Check for fewer adult gnats flying around and healthier plant growth. Continue applying the solution weekly until the infestation is fully eliminated, and pair this treatment with other preventive measures like improving soil drainage or using sticky traps.
By actively using hydrogen peroxide, you take a proactive step toward eliminating fungus gnats and protecting your houseplants. This natural, versatile solution not only targets pests but also promotes overall soil health, ensuring your indoor garden thrives in a pest-free environment!
Winning the Battle Against Gnats in Houseplants
Dealing with gnats in houseplants can be a frustrating challenge, but it’s one you can overcome with the right strategies and proactive care. These tiny pests thrive in moist environments, making overwatered soil and poor drainage their perfect breeding ground. By understanding what attracts gnats and targeting both adult insects and their larvae, you can actively eliminate infestations and protect your indoor garden.
From using yellow sticky traps to monitor and reduce gnat populations, to applying natural remedies like neem oil spray and hydrogen peroxide solutions , there are plenty of effective ways to combat these pests without resorting to harsh chemicals. Introducing beneficial nematodes and improving soil drainage further ensure that your plants remain healthy and pest-free. Pair these treatments with preventive measures such as avoiding overwatering , regularly inspecting your plants, and keeping gardening tools clean to stop future infestations before they start.
Healthy plants begin with mindful care and a balanced environment. By staying vigilant and incorporating these practices into your routine, you not only eliminate gnats but also create a thriving space for your houseplants to flourish. With patience, consistency, and the right approach, you’ll win the battle against fungus gnats and enjoy a lush, vibrant indoor garden that brings joy and beauty to your home.
1 thought on “How to Get Rid of Gnats in Houseplants: Effective Solutions”