

When it comes to home organization, implementing creative laundry room decor ideas can transform this often-overlooked space into a stylish and functional area. Whether you have a spacious laundry room or a compact corner, the right decor choices can help you maximize storage, enhance aesthetics, and create a more enjoyable environment for your daily chores. From adding chic storage solutions to incorporating stylish accents, a well-decorated laundry room can bring both efficiency and personality to your home.
In this guide, we’ll explore practical and budget-friendly laundry room decor ideas that will help you achieve a chic and organized look. Whether you’re aiming for a modern, farmhouse, or minimalist design, these tips will inspire you to revamp your space effortlessly.
Choosing the Right Storage Solutions for a Clutter-Free Look
Floating Shelves for Extra Space
Floating shelves are a game-changer when it comes to organizing and decorating your laundry room. They provide a sleek and functional storage solution that makes use of vertical space, helping to keep countertops clear while offering easy access to essentials. Whether you’re dealing with a small laundry nook or a spacious room, floating shelves allow you to maximize every inch effectively.
Benefits of Floating Shelves in a Laundry Room
- Space Optimization:
- Floating shelves take advantage of wall space, freeing up valuable floor area. They allow you to store detergents, fabric softeners, and other essentials without cluttering your workspace.
- Aesthetic Appeal:
- Available in various styles and finishes, floating shelves can enhance the overall aesthetic of your laundry room. Whether you prefer rustic wooden shelves, sleek white designs, or industrial metal styles, they can complement your existing decor theme.
- Easy Accessibility:
- Keeping frequently used items such as detergent pods, dryer sheets, and stain removers on open floating shelves ensures they are always within reach, making your laundry routine more efficient.
- Versatile Functionality:
- Floating shelves can be customized to suit your needs—whether it’s for storing laundry baskets, organizing cleaning supplies, or even displaying decorative items like plants and framed art.
Choosing the Right Floating Shelves
When selecting floating shelves for your laundry room, consider the following factors:
- Material: Choose from wood, metal, or glass shelves based on your laundry room’s theme and durability needs. Wooden shelves provide a warm, cozy feel, while metal offers a modern, industrial touch.
- Size and Depth: Ensure the shelves are deep enough to hold laundry essentials but not so large that they overwhelm the space. A depth of 10-12 inches is usually ideal.
- Weight Capacity: Consider the weight of the items you plan to store and select shelves that can handle the load without sagging. Heavy-duty brackets may be necessary for heavier loads.
Floating Shelf Styling Ideas
To make your floating shelves both functional and visually appealing, try these styling tips:
- Use Decorative Baskets: Arrange stylish woven or wire baskets to store smaller items like clothespins, dryer sheets, or stain removers while keeping them hidden from view.
- Incorporate Glass Jars: Store detergents, pods, and powder in clear labeled jars to keep things organized and aesthetically pleasing.
- Add Greenery: Small potted plants or faux greenery can add a refreshing touch to your laundry room, making it feel more inviting.
- Personal Touches: Display framed quotes, vintage laundry signs, or scented candles to add personality and charm to the space.
DIY Floating Shelf Installation Tips
If you’re considering a DIY approach, follow these steps to install floating shelves securely:
- Measure and Mark: Determine the ideal shelf placement and mark the wall accordingly. Use a level to ensure straight lines.
- Find Wall Studs: For secure mounting, locate wall studs with a stud finder, as shelves anchored into drywall alone may not hold heavy items well.
- Install Brackets: Attach brackets to the wall, ensuring they are evenly spaced and level before securing the shelf.
- Secure the Shelves: Place the shelf on top of the brackets and fasten it with screws if needed, ensuring stability.
By incorporating floating shelves into your laundry room, you can create a more organized, efficient, and visually appealing space. Whether you’re looking to add a decorative touch or need practical storage solutions, floating shelves provide the perfect balance of style and functionality.
Laundry Baskets and Hampers
Laundry baskets and hampers are essential elements of an organized and stylish laundry room. They not only help keep dirty clothes in check but also contribute to the overall decor when chosen thoughtfully. With a variety of designs, materials, and sizes available, laundry baskets and hampers can be both functional and aesthetically pleasing, making laundry chores more efficient and your space clutter-free.
Benefits of Using Laundry Baskets and Hampers
- Efficient Sorting System:
- Having multiple baskets or hampers allows you to sort laundry by color, fabric type, or family member, saving time on laundry day. Investing in divided hampers with labeled sections can streamline the entire process.
- Space Optimization:
- Whether you have a spacious laundry room or a small corner, hampers and baskets can be strategically placed under counters, inside cabinets, or in wall-mounted holders to free up floor space. Stackable or collapsible options offer even more flexibility in compact areas.
- Improved Organization:
- Keeping laundry neatly tucked away in designated baskets prevents clutter and promotes a clean, organized look. With stylish options available, your laundry storage can blend seamlessly with your decor theme.
- Enhanced Aesthetics:
- Laundry baskets and hampers come in various materials like woven rattan, canvas, and metal, allowing you to choose designs that complement your laundry room’s style, whether it’s modern, rustic, or minimalist.
Types of Laundry Baskets and Hampers
Choosing the right type of laundry basket or hamper depends on your space, lifestyle, and aesthetic preferences. Here are some popular options:
- Freestanding Hampers:
- These are standalone units that come in stylish designs and various sizes, often featuring lids to keep dirty clothes out of sight. Ideal for large laundry rooms.
- Collapsible Laundry Baskets:
- Perfect for small spaces or apartments, these baskets can be folded and tucked away when not in use, maximizing your available space.
- Rolling Hampers:
- Equipped with wheels for easy transportation, rolling hampers are ideal for moving laundry from room to room without hassle.
- Divided Laundry Sorters:
- Featuring multiple compartments, these hampers help separate whites, colors, and delicates effortlessly, making laundry day more efficient.
- Hanging Laundry Bags:
- Ideal for small laundry rooms, hanging bags can be mounted behind doors or on walls to save floor space while keeping dirty laundry organized.
Stylish Ways to Incorporate Laundry Baskets into Your Decor
- Under-the-Counter Storage:
- Placing hampers under countertops or inside cabinets keeps them hidden and maintains a clean, streamlined look.
- Open Shelving Displays:
- Opt for stylish woven baskets placed on open shelves to create a decorative yet practical storage solution for smaller items like socks, towels, and cleaning supplies.
- Matching with Room Theme:
- Choose baskets that align with your laundry room’s color scheme and style—whether it’s neutral-toned wicker baskets for a farmhouse look or sleek black metal hampers for a modern touch.
- Personalized Labels:
- Add a decorative yet functional touch by labeling your laundry baskets with chalkboard tags or printed labels for easy identification.
DIY Laundry Basket Ideas for Budget-Friendly Solutions
If you’re looking to add a personal touch while staying within a budget, consider these DIY laundry basket ideas:
- Upcycled Wooden Crates:
- Repurpose old wooden crates by painting or staining them to match your decor. Add wheels for a rustic, mobile laundry hamper.
- Fabric-Covered Baskets:
- Customize plain plastic baskets by wrapping them with fabric or burlap to create a chic, farmhouse-style laundry solution.
- Personalized Stencil Designs:
- Use stencils and paint to add creative patterns or monograms to your laundry baskets for a unique touch.
- Repurposed Furniture:
- Turn an old dresser or bookshelf into a laundry sorting station by adding pull-out bins or baskets for categorized storage.
Laundry Basket Maintenance Tips
To keep your laundry baskets and hampers looking great and functioning efficiently, follow these maintenance tips:
- Regular Cleaning:
- Wipe down plastic or metal baskets with a damp cloth and mild detergent to remove dust and odors. For fabric hampers, wash removable liners regularly.
- Avoid Overloading:
- Prevent wear and tear by not overstuffing baskets, which can lead to stretched fabric or broken handles.
- Air Drying:
- If your hamper is made of natural materials like wicker, allow it to air dry properly to prevent mold or mildew buildup.
By thoughtfully selecting and organizing laundry baskets and hampers, you can create a practical, stylish, and clutter-free laundry room that enhances your home’s functionality and design.
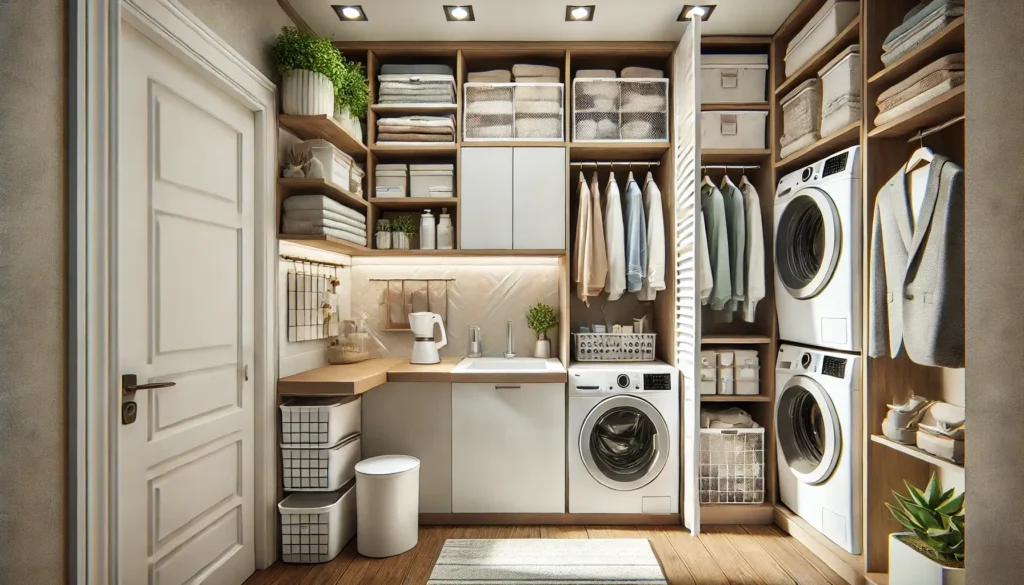
Cabinets and Open Shelving
Adding cabinets and open shelving to your laundry room is a perfect way to enhance storage, maintain organization, and elevate the aesthetic appeal of the space. Whether you prefer the clean look of concealed cabinets or the accessibility of open shelving, incorporating these elements allows you to store laundry essentials efficiently while keeping the area visually appealing and clutter-free.
Benefits of Cabinets and Open Shelving
- Maximized Storage Space:
- Cabinets provide hidden storage for items you don’t want on display, such as cleaning products, detergents, and miscellaneous laundry tools. Open shelves, on the other hand, offer easy access to frequently used items while maintaining a neat look.
- Aesthetic Enhancement:
- Cabinets create a clean and seamless appearance, while open shelving adds a touch of style and personality with decorative elements like baskets, jars, and plants. Combining both can strike a balance between functionality and design.
- Easy Organization:
- Well-placed cabinets and shelves can help categorize laundry supplies efficiently, making it easier to keep track of what you need without unnecessary clutter.
- Customizable Solutions:
- Cabinets and shelves come in various styles, sizes, and finishes, allowing you to customize them according to your laundry room’s theme—whether modern, farmhouse, or minimalist.
Types of Cabinets for Laundry Rooms
Choosing the right cabinets depends on your space, storage needs, and personal preferences. Here are a few options:
- Wall-Mounted Cabinets:
- Ideal for small laundry rooms, these cabinets make use of vertical space, keeping the floor clear while providing ample storage for detergents, fabric softeners, and other essentials.
- Base Cabinets:
- Installed beneath countertops, base cabinets offer convenient storage for larger items such as hampers, baskets, and bulk detergent containers. They also provide a flat surface for folding laundry.
- Tall Storage Cabinets:
- Perfect for storing brooms, mops, ironing boards, and other tall items that can be challenging to store elsewhere, these cabinets help keep everything neatly tucked away.
- Open Shelf Cabinets:
- A combination of closed cabinets and open shelves can offer the best of both worlds, allowing you to hide clutter while showcasing decorative items or everyday essentials.
Open Shelving Ideas for a Stylish and Functional Laundry Room
Open shelving can make your laundry room look spacious and organized while adding decorative charm. Consider these creative ways to style and utilize open shelves:
- Use Decorative Bins and Baskets:
- Store small laundry essentials such as dryer sheets, clothespins, and stain removers in labeled woven or wire baskets to create a uniform and visually pleasing look.
- Glass Jars for Essentials:
- Display frequently used items like detergent pods, powdered detergent, and laundry beads in clear glass jars to keep them easily accessible and add a chic touch.
- Floating Shelves Above Appliances:
- Install floating shelves above your washer and dryer to keep supplies within arm’s reach without taking up additional floor space.
- Mix and Match with Decor:
- Incorporate small plants, framed quotes, and stylish accents alongside functional items to personalize your laundry room and make it feel more inviting.
Choosing the Right Materials for Cabinets and Shelving
The material you choose for your cabinets and shelves will impact durability, maintenance, and the overall look of your laundry room. Here are some options to consider:
- Wood:
- Classic and versatile, wood cabinets and shelves add warmth to the space and can be painted or stained to match your decor.
- Laminate:
- A budget-friendly and durable option, laminate cabinets resist moisture and come in various colors and finishes.
- Metal:
- Sleek and modern, metal shelving adds an industrial touch to the laundry room and is highly durable, perfect for heavy items.
- Glass:
- For a contemporary look, glass-front cabinets offer a stylish way to display laundry supplies while maintaining a clean and airy feel.
Installation Tips for Cabinets and Open Shelving
- Measure Your Space Carefully:
- Before installing, take accurate measurements of your walls and consider the placement of appliances to ensure a proper fit.
- Use Wall Anchors for Heavy Loads:
- If installing shelves or cabinets on drywall, use the right anchors to prevent sagging or damage, especially if you plan to store heavy items.
- Maintain Accessibility:
- Position frequently used items within easy reach while placing less-used supplies in higher cabinets or on top shelves.
- Consider Adjustable Shelves:
- Opt for shelves that can be adjusted to accommodate different items as your storage needs change over time.
Budget-Friendly Cabinet and Shelving Ideas
If you’re looking for affordable ways to add storage to your laundry room, consider these budget-friendly ideas:
- DIY Floating Shelves:
- Create custom shelves using reclaimed wood or inexpensive materials from a hardware store for a cost-effective yet stylish solution.
- Repurpose Old Furniture:
- Transform an old bookshelf, dresser, or kitchen cabinet into laundry room storage by giving it a fresh coat of paint and adding storage bins.
- Use Ready-to-Assemble (RTA) Cabinets:
- Many home improvement stores offer affordable RTA cabinets that are easy to install and come in various styles to suit your taste.
- Install Tension Rods:
- Use tension rods under cabinets or within shelving units to create additional hanging space for delicate garments or small laundry tools.
Maintenance Tips for Cabinets and Open Shelves
To keep your laundry room looking neat and stylish, follow these maintenance tips:
- Regular Dusting and Cleaning:
- Wipe down open shelves and cabinet doors regularly to prevent dust and lint buildup.
- Declutter Periodically:
- Go through your cabinets and shelves every few months to remove expired products, unused items, and reorganize the space.
- Use Liner Mats:
- Protect cabinet shelves from spills and stains by using liner mats that can be easily removed and cleaned.
- Secure Items Properly:
- Arrange heavy items on lower shelves to avoid accidents and maintain balance in open shelving displays.
By incorporating cabinets and open shelving in your laundry room, you can achieve a perfect balance of function and style. Whether you’re aiming for a sleek, modern look or a cozy, farmhouse vibe, the right storage solutions can help create a clutter-free, efficient space that makes laundry day a breeze.
Wall-Mounted Drying Racks
Wall-mounted drying racks are an excellent addition to any laundry room, offering a practical and space-saving solution for drying clothes. Whether you’re dealing with limited space or simply looking to enhance organization, these racks provide an efficient way to air-dry delicate garments, reduce energy costs, and maintain a clutter-free environment. With various styles and materials available, wall-mounted drying racks can complement any laundry room decor while serving as a functional necessity.
Benefits of Wall-Mounted Drying Racks
- Space Efficiency:
- Unlike traditional drying racks that take up valuable floor space, wall-mounted versions fold away when not in use, making them ideal for small laundry rooms or apartments. They can be installed above appliances, behind doors, or on unused walls to maximize space.
- Energy Savings:
- Air-drying clothes instead of using a dryer reduces energy consumption and extends the lifespan of delicate fabrics. Wall-mounted drying racks provide an easy way to harness these benefits while keeping laundry neatly organized.
- Convenient Accessibility:
- With a designated drying space, you can quickly hang wet clothes, preventing wrinkling and ensuring proper airflow for faster drying. Some models even feature adjustable rods or retractable designs for added flexibility.
- Stylish and Functional Addition:
- Wall-mounted drying racks come in a variety of designs, from rustic wooden styles to sleek metal options, allowing them to seamlessly integrate into your laundry room’s decor.
Types of Wall-Mounted Drying Racks
When selecting a wall-mounted drying rack, it’s important to consider your available space, drying needs, and style preferences. Here are a few popular options:
- Accordion-Style Drying Racks:
- These racks expand outward to provide multiple hanging rods and collapse flat against the wall when not in use. They are ideal for small spaces and can hold a variety of clothing items.
- Pull-Down Racks:
- Designed to be pulled down when needed and retracted after use, these racks are perfect for keeping your laundry area neat and clutter-free. Some models are mounted inside cabinets for a hidden storage solution.
- Retractable Line Drying Racks:
- Featuring extendable lines that can be pulled out when needed, retractable racks allow you to create a drying area when required and then neatly roll them back into place. These are great for both indoor and outdoor use.
- Fixed Rod Drying Racks:
- These racks consist of stationary rods that provide a permanent drying solution. They are ideal for those with ample wall space and frequent laundry needs.
- Over-the-Door Drying Racks:
- A great alternative for renters, these racks can be mounted over doors without drilling, providing temporary drying space without damaging walls.
Installation Tips for Wall-Mounted Drying Racks
Proper installation is key to ensuring the durability and functionality of your drying rack. Follow these tips for a hassle-free setup:
- Choose the Right Location:
- Install the rack near your washer and dryer for easy access, but ensure it’s positioned away from high-traffic areas to avoid obstructions. Ideal locations include above countertops, behind doors, or on empty walls.
- Use Wall Anchors for Support:
- If mounting on drywall, use appropriate anchors to support the weight of wet clothing and prevent the rack from pulling away from the wall. Stud-mounted installations provide the best stability.
- Measure and Mark Accurately:
- Before drilling, take precise measurements to ensure the rack is level and at a convenient height for use.
- Consider Folding or Collapsible Designs:
- If space is limited, opt for racks that can be folded flat against the wall to maintain a tidy appearance when not in use.
- Ensure Proper Ventilation:
- Position your drying rack in a well-ventilated area to promote faster drying and prevent moisture buildup that can lead to mold or mildew.
Creative Ways to Use Wall-Mounted Drying Racks
Beyond drying clothes, these racks can serve multiple purposes in your laundry room and beyond:
- Storage for Ironed Clothes:
- Use the rack to temporarily hang freshly ironed garments before placing them in the closet.
- Drying Delicate Items:
- Perfect for items like lingerie, sweaters, and activewear that require air-drying to maintain their shape and quality.
- Additional Hanging Space:
- Double up your rack’s purpose by using it to hang towels, linens, or even decorative elements like hanging baskets when not in use.
- DIY Plant Hanger:
- Get creative and repurpose the drying rack to hold small potted plants in the laundry room, adding a touch of greenery.
Maintenance Tips for Wall-Mounted Drying Racks
To keep your drying rack functional and looking its best, follow these maintenance tips:
- Regular Cleaning:
- Wipe down the rack with a damp cloth to remove dust and lint. For metal racks, consider using a mild cleaner to prevent rust.
- Check for Loose Screws:
- Periodically inspect the installation to ensure screws and anchors remain secure, especially if the rack is frequently used for heavy items.
- Avoid Overloading:
- Respect the weight capacity of your drying rack to prevent damage and ensure longevity.
- Fold When Not in Use:
- If you have a foldable rack, keep it collapsed when it’s not needed to prevent unnecessary wear and tear.
Budget-Friendly Wall-Mounted Drying Rack Ideas
If you’re looking for affordable drying solutions, consider these budget-friendly options:
- DIY Wooden Racks:
- Build your own drying rack using inexpensive wood and brackets from a hardware store, customizing it to fit your laundry space perfectly.
- IKEA Hacks:
- Many IKEA products can be repurposed as drying racks, offering stylish and affordable solutions for small spaces.
- Repurposed Towel Racks:
- A sturdy towel rack can double as a drying station for lightweight clothing items, offering an affordable alternative.
- Foldable Clothing Lines:
- Simple retractable lines installed on opposite walls can create a quick, space-efficient drying area without the need for bulky racks.
Adding a wall-mounted drying rack to your laundry room is a simple yet highly effective way to improve functionality while maintaining a stylish and organized space. Whether you’re looking to maximize small areas or create a dedicated drying zone, these racks offer a practical and attractive solution for any home.
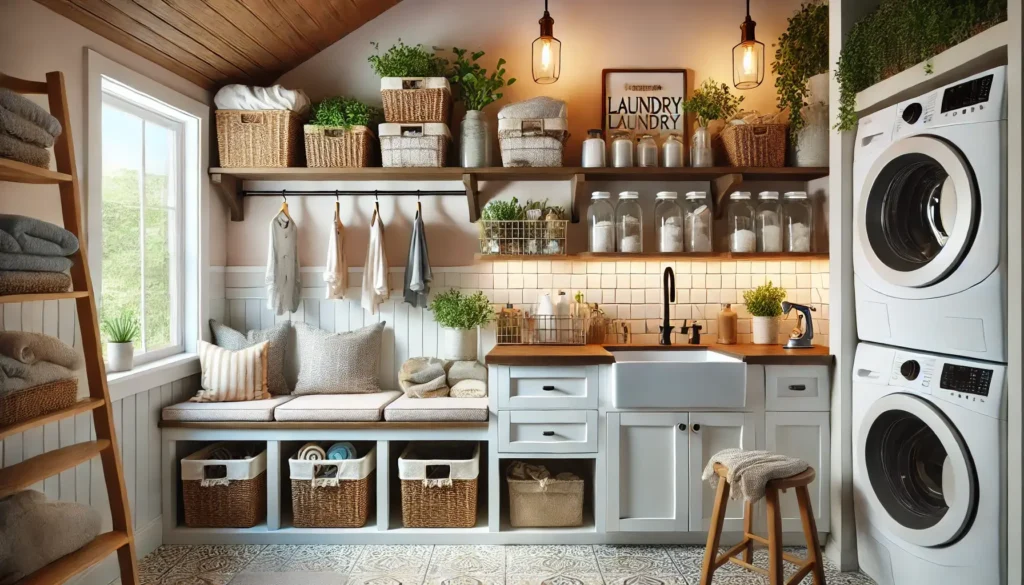
Stylish Decor Ideas to Elevate Your Laundry Room
Transform your laundry space with creative and functional decor ideas. Check out this helpful guide for inspiration on stylish storage solutions, color schemes, and design tips to make your laundry room both beautiful and efficient.
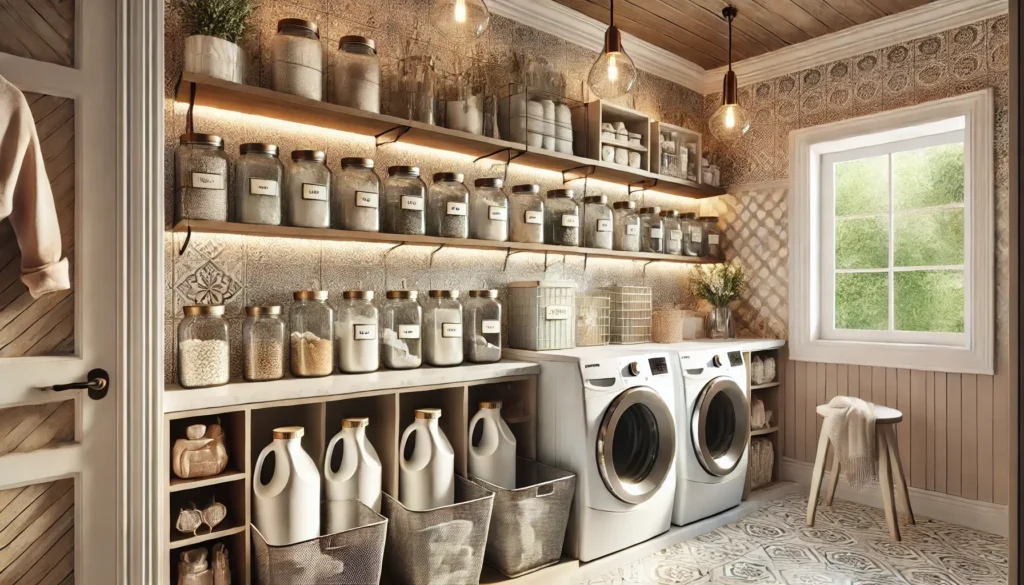
Incorporate Decorative Jars and Bins
Incorporating decorative jars and bins in your laundry room is an easy and stylish way to enhance both functionality and aesthetics. These storage solutions help keep essential laundry supplies organized while adding a decorative touch that complements your space’s overall design. Whether you have a minimalist, farmhouse, or modern laundry room theme, decorative jars and bins offer a practical yet visually appealing way to store detergent, fabric softener, dryer sheets, and other essentials.
Benefits of Using Decorative Jars and Bins
- Improved Organization:
- Decorative jars and bins allow you to store laundry essentials in an orderly manner, making it easy to access frequently used items such as detergent pods, clothespins, and stain removers. Clear or labeled containers also help you quickly identify what you need.
- Aesthetic Appeal:
- Unlike bulky and unattractive packaging, decorative storage options create a neat and cohesive look. Whether you choose matching bins or stylish glass jars, these items contribute to a polished and organized laundry space.
- Space Optimization:
- Bins and jars maximize vertical and shelf space, making it easy to keep countertops clutter-free. Stackable bins or wall-mounted jar holders further enhance space efficiency.
- Eco-Friendly Solution:
- Reusable jars and bins allow you to buy laundry products in bulk, reducing the need for excessive packaging and minimizing plastic waste, making it an environmentally conscious storage option.
- Personalization Opportunities:
- From DIY label designs to customized color schemes, decorative jars and bins allow you to personalize your laundry room while reflecting your style preferences.
Types of Decorative Jars and Bins for Laundry Rooms
Choosing the right type of storage containers depends on the size of your laundry room, your storage needs, and your design preferences. Here are some stylish and functional options to consider:
- Glass Jars with Lids:
- Ideal for storing powdered detergent, dryer sheets, and clothespins. Clear glass jars offer a sleek and modern look while allowing you to easily see the contents. Choose jars with airtight lids to keep products fresh and dust-free.
- Plastic or Acrylic Bins:
- Lightweight and durable, plastic bins are perfect for storing larger laundry essentials such as bulk detergent bottles, fabric softener, and towels. Transparent options make it easier to locate items quickly.
- Woven Baskets:
- For a farmhouse or rustic look, woven baskets add warmth and texture while offering a great way to store laundry supplies, rolled-up towels, or even dirty clothes. They work well on open shelving or tucked under countertops.
- Metal or Wire Baskets:
- Industrial-style wire baskets are great for creating a modern and functional laundry space. They provide easy visibility of contents and work well for storing folded clothes, cleaning rags, or extra supplies.
- Ceramic or Decorative Canisters:
- Stylish and sturdy, ceramic canisters with labels add a touch of sophistication to your laundry area. They’re great for holding stain removers, laundry pods, or other frequently used items.
- Fabric Storage Bins:
- Soft, collapsible fabric bins are ideal for lightweight items and can be easily stored away when not in use. They’re perfect for seasonal storage or organizing smaller accessories.
Creative Ways to Use Decorative Jars and Bins
Here are some creative ideas for incorporating decorative storage solutions into your laundry room:
- Laundry Supply Station:
- Arrange glass jars and labeled bins on a floating shelf or countertop to create a designated station for commonly used items like detergent, fabric softener, and stain removers.
- Wall-Mounted Storage:
- Install shelves or pegboards to hold jars and bins, freeing up counter space while maintaining an organized and accessible storage solution.
- Color Coordination:
- Choose jars and bins in colors that match your laundry room decor to create a cohesive and stylish look. Neutral tones work well for a minimalist space, while bold colors can add a pop of personality.
- Hidden Storage:
- Use decorative bins to conceal unsightly items such as cleaning supplies or extra sponges, maintaining a tidy and clutter-free laundry area.
- Label Everything:
- Invest in stylish, customizable labels for your jars and bins to ensure every item has its place and can be easily found when needed. Chalkboard labels, vinyl decals, or hand-written tags work beautifully.
DIY Ideas for Customizing Decorative Jars and Bins
If you’re looking to personalize your laundry room storage on a budget, consider these DIY ideas:
- Mason Jar Makeover:
- Upcycle mason jars by painting the lids or adding decorative ribbons and labels for a charming and functional storage solution.
- Personalized Vinyl Labels:
- Use a vinyl cutting machine to create custom labels for jars and bins with stylish fonts and fun icons, enhancing the organization and aesthetic appeal of your storage.
- Fabric-Wrapped Bins:
- Wrap plain plastic bins with fabric that matches your laundry room theme for a softer, more customized look.
- Spray Paint for a Fresh Look:
- Give old metal or plastic bins a new lease on life with a coat of spray paint in a trendy color like matte black, pastel blue, or classic white.
- Chalkboard Paint Labels:
- Apply chalkboard paint to jar lids or bin fronts to allow for easy re-labeling and updating of contents as needed.
Maintenance Tips for Decorative Jars and Bins
To ensure your decorative storage solutions stay in top condition and serve their purpose effectively, follow these maintenance tips:
- Regular Cleaning:
- Wipe down jars and bins regularly to remove dust, lint, and residue. Use warm, soapy water for glass and plastic containers, and vacuum woven baskets to keep them fresh.
- Keep Lids Secure:
- Ensure jars with detergents or pods have tight-fitting lids to prevent spills and keep items protected from moisture.
- Declutter Periodically:
- Take time to reorganize and discard expired or unused products to keep your laundry room tidy and efficient.
- Proper Labeling:
- Update labels if contents change to avoid confusion and maintain an organized space.
Budget-Friendly Options for Decorative Jars and Bins
You don’t need to spend a fortune to add stylish storage to your laundry room. Here are some budget-friendly alternatives:
- Dollar Store Finds:
- Many dollar stores offer stylish and affordable glass jars, plastic bins, and woven baskets that can easily be incorporated into your decor.
- Thrift Store Treasures:
- Look for vintage jars, baskets, or unique containers at thrift stores that can be repurposed for laundry storage with a little creativity.
- DIY Storage Solutions:
- Use old household containers and give them a makeover with paint, fabric, or labels to create stylish storage without spending much.
- Seasonal Sales:
- Keep an eye out for sales at home goods stores, where you can find quality storage items at discounted prices.
Incorporating decorative jars and bins is a simple and effective way to bring organization and style to your laundry room. Whether you’re aiming for a modern, rustic, or minimalist look, the right combination of storage solutions will help create an inviting and functional space that makes laundry day a little more enjoyable.
Wallpaper and Backsplashes: Elevate Your Laundry Room Decor
Incorporating wallpaper and backsplashes in your laundry room is an excellent way to infuse style, color, and personality into the space. These design elements can transform an otherwise utilitarian area into an inviting and stylish environment where doing laundry feels less like a chore. Whether you prefer bold patterns, subtle textures, or a modern minimalist look, wallpaper and backsplashes provide a budget-friendly yet impactful solution to enhance your laundry room decor.
Benefits of Using Wallpaper and Backsplashes in a Laundry Room
- Instant Aesthetic Upgrade:
- A well-chosen wallpaper or backsplash can dramatically change the look of your laundry room, adding character and visual appeal without requiring a major renovation.
- Protects Walls from Moisture and Stains:
- Laundry rooms are prone to splashes, detergent spills, and humidity. Backsplashes and moisture-resistant wallpaper provide a protective barrier, making cleanup easier and extending the life of your walls.
- Budget-Friendly Transformation:
- Compared to full renovations, wallpapers and backsplashes are an affordable way to give your laundry room a fresh and stylish update. Peel-and-stick options make DIY installations simple and cost-effective.
- Endless Design Possibilities:
- With countless patterns, colors, and textures available, you can easily personalize your space to reflect your unique style, whether you prefer a farmhouse, modern, or vintage look.
- Creates a Focal Point:
- A bold wallpaper or stylish backsplash can serve as a focal point in your laundry room, drawing attention and making the space feel more dynamic and interesting.
Types of Wallpaper for Laundry Rooms
When choosing wallpaper for your laundry room, it’s important to select materials that can withstand humidity and occasional splashes. Here are a few popular options:
- Peel-and-Stick Wallpaper:
- Ideal for renters or those who love to change up their decor frequently, peel-and-stick wallpaper is easy to install and remove without damaging walls. It’s available in a wide variety of colors and patterns.
- Vinyl Wallpaper:
- Highly durable and moisture-resistant, vinyl wallpaper is an excellent choice for laundry rooms as it can withstand the humid environment and be easily wiped clean.
- Textured Wallpaper:
- Add depth and dimension to your space with textured wallpaper that mimics the look of brick, wood, or stone while providing a touch of elegance.
- Patterned Wallpaper:
- Choose from floral, geometric, or abstract patterns to create a visually stimulating laundry room that reflects your personality.
Types of Backsplashes for Laundry Rooms
Backsplashes serve a dual purpose—protecting your walls and adding a stylish accent. Here are some popular materials to consider:
- Ceramic Tile Backsplash:
- Classic and durable, ceramic tiles come in various colors, shapes, and finishes, offering a sleek, modern, or traditional look that complements any decor style.
- Peel-and-Stick Tile:
- An easy DIY option, peel-and-stick tiles provide the look of real tile without the mess and hassle of grout. They are moisture-resistant and easy to clean, making them ideal for laundry rooms.
- Glass Backsplash:
- Glass tiles reflect light beautifully, adding a bright and airy feel to the laundry room while providing an easy-to-clean surface.
- Shiplap Panels:
- For a farmhouse-inspired look, shiplap panels offer a rustic charm while protecting your walls from splashes and stains.
- Metal Backsplash:
- Stainless steel or aluminum backsplashes provide a contemporary, industrial aesthetic while being highly resistant to heat and moisture.
Choosing the Right Wallpaper and Backsplash for Your Laundry Room
When selecting wallpaper or a backsplash, consider the following factors to ensure the best choice for your space:
- Moisture Resistance:
- Opt for waterproof or water-resistant materials to withstand the humid laundry environment.
- Easy Maintenance:
- Choose materials that can be wiped clean easily, such as vinyl wallpaper or ceramic tiles, to make maintenance a breeze.
- Style and Color Scheme:
- Coordinate your wallpaper or backsplash with the rest of your laundry room decor, including cabinetry, flooring, and appliances. Neutral tones create a clean, sophisticated look, while bold patterns can add a playful touch.
- Size of the Room:
- In smaller laundry rooms, light-colored wallpapers and backsplashes can help create an illusion of more space, while larger rooms can handle darker or more elaborate patterns.
- Budget Considerations:
- Determine how much you’re willing to spend—while ceramic tiles may be a long-term investment, peel-and-stick wallpaper offers a budget-friendly and temporary solution.
Creative Ideas for Using Wallpaper and Backsplashes in Laundry Rooms
- Accent Wall:
- Create a focal point by applying wallpaper or backsplash tiles to a single wall behind the washer and dryer for a stylish touch without overwhelming the space.
- Cabinet Interiors:
- Line the inside of cabinets with patterned wallpaper for a hidden pop of color that adds personality to your storage space.
- Half-Wall Application:
- Apply backsplash tiles to only the lower half of the wall, pairing it with complementary wallpaper or paint on the upper half for a balanced and stylish look.
- Laundry Nook Makeover:
- If you have a laundry nook or corner in another room, use wallpaper or a backsplash to visually define and separate the space.
- Ceiling Feature:
- For an unexpected design element, consider applying wallpaper to the ceiling to add depth and interest to the room.
DIY Installation Tips for Wallpaper and Backsplashes
If you’re planning a DIY installation, here are some helpful tips to ensure a smooth process:
- Prepare the Surface:
- Clean and dry the walls thoroughly before application to ensure better adhesion of wallpaper or backsplash materials.
- Use a Level:
- Ensure straight alignment by using a level when installing peel-and-stick wallpaper or tiles.
- Trim Carefully:
- Measure and cut wallpaper or tile sheets precisely to avoid gaps and achieve a polished look.
- Start from the Center:
- When applying wallpaper, start from the center of the wall and work outward to prevent misalignment.
- Apply Adhesive as Needed:
- If using traditional wallpaper, apply wallpaper adhesive evenly to avoid bubbles and peeling edges.
Maintenance Tips for Wallpaper and Backsplashes
To keep your laundry room looking fresh and stylish, follow these maintenance tips:
- Regular Cleaning:
- Wipe down backsplashes with a damp cloth and mild detergent to remove any detergent splashes or lint buildup.
- Avoid Harsh Chemicals:
- Use gentle cleaning solutions to preserve the finish and color of wallpapers and tiles.
- Inspect for Wear and Tear:
- Check for peeling edges or cracks and repair them promptly to maintain a seamless look.
- Reapply Sealant:
- If using tile backsplashes, consider resealing grout lines periodically to prevent water damage.
By incorporating wallpaper and backsplashes into your laundry room, you can create a stylish, functional, and easy-to-maintain space that reflects your personality and enhances the overall home aesthetic. Whether you choose a bold statement piece or a subtle backdrop, these elements can make your laundry room feel inviting and enjoyable.
Lighting Upgrades for a Chic Vibe
Upgrading your laundry room lighting is a simple yet impactful way to enhance both functionality and aesthetics. Proper lighting can transform your laundry space from a dull, utilitarian area into a bright and inviting environment that makes household chores more enjoyable. Whether you want to create a modern, farmhouse, or minimalist laundry room, incorporating stylish lighting upgrades can add warmth, ambiance, and a touch of chic sophistication.
Benefits of Upgrading Laundry Room Lighting
- Enhanced Functionality:
- Good lighting ensures better visibility for sorting laundry, spotting stains, and reading care labels, making the laundry process more efficient and hassle-free.
- Aesthetic Appeal:
- Stylish lighting fixtures can serve as decorative elements that elevate the overall design of your laundry room, turning it into a cohesive, well-designed space.
- Energy Efficiency:
- Upgrading to LED or energy-efficient fixtures can help lower electricity bills while providing bright, long-lasting illumination.
- Mood Enhancement:
- The right lighting can create a more inviting and comfortable atmosphere, making laundry tasks less of a chore and more of a pleasant experience.
- Increased Property Value:
- Well-lit and thoughtfully designed laundry rooms are attractive to potential homebuyers, adding value to your home.
Types of Lighting for a Chic Laundry Room Vibe
To achieve a stylish and functional laundry room, consider layering different types of lighting for maximum impact:
- Ambient Lighting (General Lighting):
- Provides overall illumination for the entire room.
- Best Options: Ceiling-mounted fixtures, flush-mount lights, recessed lighting.
- Task Lighting:
- Focuses light on specific areas where tasks are performed, such as the folding station, sink, or ironing area.
- Best Options: Under-cabinet LED strips, pendant lights over countertops, adjustable wall sconces.
- Accent Lighting:
- Adds a decorative touch and highlights specific design elements in the laundry room, such as artwork, shelves, or backsplashes.
- Best Options: Track lighting, LED spotlights, decorative sconces.
- Decorative Lighting:
- Combines form and function, serving as a focal point while providing sufficient lighting.
- Best Options: Statement pendant lights, chandeliers, stylish wall-mounted fixtures.
Stylish Lighting Ideas for a Chic Laundry Room
- Pendant Lights Over the Folding Station:
- Installing pendant lights above your folding or sorting station adds a stylish touch while providing focused illumination for your tasks. Opt for sleek metal pendants for a modern look or rattan shades for a farmhouse aesthetic.
- Under-Cabinet LED Lighting:
- Enhance visibility and create a seamless look by adding LED strip lights under cabinets or shelves. These lights are energy-efficient, easy to install, and provide a soft glow that highlights your decor.
- Statement Chandeliers for Elegance:
- Bring an unexpected touch of luxury to your laundry room with a small, elegant chandelier. Crystal or vintage-style chandeliers can add a glamorous vibe to even the most functional spaces.
- Industrial-Style Wall Sconces:
- For a trendy and functional touch, install industrial-style wall sconces with exposed bulbs or matte finishes to give your laundry room a chic, modern-industrial feel.
- Recessed Ceiling Lights for a Clean Look:
- If you prefer a minimalist style, recessed lights provide bright, uniform illumination without overwhelming the space, keeping the focus on your laundry room’s design elements.
- Smart Lighting Solutions:
- Upgrade to smart bulbs that allow you to control brightness and color temperature via a smartphone or voice assistant, offering flexibility and convenience.
Choosing the Right Light Fixtures for Your Laundry Room
When selecting lighting fixtures for your laundry room, consider the following factors to ensure both style and practicality:
- Size of the Room:
- Choose fixtures that complement the scale of your laundry space. Oversized lights can overwhelm small rooms, while subtle fixtures may get lost in larger spaces.
- Style Consistency:
- Select lighting that matches your existing decor theme, whether it’s modern, farmhouse, industrial, or traditional. For example, vintage-inspired fixtures work well in rustic spaces, while sleek metal options suit contemporary designs.
- Brightness and Color Temperature:
- Opt for bright white or daylight LED bulbs (4000K-5000K) for better visibility. Warmer tones (2700K-3000K) can create a cozy, inviting ambiance.
- Energy Efficiency:
- Look for energy-efficient lighting solutions, such as LED bulbs, which consume less power and have a longer lifespan compared to traditional incandescent bulbs.
- Fixture Placement:
- Plan the placement of your lights to eliminate shadows and ensure even distribution of illumination across key areas like countertops and storage spaces.
DIY Lighting Upgrade Tips for a Budget-Friendly Makeover
Want to upgrade your laundry room lighting without breaking the bank? Consider these budget-friendly DIY tips:
- Swap Out Old Fixtures:
- Replacing outdated light fixtures with modern designs can instantly refresh the look of your laundry room. Many stylish options are available at affordable prices from home improvement stores.
- Install Plug-in Wall Sconces:
- If hardwiring isn’t an option, plug-in wall sconces are an easy way to add lighting without major renovations.
- Use Battery-Powered LED Lights:
- For rental spaces or areas without easy electrical access, battery-operated LED puck lights provide an instant lighting solution.
- Repurpose Existing Fixtures:
- Give your old fixtures a fresh coat of paint or swap out shades for an updated, stylish appearance.
- DIY Mason Jar Light Fixtures:
- Add a touch of rustic charm by creating DIY mason jar pendant lights, perfect for farmhouse-inspired laundry rooms.
Maintenance Tips for Laundry Room Lighting
To keep your lighting fixtures looking and functioning their best, follow these maintenance tips:
- Regular Cleaning:
- Dust light fixtures and bulbs regularly to maintain brightness and prevent buildup. Use a microfiber cloth or a duster to avoid scratches.
- Replace Bulbs Promptly:
- Change out burned-out bulbs immediately to maintain adequate lighting levels in the space.
- Check Wiring and Connections:
- Periodically inspect electrical wiring for signs of wear or loose connections to ensure safety and longevity.
- Switch to Dimmable Bulbs:
- If your fixtures allow, consider using dimmable bulbs to adjust brightness according to your needs.
- Prevent Moisture Damage:
- Since laundry rooms can have high humidity, choose moisture-resistant fixtures and wipe down any condensation buildup.
By upgrading your laundry room’s lighting, you can create a bright, stylish, and efficient space that enhances both functionality and ambiance. Whether you opt for modern pendant lights, practical LED strips, or chic chandeliers, the right lighting choices can truly transform your laundry routine into a more enjoyable experience.
Space-Saving Hacks for Small Laundry Rooms
Compact Folding Stations: Maximizing Functionality in Small Laundry Spaces
A compact folding station is a practical and stylish solution for laundry rooms with limited space. Whether you have a dedicated laundry room or a small laundry nook, incorporating a designated area for folding clothes can help you stay organized and make the laundry process more efficient. A well-designed folding station can serve multiple purposes, offering storage, workspace, and even a decorative touch to your laundry area.
Benefits of a Compact Folding Station
- Space Optimization:
- Compact folding stations are designed to fit seamlessly into small spaces, making use of every available inch without overwhelming the room. Whether mounted on a wall or tucked into a corner, they provide a functional surface without sacrificing valuable space.
- Improved Organization:
- Having a dedicated folding area helps keep clean laundry separate from dirty clothes, reducing clutter and ensuring that everything is neatly arranged before storage.
- Multipurpose Functionality:
- In addition to folding clothes, the station can serve as a space for sorting laundry, ironing, or even organizing laundry essentials like detergents and stain removers.
- Enhanced Aesthetics:
- Compact folding stations come in various designs, materials, and styles to complement the overall decor of your laundry room, adding a touch of charm while maintaining functionality.
- Increased Efficiency:
- A designated workspace streamlines the laundry process, making it easier to fold and organize clothes without needing to move items to other rooms.
Types of Compact Folding Stations
Depending on your space, storage needs, and aesthetic preferences, you can choose from several types of compact folding stations:
- Wall-Mounted Folding Tables:
- These foldable stations can be installed on any wall, and they can be flipped down when in use and folded up to save space when not needed. They’re perfect for tight laundry rooms or multi-functional spaces.
- Pull-Out Folding Stations:
- Installed within cabinets or under countertops, pull-out folding stations provide a hidden workspace that can be extended when needed and pushed back when not in use.
- Over-the-Washer/Dryer Folding Surfaces:
- If floor space is limited, a countertop or shelf can be installed directly above the washer and dryer, creating a practical surface for folding clothes without taking up additional room.
- Rolling Folding Carts:
- Mobile and versatile, rolling carts with foldable tops provide a flexible solution that can be moved around as needed and stored in a corner when not in use.
- Multi-Functional Folding Stations:
- These stations often include built-in storage solutions, such as shelves, hooks, or drawers, making them a convenient all-in-one laundry station.
Creative Ideas for Incorporating Compact Folding Stations
- Wall-Mounted Drop-Down Table:
- Install a drop-down wooden table on an empty wall to create an instant folding station. Add a stylish design to the underside of the table for a decorative touch when it’s folded up.
- Countertop Extension:
- If you have an existing laundry counter, consider extending it with a foldable or pull-out section to provide additional workspace when needed.
- Hinged Cabinet Doors:
- Convert a cabinet door into a fold-out folding station by installing a sturdy hinge mechanism. When closed, it serves as a decorative element; when open, it provides a functional surface.
- DIY Butcher Block Folding Station:
- A butcher block-style folding station adds warmth and durability to the space while providing a sturdy surface for folding clothes.
- Laundry Basket Storage Integration:
- Incorporate built-in shelves or compartments beneath the folding station to store laundry baskets neatly and keep clothes organized by category.
Choosing the Right Material for Folding Stations
When selecting materials for your folding station, consider durability, aesthetics, and maintenance. Popular materials include:
- Wood:
- Provides a warm, classic look and can be customized to match your decor. Choose treated or sealed wood to prevent water damage.
- Laminate:
- Affordable and easy to clean, laminate surfaces resist moisture and stains, making them ideal for laundry rooms.
- Stainless Steel:
- A modern and industrial option, stainless steel is durable, water-resistant, and easy to maintain.
- Quartz or Solid Surface:
- Durable and stylish, these materials provide a seamless, high-end look and are resistant to scratches and stains.
DIY Installation Tips for Compact Folding Stations
- Measure Your Space Accurately:
- Before installing, ensure you measure your available space to avoid overcrowding and ensure easy accessibility.
- Use Wall Anchors for Stability:
- When installing a wall-mounted station, use appropriate anchors to support the weight of laundry loads.
- Consider Adjustable Heights:
- Install the station at a comfortable height to prevent back strain during folding tasks.
- Add Protective Finishes:
- Apply a moisture-resistant finish to protect wooden surfaces from detergent spills or water splashes.
- Optimize Nearby Storage:
- Place shelves, hooks, or bins near the folding station to keep laundry supplies easily accessible.
Maintenance Tips for Folding Stations
To keep your compact folding station in top condition, follow these maintenance tips:
- Regular Cleaning:
- Wipe down the surface regularly to remove dust, lint, and detergent residue. Use mild soap and water for wooden or laminate surfaces.
- Check for Wear and Tear:
- Inspect hinges, brackets, and supports periodically to ensure the folding mechanism remains functional and secure.
- Avoid Overloading:
- Keep the weight of items on the station within recommended limits to prevent sagging or damage over time.
- Organize Efficiently:
- Use baskets or dividers to keep folded clothes organized and maximize the space effectively.
Budget-Friendly Compact Folding Station Ideas
If you’re looking for affordable folding station solutions, consider these budget-friendly options:
- DIY Floating Shelf Folding Table:
- Create a floating shelf with hinges to double as a folding station when needed. Use reclaimed wood or inexpensive plywood for a cost-effective DIY project.
- Repurpose an Old Desk or Table:
- Upcycle an old desk by cutting it down to size and mounting it to the wall for a rustic, functional folding area.
- Tension Rod and Curtain Hack:
- Use a sturdy tension rod with a curtain to create a makeshift folding station that can be concealed when not in use.
- Secondhand Finds:
- Check thrift stores or online marketplaces for small tables or shelving units that can be repurposed into a compact folding station.
By incorporating a compact folding station into your laundry room, you can create a more efficient and organized space that makes laundry chores easier and more enjoyable. Whether you opt for a wall-mounted solution, a rolling cart, or a DIY project, the right folding station can help you maintain a clutter-free and stylish laundry area.
Over-the-Door Storage: Maximizing Space in Your Laundry Room
Over-the-door storage is an excellent way to maximize space in your laundry room, especially if you’re dealing with a small or compact area. By utilizing the often-overlooked space behind doors, you can create additional storage for essential laundry supplies, keeping them organized and easily accessible without taking up valuable floor space. Whether you’re looking for a temporary or permanent storage solution, over-the-door organizers come in various designs to suit different needs and aesthetics.
Benefits of Over-the-Door Storage in the Laundry Room
- Maximizes Vertical Space:
- Over-the-door storage takes advantage of unused vertical space, making it ideal for small laundry rooms where every inch counts.
- Declutters the Room:
- By keeping frequently used items such as detergents, fabric softeners, and cleaning supplies off countertops and shelves, you can create a cleaner, more organized look.
- Easy Accessibility:
- With items stored conveniently behind the door, you can quickly grab what you need without having to dig through cabinets or shelves.
- Simple Installation:
- Most over-the-door organizers require no tools for installation, making them a hassle-free solution for renters or those looking for a non-permanent option.
- Versatile Storage Solution:
- From small baskets for clothespins to tall racks for ironing boards and bottles, over-the-door storage can be customized to fit various laundry-related items.
Types of Over-the-Door Storage Solutions
Depending on your laundry room layout and storage needs, there are several types of over-the-door storage solutions to choose from:
- Over-the-Door Shelving Units:
- These units come with multiple shelves or baskets, providing ample storage for larger items such as detergent bottles, fabric softener, and cleaning sprays.
- Hanging Pocket Organizers:
- Made from fabric or plastic, pocket organizers offer multiple compartments to store small items such as dryer sheets, stain removers, and lint rollers.
- Wire Rack Organizers:
- These durable and breathable racks allow you to store heavy items like bleach bottles and bulky supplies while keeping them within easy reach.
- Ironing Board Holders:
- Special over-the-door hooks are designed to store full-sized or tabletop ironing boards securely, freeing up valuable floor space.
- Hook Systems:
- Over-the-door hooks are a simple way to hang lightweight items like cleaning cloths, reusable bags, or laundry bags, keeping them off the floor and within reach.
Creative Ways to Use Over-the-Door Storage in Your Laundry Room
- Create a Mini Laundry Station:
- Use an over-the-door shelving unit to store laundry essentials such as detergent pods, dryer sheets, and spray bottles in one convenient location.
- Designate Storage for Delicates:
- Install a hanging pocket organizer to keep mesh laundry bags, delicate clothing care items, and wool dryer balls separate and easily accessible.
- Store Cleaning Supplies:
- Dedicate an over-the-door rack to store all-purpose cleaners, disinfectants, and laundry-specific products such as stain removers and fabric fresheners.
- Hanging Storage for Towels and Linens:
- Use sturdy hooks or rod attachments to store folded towels or hang drying clothes, ensuring they remain wrinkle-free and off the floor.
- Sort and Label Storage Areas:
- Organize different sections of the storage unit by category (e.g., “Everyday Essentials,” “Stain Removal,” “Drying Supplies”) and add labels to make finding items easier.
How to Choose the Right Over-the-Door Storage for Your Laundry Room
- Consider the Door Type:
- Ensure the organizer fits your door thickness and can be securely attached without damaging the door’s surface, especially if you have a hollow-core or glass door.
- Evaluate Weight Capacity:
- Depending on the items you plan to store, choose a storage solution that can hold heavier items without sagging or falling off the door.
- Check for Adjustability:
- Some over-the-door organizers come with adjustable shelves or pockets that allow you to customize the layout according to your needs.
- Style and Aesthetics:
- Choose a storage unit that complements your laundry room’s decor. Wire racks offer an industrial look, while fabric organizers can add a touch of softness to the space.
- Ease of Access:
- Consider how frequently you’ll need to access items and choose a design that allows for easy retrieval without obstructing the door’s functionality.
Installation Tips for Over-the-Door Storage Solutions
- Measure Before Buying:
- Measure the width and height of your door to ensure the organizer will fit without interfering with the door’s operation.
- Secure Hooks Properly:
- If the organizer comes with hooks, make sure they are securely placed to prevent shifting or damage when opening and closing the door.
- Use Anti-Slip Padding:
- To avoid scuff marks or noise, place anti-slip pads between the storage unit and the door for added stability.
- Distribute Weight Evenly:
- Arrange heavier items at the bottom of the unit to prevent tipping or putting too much strain on the top hooks.
- Consider Alternative Placement:
- If over-the-door storage isn’t feasible, consider mounting the organizer on the wall next to the door for a similar space-saving effect.
DIY Ideas for Over-the-Door Storage Solutions
If you’re looking for budget-friendly or customized over-the-door storage ideas, try these DIY solutions:
- Repurpose a Shoe Organizer:
- A hanging shoe organizer with clear pockets can be used to store small laundry items such as dryer sheets, lint rollers, and cleaning cloths.
- Install a Pegboard:
- Attach a pegboard to the back of the door and customize it with hooks, baskets, and shelves to store laundry essentials.
- Use Hanging Wire Baskets:
- Attach wire baskets to over-the-door hooks to create additional storage for frequently used items like detergent bottles or fabric sprays.
- Tension Rod with Hooks:
- Install a tension rod across the back of the door and use S-hooks to hang laundry bags, spray bottles, or cleaning rags.
- Upcycle an Old Rack:
- Give an old spice rack or magazine holder new life by mounting it to the back of the laundry room door for holding stain removers and laundry boosters.
Maintenance Tips for Over-the-Door Storage
- Regular Cleaning:
- Dust and wipe down racks and organizers regularly to prevent lint buildup and keep items clean.
- Declutter Periodically:
- Go through your storage unit every few months and remove expired or unnecessary items to maintain an organized space.
- Ensure Proper Door Functionality:
- Check regularly that the added weight of the storage unit isn’t causing any strain on door hinges or affecting its ability to close properly.
- Check for Wear and Tear:
- Inspect hooks, fasteners, and shelves periodically to ensure they remain secure and functional.
Incorporating over-the-door storage in your laundry room is a smart, affordable, and stylish way to optimize your space. Whether you need additional storage for cleaning supplies, laundry accessories, or seasonal items, these solutions provide a clutter-free and efficient approach to organizing your space.
Under-Sink Storage Solutions: Maximizing Hidden Space in Your Laundry Room
The area beneath the sink in your laundry room often goes underutilized, but with smart under-sink storage solutions, you can transform it into a functional and organized space. Whether you have a small laundry nook or a spacious utility room, optimizing under-sink storage can help you keep cleaning supplies, laundry essentials, and miscellaneous items neatly tucked away while maintaining easy accessibility. With the right organization techniques, this often-cluttered space can become a tidy and efficient storage hub.
Benefits of Utilizing Under-Sink Storage Solutions
- Maximizes Unused Space:
- The under-sink area is often left empty or cluttered. Implementing the right storage solutions allows you to take advantage of this hidden space effectively.
- Keeps Essentials Within Reach:
- Frequently used items like detergents, stain removers, and cleaning sprays can be stored conveniently within arm’s reach, making your laundry routine more efficient.
- Reduces Clutter:
- By organizing under the sink, you can keep countertops free of clutter, giving your laundry room a cleaner and more organized look.
- Provides Concealed Storage:
- Unlike open shelving, under-sink storage hides unsightly cleaning products and supplies, maintaining a streamlined aesthetic.
- Cost-Effective Solution:
- Under-sink organization doesn’t require a big budget; affordable storage solutions like bins, shelves, and drawers can enhance functionality without major renovations.
Common Challenges with Under-Sink Storage and How to Overcome Them
- Limited Space Due to Plumbing Pipes:
- Solution: Use adjustable or U-shaped shelving units that fit around pipes while maximizing available storage.
- Moisture and Spills:
- Solution: Opt for water-resistant materials such as plastic or coated metal organizers, and use waterproof liners to protect the cabinet floor.
- Dark and Hard-to-Reach Areas:
- Solution: Install LED motion sensor lights inside the cabinet to improve visibility and use sliding drawers for easy access.
- Odors from Cleaning Supplies:
- Solution: Store items in airtight containers or add deodorizing sachets to keep the area smelling fresh.
Best Under-Sink Storage Solutions for Your Laundry Room
- Stackable Bins and Drawers:
- Stackable plastic or acrylic bins are perfect for organizing smaller items like fabric softener sheets, clothespins, and dryer balls. They allow you to categorize supplies and make use of vertical space.
- Pull-Out Sliding Shelves:
- These shelves make accessing items at the back of the cabinet much easier. Simply pull them out to grab what you need without having to dig through clutter.
- Expandable U-Shaped Shelves:
- Designed to fit around plumbing, these shelves provide a customized fit while optimizing available storage space. They are great for holding bulkier items like detergent bottles and cleaning sprays.
- Hanging Over-the-Door Caddies:
- Attach organizers to the inside of the cabinet doors to store items like sponges, brushes, and cleaning cloths for quick and easy access.
- Lazy Susans:
- A rotating turntable is an excellent way to store bottles and containers, making it easy to access items without moving everything around.
- Tension Rods for Hanging Spray Bottles:
- Install a tension rod across the cabinet to hang spray bottles by their trigger handles, freeing up shelf space for other items.
- Plastic or Fabric Storage Bins:
- Group similar items in labeled bins, such as “stain removers,” “delicates care,” and “cleaning rags.” Transparent bins allow you to quickly identify contents.
- Wire Baskets:
- Sturdy wire baskets provide ventilation, which is helpful for storing damp or frequently used items like cleaning cloths or scrub brushes.
- Hooks and Clips:
- Attach adhesive hooks to the sides of the cabinet or door to hang gloves, dusters, or small towels to keep them within easy reach.
- Drawer Organizers:
- If your under-sink space includes drawers, use dividers to separate smaller items and prevent clutter.
Creative Ways to Organize Under-Sink Storage
- Sort Items by Frequency of Use:
- Place everyday essentials at the front of the cabinet for quick access and store seasonal or rarely used items toward the back.
- Label Everything:
- Using clear labels on bins and containers helps keep things organized and ensures that every item has a designated place.
- Use Color Coding:
- Assign different colors to categories like laundry detergents, stain removers, and cleaning products for easy identification.
- Maximize Vertical Space:
- Use tiered shelving units to create additional layers of storage instead of stacking items on top of each other.
- Incorporate Drawer Liners:
- Use waterproof and non-slip liners to protect the cabinet floor and make cleaning easier in case of spills.
DIY Under-Sink Storage Solutions
If you’re looking for cost-effective and creative ways to improve your under-sink storage, consider these DIY ideas:
- Repurpose Old Baskets:
- Use leftover baskets or shoeboxes to organize supplies neatly without spending extra money.
- Upcycle Tension Rods:
- Install tension rods to create hanging storage for lightweight items such as rags or gloves.
- Attach Velcro Strips to Containers:
- Secure small storage containers to the inside of the cabinet doors using Velcro for an easy-to-remove storage solution.
- PVC Pipe Holders:
- Cut pieces of PVC pipe to create holders for storing rolled-up rags or cleaning brushes.
- Magazine Holders for Storage:
- Use magazine holders to store small laundry items like dryer sheets, lint rollers, and stain sticks upright.
Maintenance Tips for Under-Sink Storage
- Regular Cleaning:
- Wipe down shelves and storage bins regularly to prevent buildup of detergent spills and dust.
- Check for Leaks:
- Inspect the plumbing under the sink periodically to detect leaks early and prevent water damage to stored items.
- Declutter Every Few Months:
- Go through your under-sink items and discard expired or unused products to maintain an organized space.
- Use Moisture Absorbers:
- Place moisture-absorbing packets under the sink to prevent mold and mildew from developing in damp environments.
- Keep Items Off the Cabinet Floor:
- Store items on elevated shelves or risers to protect them from potential water damage in case of leaks.
Budget-Friendly Under-Sink Storage Ideas
If you’re on a budget, you can still achieve an organized under-sink area with these affordable ideas:
- Dollar Store Finds:
- Look for inexpensive plastic bins, hooks, and organizers at your local dollar store to enhance under-sink storage.
- DIY Pegboards:
- Install a small pegboard under the sink to hang cleaning tools and keep items off the cabinet floor.
- Repurpose Household Items:
- Use empty jars, shoe boxes, or ice cube trays to store smaller items like clothespins or detergent pods.
By implementing under-sink storage solutions, you can turn a cluttered and overlooked space into a well-organized and functional part of your laundry room. Whether you opt for DIY solutions or invest in adjustable shelving, maximizing this hidden storage area will help you maintain a tidy, efficient, and stylish laundry space.
Stackable Washer and Dryer Options: Maximizing Space and Efficiency
When space is limited in your laundry room, opting for stackable washer and dryer options is an excellent way to maximize efficiency while maintaining functionality and style. Stackable units are designed to fit vertically, taking up less floor space compared to traditional side-by-side models, making them ideal for small apartments, condos, and compact laundry areas. Whether you’re looking for front-loading units or stackable all-in-one solutions, these appliances offer a modern and space-saving approach to laundry tasks.
Benefits of Stackable Washer and Dryer Units
- Space-Saving Design:
- One of the primary advantages of stackable units is their vertical alignment, freeing up valuable floor space for additional storage, folding stations, or organizing accessories.
- Improved Functionality in Small Spaces:
- Perfect for apartments, closets, and small laundry rooms, stackable machines allow you to have a full-service laundry setup without requiring a large footprint.
- Energy and Water Efficiency:
- Many modern stackable units come with energy-efficient features, such as lower water consumption, shorter drying times, and ENERGY STAR certification, helping you reduce utility bills.
- Flexible Installation Options:
- Stackable washer and dryer units can be installed in closets, under countertops, or in designated laundry areas without the need for extensive remodeling.
- Modern and Stylish Designs:
- Available in sleek designs and contemporary finishes such as stainless steel, black, or white, stackable units can complement your laundry room decor and elevate the overall aesthetic.
Types of Stackable Washer and Dryer Units
When selecting a stackable washer and dryer, it’s important to consider the different types available to suit your space and laundry needs:
- Front-Loading Stackable Units:
- These feature separate front-loading washer and dryer units that can be stacked using a stacking kit. They offer larger capacities and advanced features like steam cleaning, multiple wash cycles, and smart technology integration.
- Stackable All-in-One Washer Dryer Combos:
- A single unit that washes and dries clothes in one machine, eliminating the need for separate appliances. These are compact, efficient, and great for extremely tight spaces.
- Compact Stackable Washers and Dryers:
- Designed specifically for small spaces, these units have a smaller footprint while still providing efficient washing and drying cycles.
- Gas vs. Electric Stackable Units:
- Gas dryers typically offer faster drying times and are more energy-efficient, while electric dryers are easier to install and maintain without needing a gas connection.
Key Features to Consider When Choosing Stackable Units
When purchasing a stackable washer and dryer set, consider the following features to ensure you select the right model for your needs:
- Size and Capacity:
- Measure your available space and choose a unit that fits comfortably. Standard stackable units are around 24-27 inches wide, but compact models are available for tighter spaces.
- Energy Efficiency:
- Look for ENERGY STAR-certified models that use less water and electricity, saving money in the long run.
- Noise Levels:
- If your laundry area is near living spaces or bedrooms, consider models with quiet operation technology to minimize noise disturbances.
- Smart Technology:
- Modern stackable units often come with Wi-Fi connectivity, allowing you to monitor and control wash cycles from your smartphone.
- Stacking Kit Compatibility:
- Ensure your washer and dryer are compatible with a stacking kit, which provides stability and safety when stacking the units.
- Drying Technology:
- Consider whether you need vented or ventless dryers. Ventless dryers are great for condos and apartments where external venting is not an option.
- Wash and Dry Cycles:
- Choose models that offer specialized cycles such as steam cleaning, quick wash, or allergen removal to cater to your household’s needs.
Installation Tips for Stackable Washer and Dryer Units
Proper installation is key to ensuring the safe and efficient operation of your stackable washer and dryer. Here are some tips to consider:
- Measure Your Space Accurately:
- Take precise measurements of the available space, including height, width, and depth, ensuring enough room for ventilation and access to connections.
- Secure with a Stacking Kit:
- Always use the manufacturer-recommended stacking kit to securely attach the dryer to the washer, preventing movement and reducing vibration during cycles.
- Ensure Proper Ventilation:
- Allow adequate airflow around the units to prevent overheating and ensure proper drying performance.
- Level the Machines:
- Use a level to adjust the feet of the washer and dryer to prevent excessive vibration and noise during operation.
- Check Water and Electrical Connections:
- Ensure that plumbing and electrical outlets are properly installed and meet the appliance requirements before placing the units in position.
- Test Before Final Placement:
- Run a test cycle to confirm that both units are functioning correctly and without leaks before completing the installation.
Space-Saving Ideas for Stackable Laundry Units
Even with stackable washer and dryer units, you can further optimize your laundry space by incorporating creative storage and organizational ideas:
- Install Floating Shelves Above the Units:
- Utilize wall space above the stacked units to store laundry detergents, fabric softeners, and other essentials neatly.
- Add a Pull-Out Shelf Between Units:
- A slim pull-out shelf between the washer and dryer can act as a convenient folding station or extra storage for small items.
- Use a Rolling Cart:
- Place a slim rolling cart next to the stacked units to hold frequently used supplies and easily slide it in and out of tight spaces.
- Built-In Cabinetry:
- Surround your stacked units with custom cabinetry to conceal them when not in use and create a more polished, built-in appearance.
- Wall-Mounted Hooks and Baskets:
- Install hooks for hanging drying racks, lint rollers, or small laundry bags, and use wall-mounted baskets for additional organization.
Maintenance Tips for Stackable Washer and Dryer Units
Keeping your stacked laundry appliances in top condition will help ensure their longevity and efficiency. Follow these maintenance tips:
- Clean the Lint Trap Regularly:
- Remove lint after every drying cycle to prevent fire hazards and maintain optimal airflow.
- Check for Leaks:
- Periodically inspect hoses and connections for leaks to avoid water damage.
- Wipe Down Seals and Gaskets:
- Prevent mold and mildew buildup by regularly cleaning rubber seals and leaving the washer door slightly open when not in use.
- Level the Units:
- Ensure the washer and dryer remain level to prevent excessive vibration and noise.
- Run a Cleaning Cycle Monthly:
- Use a washing machine cleaner or a mixture of vinegar and baking soda to keep the drum fresh and free from odors.
Budget-Friendly Stackable Washer and Dryer Options
If you’re looking for stackable washer and dryer options that won’t break the bank, consider:
- Buying During Sales Events:
- Look for discounts during Black Friday, holiday sales, or clearance events at major retailers.
- Refurbished or Gently Used Models:
- Purchase certified pre-owned units from reputable retailers to save money.
- Opting for Basic Features:
- Choose models with essential functions rather than high-tech features to cut costs without compromising performance.
Incorporating stackable washer and dryer options into your laundry room is a smart way to optimize space while maintaining a chic and functional environment. Whether you prefer high-tech models or simple, budget-friendly options, stackable units offer flexibility, efficiency, and convenience for modern living.
DIY Ideas for a Personalized Touch
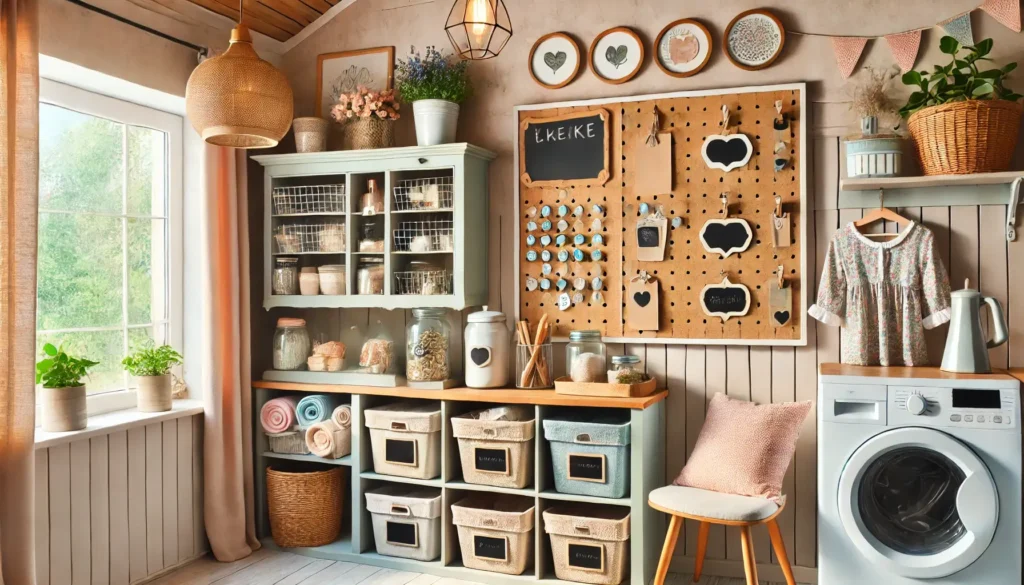
Creative Labeling Systems: Organizing Your Laundry Room with Style and Functionality
Implementing a creative labeling system in your laundry room is an excellent way to enhance organization, maintain order, and add a touch of style to the space. Labels help you quickly identify laundry essentials, prevent mix-ups, and create an aesthetically pleasing, clutter-free environment. Whether you prefer a minimalist, farmhouse, or modern look, incorporating stylish and functional labels can make your laundry routine more efficient and enjoyable.
Benefits of Using Creative Labeling Systems in the Laundry Room
- Enhanced Organization:
- Labels provide clear identification for various laundry essentials such as detergents, stain removers, fabric softeners, and cleaning supplies, making it easier to find and use the right products quickly.
- Aesthetic Appeal:
- A well-designed labeling system can complement your laundry room decor, adding a cohesive and stylish touch that enhances the overall look of the space.
- Time-Saving Efficiency:
- Clearly labeled storage bins, jars, and shelves help reduce the time spent searching for specific items, streamlining your laundry routine.
- Personalization:
- Custom labels allow you to add a unique and personal touch to your laundry space, reflecting your style and preferences.
- Maintenance and Consistency:
- Labels encourage everyone in the household to maintain organization by ensuring that items are returned to their designated spots after use.
Types of Creative Labeling Ideas for Laundry Organization
Choosing the right labeling system depends on your laundry room style, storage solutions, and organizational needs. Here are some creative labeling ideas to consider:
- Chalkboard Labels:
- Ideal for frequently changing contents, chalkboard labels can be written on and erased easily. They add a rustic charm to woven baskets, glass jars, and fabric bins.
- Vinyl Decals:
- Sleek and professional-looking, vinyl decals are a popular choice for labeling detergent dispensers, cabinets, and shelves. They are available in various fonts and styles to suit different aesthetics.
- Mason Jar Tags:
- Tie custom-made kraft paper or wooden tags around mason jars to label their contents, such as “Laundry Pods,” “Dryer Sheets,” or “Delicates Wash.”
- Clip-On Labels:
- Perfect for fabric bins and wire baskets, clip-on labels allow you to change categories easily without damaging the containers.
- Handwritten Calligraphy Labels:
- For a touch of elegance, handwritten calligraphy labels on glass jars or storage boxes can add a personal and stylish feel to your laundry room.
- Color-Coded Labeling:
- Assign different colors to various categories (e.g., blue for cleaning supplies, white for detergents, and green for eco-friendly products) to make organization more intuitive.
- Printed Labels with Icons:
- Use printed labels that include both text and icons to make it easier for all family members, including kids, to identify items without confusion.
- Magnetic Labels:
- For metal storage units or shelving, magnetic labels offer a flexible option that can be repositioned or removed as needed.
- Engraved Wooden Labels:
- Add a farmhouse touch to your laundry room by using wooden labels engraved with laundry-related text such as “Softeners,” “Whites,” or “Delicates.”
- Peel-and-Stick Labels:
- These adhesive labels are budget-friendly, easy to apply, and available in various designs, perfect for labeling detergent bottles and baskets.
How to Label Different Laundry Room Items
- Storage Bins and Baskets:
- Use large, clear labels or tags to indicate categories such as “Whites,” “Colors,” “Towels,” and “Delicates.” Clip-on labels work best for flexibility.
- Glass Jars:
- Apply vinyl decals or chalkboard stickers to label contents such as “Detergent Pods,” “Fabric Softener,” “Stain Remover,” and “Baking Soda.”
- Cabinets and Shelves:
- Label cabinet doors with minimalistic decals to indicate their contents, such as “Cleaning Supplies” or “Extra Towels.”
- Hampers and Sorting Bins:
- Use bold, easy-to-read labels like “Dark,” “Light,” and “Delicate” to facilitate laundry sorting.
- Measuring Scoops and Accessories:
- Attach small waterproof labels to measuring scoops or spoons to indicate their purpose, such as “Detergent” or “Oxygen Bleach.”
DIY Labeling Ideas for a Budget-Friendly Makeover
If you’re looking for affordable ways to incorporate creative labels into your laundry room, try these DIY ideas:
- Printable Label Templates:
- Use free online templates to create your own custom labels at home using a printer and adhesive paper.
- Mason Jar Lid Chalk Paint:
- Paint jar lids with chalkboard paint and write contents with chalk markers for a rustic and reusable solution.
- Repurpose Gift Tags:
- Use leftover gift tags and twine to label storage bins and jars creatively.
- Upcycled Clothespins:
- Clip labeled clothespins onto baskets or shelves for a fun, laundry-themed labeling option.
- Doodle Stickers:
- Create custom doodle stickers with cute laundry icons to add a playful touch to storage solutions.
Tips for Implementing an Effective Labeling System
- Keep It Consistent:
- Use uniform fonts, colors, and styles across all labels to maintain a cohesive look in the laundry room.
- Choose Durable Materials:
- Select waterproof and smudge-resistant labels to ensure they last in humid laundry room environments.
- Position Labels Strategically:
- Place labels where they are easy to see and read, ensuring they help with quick identification.
- Update Labels Periodically:
- As your laundry needs change, regularly review and update labels to reflect any new additions or adjustments.
- Involve the Whole Family:
- Make the labeling system intuitive and simple enough for all household members to follow, encouraging consistent use.
Where to Find Creative Labels for Your Laundry Room
- Online Marketplaces:
- Websites like Etsy, Amazon, and eBay offer a wide variety of customizable and pre-designed laundry labels.
- Stationery and Craft Stores:
- Visit craft stores for blank labels, chalk markers, and DIY supplies to create personalized labels at home.
- Office Supply Stores:
- Stores such as Staples and Office Depot offer professional label-making tools and sticker sheets for home organization.
- Label-Making Apps and Machines:
- Consider investing in a label maker to print high-quality labels on demand with different fonts and styles.
By incorporating creative labeling systems, you can transform your laundry room into a more efficient, organized, and visually appealing space. Whether you choose chalkboard tags, vinyl decals, or DIY options, a thoughtful labeling system can make laundry tasks easier while adding a touch of charm to your home.
DIY Pegboard Organization: A Versatile Storage Solution for Your Laundry Room
A DIY pegboard organization system is a fantastic way to maximize storage, keep your laundry essentials easily accessible, and add a touch of style to your space. Pegboards are highly versatile, customizable, and budget-friendly, making them an ideal solution for organizing a cluttered laundry room. Whether you have a small laundry nook or a spacious utility room, installing a pegboard can help you utilize vertical wall space efficiently while adding a personalized touch to your decor.
Benefits of Using a Pegboard in Your Laundry Room
- Maximizes Wall Space:
- Pegboards provide vertical storage, freeing up countertops and cabinets while keeping essentials within easy reach.
- Customizable Layout:
- With adjustable hooks, shelves, and baskets, pegboards can be customized to suit your unique storage needs and rearranged as they change over time.
- Budget-Friendly Organization:
- Pegboards are an inexpensive storage solution that can be found at most hardware stores and adapted to fit any style or budget.
- Improves Efficiency:
- A well-organized pegboard keeps frequently used items such as stain removers, lint rollers, and brushes accessible, streamlining your laundry routine.
- Stylish and Functional:
- Available in a variety of colors, materials, and designs, pegboards can blend seamlessly with your laundry room decor while serving a functional purpose.
What You Can Store on a Laundry Room Pegboard
Pegboards offer endless storage possibilities, making them perfect for organizing:
- Cleaning Supplies:
- Hang spray bottles, dusters, and microfiber cloths for quick access. Use hooks or baskets to store stain removers and fabric softeners.
- Laundry Tools:
- Store lint rollers, measuring cups for detergent, and fabric care tools such as sweater shavers and garment brushes.
- Ironing Essentials:
- Hang an iron, ironing board, spray starch, and wrinkle-release sprays on dedicated hooks.
- Clothespins and Drying Racks:
- Keep clothespins neatly stored in a small basket and mount a foldable drying rack for delicates.
- Laundry Bags and Hampers:
- Attach larger hooks to hold mesh laundry bags or collapsible hampers.
- Decorative Elements:
- Add a touch of personality with framed prints, decorative baskets, or inspirational laundry quotes.
Steps to Create a DIY Pegboard Organization System
Creating your own pegboard organization system is an easy and rewarding project. Follow these steps to achieve a stylish and functional result:
Step 1: Gather Your Materials
Before starting your DIY pegboard installation, gather the necessary materials:
- A pegboard panel (available in wood, metal, or plastic)
- Wall anchors and screws for secure mounting
- Pegboard hooks, shelves, and storage baskets
- A drill, level, and measuring tape
- Optional: Paint or wallpaper to customize the pegboard
2: Choose the Ideal Location
- Select an empty wall or unused space in your laundry room where the pegboard can be easily accessed without obstructing appliances or walkways.
3: Measure and Cut the Pegboard
- Measure the wall space and cut the pegboard to fit your desired dimensions. Most hardware stores offer pre-cut pegboards or custom sizing options.
4: Install the Pegboard
- Mark the placement of the pegboard on the wall and locate the wall studs for secure mounting.
- If studs are not available, use wall anchors to support the weight of the items you plan to store.
- Secure the pegboard with screws, ensuring it is level and evenly attached.
5: Customize and Organize
- Arrange hooks, shelves, and bins based on your needs. Consider organizing by category to keep frequently used items within easy reach.
- Personalize your pegboard by painting it to match your decor or adding labels to designated storage areas.
Creative Pegboard Design Ideas for Your Laundry Room
- Color-Coordinated Pegboard:
- Paint the pegboard in a color that matches your laundry room palette, such as soft pastels for a farmhouse look or bold hues for a modern touch.
- Framed Pegboard Panel:
- Install a decorative frame around the pegboard to give it a polished, built-in look.
- Chalkboard and Pegboard Combo:
- Combine a pegboard with a chalkboard section to keep track of laundry schedules, to-do lists, and reminders.
- Floating Shelf Integration:
- Install floating shelves above or below the pegboard for additional storage and display space.
- Multi-Level Pegboard Wall:
- Use pegboards in different sizes or arrange them in sections to accommodate various storage needs.
DIY Pegboard Hacks to Enhance Functionality
Take your pegboard organization to the next level with these creative hacks:
- Use S-Hooks for Hanging Clothes:
- Install S-hooks to hang delicates, scarves, or small laundry bags while they dry.
- Add Small Magnetic Strips:
- Attach a magnetic strip to hold scissors, pins, and other small metallic items conveniently.
- Repurpose Mason Jars:
- Secure mason jars onto the pegboard with metal brackets to store small laundry items such as buttons, detergent pods, or clothespins.
- Incorporate a Fold-Down Table:
- Attach a fold-down table to the pegboard that can double as a folding station when needed.
- Label Pegboard Sections:
- Use chalkboard labels or printed tags to designate specific sections for items such as “Stain Removal,” “Ironing,” and “Folding.”
Maintenance Tips for Pegboard Organization
To keep your pegboard in top condition and functioning effectively, follow these maintenance tips:
- Regular Cleaning:
- Wipe down the pegboard and accessories to remove dust and lint buildup. Use a damp cloth for deep cleaning.
- Rearrange for Efficiency:
- Periodically reassess your pegboard layout to accommodate new storage needs and ensure maximum efficiency.
- Check for Loose Hooks:
- Ensure hooks and accessories are secure and not overloaded to prevent accidental falls.
- Avoid Overloading:
- Be mindful of weight distribution to avoid damaging the pegboard or wall anchors.
- Keep It Clutter-Free:
- Maintain organization by decluttering unnecessary items regularly and keeping only essential supplies.
Budget-Friendly DIY Pegboard Organization Tips
If you’re looking to organize your laundry room on a budget, consider these affordable DIY solutions:
- Repurpose an Old Pegboard:
- Check for unused pegboards from old projects and repaint or customize them to fit your laundry space.
- Thrift Store Finds:
- Look for inexpensive baskets, hooks, and storage accessories at thrift stores to personalize your pegboard setup.
- DIY Pegboard Accessories:
- Create your own hooks or shelves using inexpensive materials like wooden dowels, metal rods, or plastic containers.
- Use Pegboard Leftovers:
- Small pegboard sections can be used inside cabinets or behind doors to store smaller items efficiently.
By incorporating a DIY pegboard organization system, you can transform your laundry room into a highly functional and visually appealing space. Whether you’re looking to maximize storage, add a decorative touch, or simplify your laundry routine, pegboards offer endless customization and organization possibilities.
Repurposing Furniture for Storage: Creative and Functional Laundry Room Solutions
Repurposing furniture for storage in your laundry room is a cost-effective and stylish way to maximize space, reduce clutter, and add a unique touch to the room. Whether you’re transforming an old dresser, bookshelf, or vintage cabinet, repurposed furniture can offer practical storage while complementing your laundry room’s decor. By giving new life to old furniture, you can create a customized and organized space without breaking the bank.
Benefits of Repurposing Furniture for Laundry Room Storage
- Budget-Friendly Solution:
- Repurposing existing furniture saves money by eliminating the need to buy expensive storage units. Thrift store finds, garage sale items, or unused furniture pieces can be transformed into functional storage solutions with minimal investment.
- Eco-Friendly Choice:
- Upcycling old furniture helps reduce waste and promotes sustainability by keeping discarded items out of landfills.
- Customizable to Your Needs:
- Unlike store-bought storage solutions, repurposed furniture can be tailored to fit your specific laundry room needs, including shelving, compartments, and decorative touches.
- Adds Character and Charm:
- Vintage furniture pieces bring personality and charm to your laundry room, creating a warm and inviting space with a unique, one-of-a-kind aesthetic.
- Increased Storage Capacity:
- Larger furniture pieces such as dressers or cabinets provide ample storage space for laundry essentials like detergents, fabric softeners, towels, and baskets.
Types of Furniture That Can Be Repurposed for Laundry Storage
Almost any piece of furniture can be repurposed for your laundry room with a little creativity. Here are some popular options:
- Dressers:
- Old dressers can be converted into multi-purpose storage units. Use the drawers to store laundry supplies and remove some drawers to create open shelving for baskets or folded clothes.
- Bookshelves:
- Tall or short bookshelves are perfect for organizing detergents, fabric softeners, and cleaning supplies. Adding stylish bins or baskets can keep items neatly arranged.
- Cabinets and Armoires:
- Repurpose old kitchen cabinets or armoires to store linens, ironing supplies, and laundry essentials. A fresh coat of paint and new hardware can give them a modern look.
- Sideboards or Buffets:
- These pieces often have both drawers and cabinet space, making them ideal for storing folded laundry, stain removers, and even hidden hampers.
- Rolling Carts:
- Repurpose bar carts or utility carts to hold laundry essentials. Their portability makes it easy to move supplies around as needed.
- Cribs or Playpens:
- Convert an old crib into a drying rack or storage shelving by removing the mattress and using the frame for hanging clothes or holding baskets.
- Desks:
- Old desks can serve as a folding station with added storage underneath for baskets, laundry bins, or cleaning supplies.
- Wardrobes:
- Freestanding wardrobes can be repurposed to store larger laundry items, such as blankets, linens, or ironing boards, while providing concealed storage.
Creative Repurposing Ideas for Laundry Room Storage
- Turn a Dresser into a Folding Station:
- Remove the top drawers from an old dresser to create an open space for folding clothes, while the remaining drawers can be used for storage of cleaning supplies and linens.
- Use a Ladder for Hanging Clothes:
- An old wooden ladder can be mounted horizontally on the wall or leaned against it to hang freshly ironed clothes or drying delicates.
- Repurpose a Hutch for Extra Shelving:
- Use an old kitchen hutch to store laundry essentials. The top shelves can hold detergents, while the bottom section can be used for concealed storage.
- Convert a Cabinet into a Laundry Sorting Station:
- Add labeled bins or pull-out baskets inside an old cabinet to create an organized sorting system for whites, colors, and delicates.
- Makeover an Entryway Bench:
- An old bench with storage underneath can be used to store laundry hampers while offering a seating area for folding clothes.
- Upcycle Wooden Crates for Wall Storage:
- Stack or mount wooden crates on the wall for an industrial-chic look that provides ample space for detergents, fabric softeners, and towels.
- Use a Repurposed Console Table:
- A narrow console table can serve as a stylish countertop for folding, with space underneath for storage bins and baskets.
DIY Steps to Repurpose Furniture for Laundry Room Storage
Repurposing furniture can be a fun DIY project that requires minimal tools and effort. Here’s how to get started:
1: Choose the Right Piece
- Evaluate available furniture and choose a piece that fits your laundry room’s size and storage needs. Ensure it’s in good condition or can be easily refurbished.
2: Clean and Prep
- Thoroughly clean the furniture to remove dust, dirt, or old paint. Sand surfaces if necessary to ensure a smooth finish for painting or staining.
3: Paint or Stain
- Customize the furniture by applying a fresh coat of paint or wood stain to match your laundry room’s decor. Consider using moisture-resistant finishes to protect against humidity.
4: Add Functional Upgrades
- Install shelves, dividers, or hooks to optimize storage space within the furniture. Drawer organizers can help separate smaller laundry items.
5: Incorporate Decorative Touches
- Add decorative elements such as stylish hardware, labels, or patterned contact paper inside shelves for a personalized touch.
6: Organize Supplies
- Arrange laundry supplies logically, keeping frequently used items within easy reach and less-used items stored higher or deeper.
Maintenance Tips for Repurposed Furniture
- Protect Against Moisture:
- Since laundry rooms can be humid, use waterproof liners, sealants, or coatings to protect furniture from potential damage.
- Regular Cleaning:
- Dust and wipe down surfaces regularly to keep the furniture looking fresh and organized.
- Inspect for Wear and Tear:
- Check for loose knobs, hinges, or shelves and make necessary repairs to maintain functionality.
- Keep It Organized:
- Avoid clutter by periodically reassessing storage needs and decluttering unused items.
- Use Baskets and Dividers:
- Keep small items contained and categorized using baskets or drawer dividers to prevent messes.
Budget-Friendly Repurposing Ideas
If you’re working on a budget, consider these low-cost ways to repurpose furniture for your laundry room:
- Thrift Store Finds:
- Look for second-hand furniture at thrift stores or flea markets that can be easily updated with a bit of paint and creativity.
- Upcycle Items from Other Rooms:
- Repurpose existing furniture from your home, such as old kitchen cabinets, nightstands, or TV stands.
- Use Free Online Listings:
- Check local online platforms like Craigslist or Facebook Marketplace for free or low-cost furniture that can be repurposed.
- DIY Modifications:
- Add shelves, dividers, or baskets yourself instead of purchasing expensive organizers.
By repurposing furniture for storage, you can create a functional, stylish, and budget-friendly laundry space that meets your needs while adding character and charm to the room. Whether you’re upcycling a dresser, hutch, or old cabinet, the possibilities for creative and practical storage solutions are endless.
Handmade Decorative Accents: Adding a Personal Touch to Your Laundry Room
Incorporating handmade decorative accents in your laundry room is a wonderful way to infuse personality, charm, and warmth into the space. Whether you’re aiming for a rustic farmhouse vibe, a minimalist modern aesthetic, or a playful and colorful atmosphere, DIY decorations can bring a unique, customized touch without breaking the bank. Handmade elements not only reflect your style but also add a cozy and inviting feel to an otherwise utilitarian room.
Benefits of Handmade Decorative Accents in Your Laundry Room
- Personalized Aesthetic:
- Handmade decorations allow you to tailor your laundry room’s style to your preferences, whether it’s a vintage-inspired space, modern minimalist look, or cozy farmhouse charm.
- Budget-Friendly Decor:
- DIY decorative accents are often more affordable than store-bought decor, allowing you to achieve a stylish look while staying within your budget.
- Eco-Friendly and Sustainable:
- Repurposing old items and using sustainable materials for handmade accents can help reduce waste and promote an eco-friendly lifestyle.
- Adds Character and Warmth:
- Custom decorations bring personality and warmth to your laundry space, making it feel more homely and inviting.
- Therapeutic DIY Experience:
- Crafting handmade accents can be a fun and fulfilling DIY project that adds a sense of accomplishment and creativity to your home.
Creative Handmade Decorative Accent Ideas for Your Laundry Room
Whether you’re a DIY enthusiast or just looking for simple projects, here are some creative ideas to inspire your laundry room decor:
- DIY Laundry Room Signage:
- Create custom signs using reclaimed wood, chalkboard paint, or canvas prints with fun laundry-themed quotes such as:
- “Laundry Today or Naked Tomorrow”
- “Wash, Dry, Fold, Repeat”
- “Lost Socks Seeking Mates”
- Hand-paint your signs or use vinyl decals to add stylish lettering.
- Create custom signs using reclaimed wood, chalkboard paint, or canvas prints with fun laundry-themed quotes such as:
- Handcrafted Baskets and Bins:
- Woven or fabric-covered baskets add a touch of handmade charm while serving as practical storage for detergent, dryer sheets, or cleaning supplies. You can personalize baskets with fabric scraps, embroidery, or painted labels.
- DIY Clothespin Wreath:
- Repurpose wooden clothespins to create a charming wreath for your laundry room door or wall. Paint the clothespins in your favorite colors and arrange them in a circular pattern for a rustic farmhouse touch.
- Handmade Floating Shelves:
- Craft your own floating shelves using reclaimed wood and brackets to store and display laundry essentials. A distressed or stained finish can add a rustic appeal.
- Upcycled Mason Jar Organizers:
- Attach mason jars to a wooden board and use them to store clothespins, dryer balls, or even small bouquets of dried flowers for a decorative touch.
- DIY Pegboard Artwork:
- Customize a pegboard with hooks and hanging elements to serve both as a decorative and functional storage solution. Add decorative hooks or hang small potted plants for a fresh look.
- Fabric-Covered Detergent Bins:
- Cover plain plastic or metal bins with patterned fabric and adhesive to match your laundry room’s color scheme and style.
- Hand-Painted Laundry Hampers:
- Add a pop of personality to plain laundry hampers by painting them with geometric designs, stripes, or floral patterns.
- Crocheted or Knitted Accessories:
- Handmade crocheted baskets, rug mats, or wall hangings can add a soft and cozy touch to the laundry space.
- Repurposed Wooden Ladder:
- Use an old wooden ladder as a drying rack or decorative shelf. Hang towels, linens, or small baskets for a rustic look.
How to Incorporate Handmade Decor with Existing Elements
- Mix Handmade and Store-Bought Items:
- Balance handmade pieces with functional store-bought items for a cohesive look. For example, pair a DIY wooden sign with sleek modern shelving.
- Use a Coordinated Color Scheme:
- Ensure your handmade accents complement your existing color palette to create a unified and stylish look.
- Layer Textures and Materials:
- Combine different materials such as wood, fabric, metal, and glass to add depth and interest to your decor.
- Create a Feature Wall:
- Dedicate one wall to display handmade elements like framed quotes, pegboard storage, and DIY shelves for an eye-catching focal point.
- Incorporate Seasonal Decor:
- Add handmade accents that can be changed seasonally, such as fabric banners, decorative jars, or small wall hangings to keep the space fresh and fun.
DIY Handmade Decor Projects for Beginners
If you’re new to DIY crafts, here are some simple projects to get started:
- DIY Laundry Jar Labels:
- Print or hand-draw labels for jars containing detergent pods, fabric softeners, or baking soda and attach them using twine or adhesive labels.
- Decorative Clothespin Holders:
- Paint and embellish an old tin can or small bucket to hold clothespins in a charming way.
- Easy Fabric Bunting:
- Cut fabric scraps into triangular shapes and string them together to create a simple yet cheerful bunting to hang in your laundry room.
- Stencil Painted Storage Bins:
- Use stencils to paint fun laundry-related words or designs on plain storage bins.
- Laundry-Themed Embroidery Hoop Art:
- Stretch fabric into embroidery hoops and add stitched laundry-themed phrases or designs for a cute wall decoration.
Tips for Maintaining Handmade Decorative Accents
- Regular Cleaning:
- Dust and wipe down DIY decorations to keep them looking fresh and clean. Use a gentle cleaner for fabric-based accents.
- Protect Against Moisture:
- Since laundry rooms can have humidity, consider sealing wooden items with a moisture-resistant coating to prevent warping.
- Rotate Decor Seasonally:
- Swap out handmade items throughout the year to keep your laundry room feeling fresh and updated.
- Repair and Refresh:
- Touch up painted pieces or reinforce glued elements to ensure longevity.
- Avoid Overcrowding:
- Stick to a few key handmade pieces to avoid clutter and maintain a clean, organized space.
Budget-Friendly Handmade Decor Ideas
Creating handmade accents for your laundry room doesn’t have to be expensive. Here are some cost-effective DIY ideas:
- Use Recycled Materials:
- Repurpose old clothing, fabric scraps, or furniture pieces to create unique decorations.
- Shop at Dollar Stores:
- Find affordable supplies such as frames, jars, and craft items to create personalized decor.
- Print Free Artwork:
- Download free printable laundry-themed art online and frame it for a budget-friendly wall decor option.
- Upcycle Old Household Items:
- Turn unused household items into decorative storage or wall hangings.
By incorporating handmade decorative accents, you can turn your laundry room into a stylish and inviting space filled with charm and personality. Whether you’re crafting custom signage, upcycling old furniture, or creating unique storage solutions, these DIY touches will make your laundry chores more enjoyable and visually appealing.
Budget-Friendly Ways to Transform Your Laundry Room
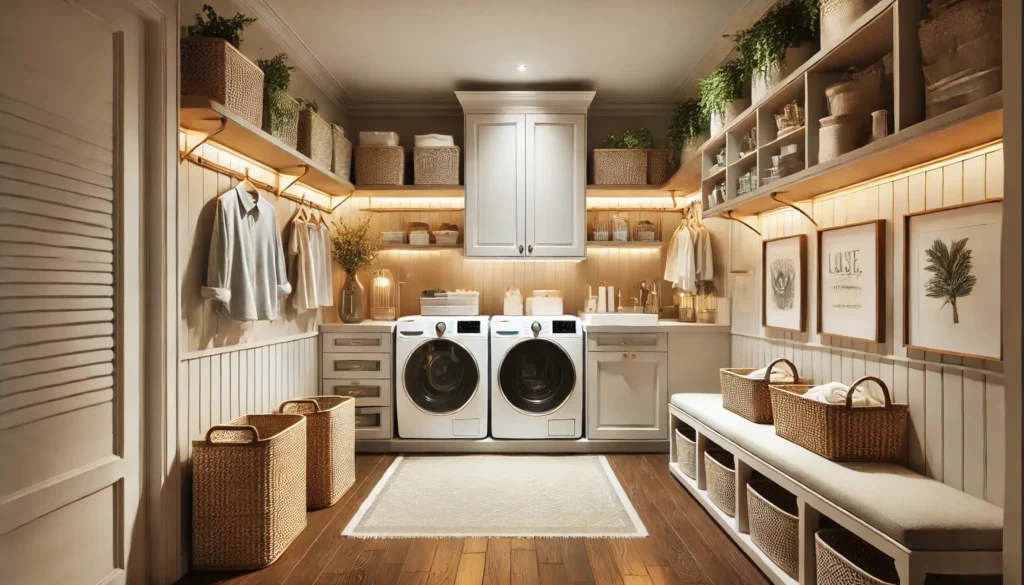
Thrift Store Finds for Decor: Budget-Friendly Laundry Room Makeover Ideas
Decorating your laundry room doesn’t have to be expensive—thrift store finds can provide unique, stylish, and budget-friendly solutions that bring charm and personality to your space. Whether you’re looking for vintage accents, practical storage solutions, or decorative pieces that add a touch of warmth, thrift stores offer a treasure trove of items that can be repurposed and transformed to fit your laundry room’s theme. From rustic farmhouse vibes to modern chic aesthetics, thrift store finds can help you achieve a beautiful and functional space without breaking the bank.
Benefits of Decorating with Thrift Store Finds
- Affordability:
- Thrift stores offer budget-friendly decor options, allowing you to enhance your laundry space without spending a fortune.
- Unique and Vintage Finds:
- Many thrift stores carry one-of-a-kind pieces that add character and a sense of history to your laundry room, creating a unique look that mass-produced decor can’t replicate.
- Eco-Friendly and Sustainable:
- Shopping second-hand helps reduce waste by giving pre-loved items a second life, making it an environmentally friendly way to decorate your space.
- DIY Potential:
- Many thrift store items can be upcycled, repainted, or repurposed into custom decor elements that reflect your personal style.
- Mix of Function and Style:
- Beyond aesthetics, thrift store finds can also serve practical purposes, offering additional storage or organizational solutions.
Best Thrift Store Items to Look for in Laundry Room Decor
When browsing thrift stores, keep an eye out for these versatile and stylish items that can easily be incorporated into your laundry room decor:
- Baskets and Bins:
- Wicker or wire baskets are perfect for organizing laundry essentials such as detergents, dryer sheets, and stain removers while adding a rustic touch to the space.
- Vintage Frames and Artwork:
- Repurpose old picture frames to display laundry-related quotes, DIY signage, or artwork that complements your room’s theme.
- Mason Jars and Glass Containers:
- Use thrifted mason jars or decorative glass containers to store clothespins, detergent pods, and laundry essentials in an organized and stylish way.
- Shelving Units:
- Small bookshelves, wall-mounted shelves, or floating shelves can be used to hold storage bins, decorative items, or extra towels.
- Antique Washboards:
- Vintage washboards add a charming, nostalgic touch to a laundry room and can also serve as functional elements such as message boards or shelf decor.
- Decorative Signs and Chalkboards:
- Many thrift stores carry pre-loved signs that can be updated with fresh paint or new lettering to fit your laundry room aesthetic.
- Mirrors:
- A decorative thrift store mirror can make your laundry room feel larger and brighter while adding an elegant touch to the space.
- Furniture Pieces:
- Repurpose small dressers, cabinets, or side tables for storage solutions, using them to hold laundry supplies or as folding stations.
- Hooks and Hangers:
- Look for unique hooks, coat racks, or wall hangers that can be used to hang laundry bags, ironing boards, or cleaning tools.
- Fabric and Linens:
- Search for vintage fabric, curtains, or tablecloths that can be repurposed into laundry room curtains, cushion covers, or DIY bunting.
Creative Ways to Use Thrift Store Finds in Your Laundry Room
- Turn a Dresser into a Laundry Station:
- An old dresser can be painted and used to store laundry essentials. The top can serve as a folding surface, and the drawers can hold detergents and other supplies.
- Repurpose a Ladder for Drying Racks:
- An old wooden ladder can be hung on the wall to serve as a unique drying rack for delicates, adding both function and rustic charm.
- Use Mason Jars for Stylish Storage:
- Fill mason jars with detergent pods, clothespins, and dryer sheets and place them on open shelves for easy access and a clean, uniform look.
- Frame Laundry-Themed Prints:
- Use thrifted frames to showcase DIY laundry-themed artwork or printables, such as washing instructions, inspirational quotes, or vintage advertisements.
- Upcycle an Old Window Frame:
- Repurpose an old window frame as a decorative wall feature, adding hooks or clips to hang small items like clothespins or socks.
- Create a Chalkboard Organizer:
- Turn an old thrift store frame into a chalkboard by painting the glass with chalkboard paint. Use it to keep track of laundry schedules, to-do lists, or stain-removal tips.
- Use Woven Baskets for Hidden Storage:
- Hide clutter by using large woven baskets to store laundry-related items such as extra towels, cleaning supplies, and seasonal linens.
- Revamp a Small Table as an Ironing Station:
- Place a heat-resistant cover on a thrifted small table and use it as a compact ironing station with storage underneath.
DIY Projects Using Thrift Store Finds
Looking for easy and budget-friendly DIY projects? Here are some ideas to transform thrift store finds into stunning laundry room decor:
- Painted Wooden Crates:
- Thrift store wooden crates can be sanded and painted to create stylish and functional wall-mounted storage for laundry baskets or towels.
- Fabric-Covered Storage Boxes:
- Use leftover fabric from thrift store finds to cover plain storage boxes, adding a splash of color and pattern to your laundry shelves.
- Pegboard Wall Organizer:
- Find an old pegboard or board at a thrift store and paint it to create a customizable organization system for hanging laundry tools and accessories.
- Reclaimed Door for Shelving:
- Transform an old door into a shelving unit by adding wooden planks and a fresh coat of paint for a rustic farmhouse look.
- DIY Laundry Cart from a Bar Cart:
- Repurpose an old bar cart into a mobile laundry cart to hold detergents, fabric softeners, and stain removers, making them easily portable.
Tips for Finding the Best Thrift Store Decor Items
- Visit Regularly:
- Thrift stores receive new inventory frequently, so visit often to find hidden gems before they are sold.
- Look Beyond Appearances:
- Focus on an item’s potential rather than its current state—paint, sanding, or new hardware can completely transform a piece.
- Bring Measurements:
- Know your laundry room’s dimensions to ensure any thrifted furniture or decor will fit properly.
- Check for Durability:
- Make sure items are sturdy and functional before purchasing, especially when it comes to furniture pieces.
- Negotiate Prices:
- Don’t hesitate to ask for discounts, as many thrift stores are willing to lower prices, especially for older inventory.
Conclusion
Decorating your laundry room with thrift store finds is an excellent way to achieve a stylish, functional, and budget-friendly space filled with unique and personalized touches. Whether you’re repurposing vintage furniture, adding decorative accents, or crafting DIY projects, thrift stores offer endless possibilities for transforming your laundry area into an inviting and practical part of your home.
Affordable Storage Solutions: Budget-Friendly Ways to Organize Your Laundry Room
Organizing your laundry room doesn’t have to come with a hefty price tag. Affordable storage solutions can help you maximize your space, keep your laundry essentials neatly arranged, and enhance the functionality of your room—all without breaking the bank. Whether you have a spacious laundry room or a compact corner, there are plenty of budget-friendly ideas that will help you achieve a clean, organized, and stylish space.
Benefits of Affordable Storage Solutions in the Laundry Room
- Cost-Effective Organization:
- Budget-friendly solutions provide practical storage without the need for expensive renovations or custom-built cabinetry.
- Maximized Space Utilization:
- Affordable storage options help make the most of every inch in your laundry room, including walls, doors, and underutilized spaces.
- Easy DIY Customization:
- Many low-cost storage solutions can be customized with a touch of creativity, making your laundry room both functional and personalized.
- Quick and Easy Implementation:
- Affordable solutions are typically easy to install, allowing for instant organization without extensive effort.
- Stylish Yet Practical:
- You don’t have to sacrifice style for budget; many affordable options offer aesthetic appeal while serving a functional purpose.
Affordable Storage Solutions for Your Laundry Room
There are numerous ways to organize your laundry room affordably. Here are some budget-friendly storage ideas to help you declutter and streamline your space:
1. Wall-Mounted Storage Solutions
Utilizing wall space is a smart and inexpensive way to increase storage without taking up valuable floor space.
- Floating Shelves:
- Inexpensive wall-mounted shelves provide storage for detergent bottles, fabric softeners, and decorative items. Look for affordable options at discount stores or DIY with reclaimed wood.
- Hanging Pegboards:
- A pegboard mounted on the wall can hold laundry essentials like clothespins, lint rollers, and small baskets while keeping things accessible.
- Tension Rod for Hanging Clothes:
- Install a budget-friendly tension rod between two walls or under shelves to hang drying clothes, saving floor space.
- Over-the-Washer Shelves:
- Add an affordable shelf above your washer and dryer to store everyday items, making them easily accessible without cluttering the area.
2. Over-the-Door Storage Solutions
Using the back of the laundry room door provides extra storage for lightweight items and keeps everything within reach.
- Hanging Pocket Organizers:
- These fabric or plastic organizers with multiple pockets can hold small laundry items like stain removers, lint brushes, and dryer sheets.
- Over-the-Door Hooks:
- Install hooks to hang laundry bags, ironing boards, or even small baskets for quick storage of delicates.
- Shoe Organizers for Small Items:
- A repurposed shoe organizer can be used to store detergent pods, clothespins, and other supplies.
3. Budget-Friendly Baskets and Bins
Baskets and bins provide an affordable and stylish way to store laundry essentials while keeping things organized and easy to access.
- Dollar Store Bins:
- Find budget-friendly plastic or fabric bins at dollar stores to categorize items like detergents, cleaning supplies, and folded laundry.
- Woven Baskets for a Rustic Look:
- Thrifted or budget-friendly woven baskets add a farmhouse aesthetic while offering functional storage for towels and extra supplies.
- Stackable Plastic Crates:
- Stackable crates from discount retailers can help maximize floor space while offering portable storage solutions.
- Clear Storage Containers:
- Transparent bins allow you to see what’s inside without opening them, making it easier to locate items.
4. Repurposed Furniture for Storage
Instead of buying new storage units, repurpose furniture you already own or find second-hand items to create functional storage.
- Upcycled Bookshelves:
- A repurposed bookshelf can be used to store folded laundry, cleaning supplies, and decorative elements like small plants.
- Repainted Cabinets:
- Find affordable cabinets at thrift stores, repaint them, and use them to store laundry essentials neatly.
- Old Dressers for Sorting:
- A second-hand dresser can be used to sort laundry by color or store folded clothes in an organized way.
- Rolling Carts:
- Inexpensive utility carts or repurposed bar carts can serve as mobile storage solutions for laundry supplies.
5. DIY Storage Hacks for a Laundry Room
If you’re a DIY enthusiast, there are countless ways to create stylish and functional storage on a budget.
- DIY Floating Shelves:
- Build your own floating shelves using affordable wood planks and brackets to maximize wall space.
- Mason Jar Organizers:
- Use mason jars to store clothespins, dryer sheets, or homemade detergent and mount them on a wall for a farmhouse look.
- PVC Pipe Hanging System:
- Install inexpensive PVC pipes as a drying rack or hanging solution for clothes and towels.
- Repurposed Wooden Crates:
- Stack wooden crates or attach them to walls for stylish and functional shelving units.
6. Space-Saving Ideas for Small Laundry Rooms
If you have a compact laundry area, there are affordable ways to make it feel more spacious and efficient.
- Collapsible Drying Racks:
- Foldable drying racks provide temporary hanging space without taking up permanent room when not in use.
- Wall-Mounted Ironing Boards:
- Install an affordable, foldable ironing board that tucks away neatly when not in use.
- Compact Storage Towers:
- Slim, inexpensive storage towers can fit between your washer and dryer to hold detergents and softeners.
- Laundry Basket Stacking:
- Stack laundry baskets vertically using an affordable metal frame or shelving unit to create a sorting station.
7. Labeling for Organized Storage
Affordable labels can add a touch of style while keeping things organized and easy to find.
- DIY Chalkboard Labels:
- Use chalkboard stickers to label bins and containers, making it easy to change contents when needed.
- Vinyl Decal Labels:
- Purchase inexpensive vinyl labels or create your own using a label maker.
- Handwritten Tags:
- Use printable tags or handwrite labels for a personalized and budget-friendly organization system.
8. Budget-Friendly Laundry Room Decor Additions
Inexpensive decorative touches can enhance your laundry room’s aesthetic without spending a lot.
- Peel-and-Stick Wallpaper:
- Add a stylish touch to an accent wall with affordable peel-and-stick wallpaper.
- Second-Hand Decorative Items:
- Thrift store finds such as old frames, mirrors, or signs can add personality and charm.
- DIY Artwork:
- Print out free laundry-related artwork or quotes and frame them for an inexpensive decorative touch.
Final Thoughts
With these affordable storage solutions, you can create a well-organized and stylish laundry room without overspending. Whether you choose to repurpose furniture, invest in budget-friendly organizers, or take on a DIY project, there are plenty of cost-effective ways to enhance your space while keeping it functional and beautiful.
DIY Paint Makeovers: Transforming Your Laundry Room on a Budget
A DIY paint makeover is one of the most affordable and impactful ways to revamp your laundry room. Whether you’re looking to refresh tired walls, add a pop of color, or create unique decorative elements, paint offers endless possibilities for transforming your space. With just a few supplies and a creative touch, you can give your laundry room a whole new look without breaking the bank.
Benefits of a DIY Paint Makeover in Your Laundry Room
- Cost-Effective Transformation:
- Paint is an inexpensive way to refresh your space compared to full renovations or purchasing new decor and furniture.
- Instant Refresh:
- A fresh coat of paint can instantly brighten up and modernize your laundry room, making it feel cleaner and more inviting.
- Customization Options:
- DIY paint projects allow you to personalize your space with unique colors, patterns, and finishes that reflect your style.
- Easy to Update:
- Paint is a reversible and easy-to-change solution if you decide to refresh your decor in the future.
- Increased Home Value:
- A well-maintained and stylish laundry room adds value to your home, especially with updated finishes and colors.
Best Paint Colors for Laundry Rooms
Choosing the right color for your laundry room can set the tone and ambiance of the space. Here are some popular options to consider:
- Bright and Airy Neutrals:
- White, beige, light gray, or soft pastels create an open and airy feel, making smaller laundry rooms appear larger and brighter.
- Calming Blues and Greens:
- Soft blue, sage green, or aqua tones add a soothing and fresh atmosphere, perfect for a tranquil laundry environment.
- Bold and Dramatic Hues:
- If you prefer a statement look, opt for navy blue, deep teal, or dark charcoal to create contrast and sophistication.
- Warm and Cozy Tones:
- Earthy tones such as terracotta, mustard yellow, or soft peach can add warmth and a welcoming touch to the space.
- Two-Tone Combinations:
- Combine a darker hue on the lower half of the walls with a lighter shade above to create depth and dimension.
DIY Paint Makeover Ideas for Your Laundry Room
Whether you want a simple refresh or a bold transformation, here are some creative DIY paint makeover ideas:
- Accent Walls for a Focal Point:
- Choose one wall to paint in a bold or contrasting color to create an eye-catching focal point without overwhelming the entire space.
- Geometric Patterns:
- Use painter’s tape to create modern geometric shapes such as chevrons, stripes, or diamonds for a trendy and stylish effect.
- Stenciled Walls or Backsplash:
- Stencils offer an affordable way to mimic the look of expensive wallpaper or tile backsplashes. Choose a fun pattern to add character to your laundry room.
- Painted Cabinets and Shelves:
- Give old cabinets and open shelves a fresh look with a coat of paint in a bold or neutral color to coordinate with your laundry room decor.
- Chalkboard Paint for Functionality:
- Consider applying chalkboard paint on one section of the wall or cabinet to create a functional space for writing reminders, to-do lists, or inspirational quotes.
- Ombre Walls:
- Create a gradual transition from a light shade to a darker one for a unique, modern look that adds visual interest.
- Painted Floor Designs:
- If your laundry room has a worn-out floor, painting it with patterns like checkerboard or herringbone can give it a fresh new look.
- Cabinet Trim and Details:
- Add a pop of color to cabinet trims, door edges, or open shelving edges for a subtle yet stylish touch.
- Ceiling Accents:
- Don’t forget the ceiling! A bold color or subtle pastel can make the space feel more dynamic and put together.
- Hand-Painted Signs:
- Create DIY laundry-themed signs with painted wooden boards featuring quotes like “Wash, Dry, Fold, Repeat” or “Lost Socks Seeking Mates.”
How to Plan a DIY Paint Makeover
- Choose Your Color Palette:
- Select colors that match your existing decor, appliances, and accessories to ensure a cohesive look.
- Gather Supplies:
- Essential items include:
- Paint and primer
- Paint rollers and brushes
- Painter’s tape
- Drop cloths
- Sandpaper (for prepping cabinets or walls)
- Essential items include:
- Prep the Space:
- Clean the walls or cabinets to remove dirt and dust, and use painter’s tape to protect areas you don’t want to paint.
- Test a Small Area:
- Apply a sample swatch on a small section of the wall to see how the color looks in different lighting conditions.
- Apply Primer if Necessary:
- If painting over dark colors or glossy surfaces, apply a primer to ensure better adhesion and coverage.
- Paint in Sections:
- Start with edges and trim, then move to larger surfaces to avoid streaks and uneven application.
- Let It Dry Completely:
- Allow enough drying time between coats and before moving appliances or shelves back into place.
Budget-Friendly DIY Paint Makeover Tips
If you’re looking to give your laundry room a facelift without spending much, consider these budget-friendly tips:
- Use Leftover Paint:
- Check your garage or storage for leftover paint from previous projects to repurpose in your laundry room.
- Shop at Discount Stores:
- Many hardware stores offer discounted or mis-tinted paint options at a fraction of the cost.
- DIY Your Own Stencils:
- Create DIY stencils using cardboard or plastic sheets to achieve stylish wall patterns without buying expensive wallpaper.
- Paint Only Key Areas:
- Instead of painting the entire room, focus on small areas like the backsplash, cabinets, or an accent wall for a high-impact look.
- Repurpose Furniture with Paint:
- Give old furniture pieces a fresh coat of paint instead of purchasing new storage units.
- Layer Paint for Texture:
- Use sponging or dry brushing techniques to add texture and dimension to your painted surfaces.
Maintenance Tips for Painted Laundry Rooms
To keep your painted laundry room looking fresh and vibrant, follow these maintenance tips:
- Clean Regularly:
- Wipe down walls and cabinets with a damp cloth to remove dust, lint, and detergent splashes.
- Touch Up as Needed:
- Keep leftover paint on hand for quick touch-ups if scuffs or chips occur over time.
- Use Mold-Resistant Paint:
- If your laundry room is prone to humidity, choose mold-resistant or moisture-resistant paint to prevent damage.
- Protect High-Traffic Areas:
- Consider using a washable paint finish, such as semi-gloss or satin, for areas that require frequent cleaning.
By incorporating a DIY paint makeover, you can refresh your laundry room with minimal investment and effort. Whether you choose a bold accent wall, a stylish stencil pattern, or a simple fresh coat of neutral paint, your laundry space can feel brand new and more enjoyable with just a few strokes of a brush.
Smart Layout Planning: Designing a Functional and Efficient Laundry Room
A well-organized laundry room begins with smart layout planning, which ensures that your space is both functional and efficient. Whether you have a small laundry closet or a spacious utility room, optimizing the layout can improve workflow, maximize storage, and make your laundry tasks more manageable. Thoughtful design choices can help create a clutter-free environment while enhancing the aesthetic appeal of your laundry space.
Benefits of Smart Layout Planning
- Enhanced Workflow Efficiency:
- A well-thought-out layout minimizes movement by placing essential items within easy reach, helping you complete laundry tasks faster and with less effort.
- Maximized Space Utilization:
- Proper planning allows you to make the most of your available space, whether it’s a small corner or a dedicated room.
- Improved Organization:
- A strategically designed layout ensures that all laundry supplies, appliances, and storage solutions are arranged neatly and accessibly.
- Better Aesthetics:
- A thoughtfully planned layout contributes to a visually appealing laundry room that complements your home’s decor.
- Reduced Clutter:
- Smart design choices help keep countertops clear, hampers hidden, and supplies neatly stored, creating a tidy and streamlined space.
Key Factors to Consider in Laundry Room Layout Planning
When planning your laundry room layout, consider these important elements to ensure functionality and efficiency:
- Available Space:
- Measure your laundry area to determine how much space you have for appliances, storage, and movement.
- Appliance Placement:
- Position your washer and dryer strategically to allow easy access to plumbing and electrical outlets while maintaining a good workflow.
- Storage Needs:
- Plan for sufficient storage solutions such as shelves, cabinets, or bins to keep laundry essentials organized and out of sight.
- Ventilation:
- Ensure proper airflow to prevent moisture buildup and mold growth by incorporating vents or fans in your layout.
- Accessibility and Ergonomics:
- Arrange items at comfortable heights to avoid unnecessary bending or stretching, making laundry tasks easier on your back and joints.
Popular Laundry Room Layout Ideas
Depending on the size and shape of your laundry space, you can choose from various layout designs to optimize efficiency and functionality.
1. Single-Wall Layout (Best for Small Spaces)
- Description: Appliances and storage are placed along a single wall, ideal for narrow laundry rooms or multi-functional spaces.
- Benefits:
- Saves space while providing essential functionality.
- Leaves room for additional storage above appliances.
- Works well in apartments, closets, or compact areas.
- Layout Suggestions:
- Stackable washer and dryer to save floor space.
- Floating shelves or overhead cabinets for storing laundry essentials.
- A pull-out ironing board for added functionality.
2. Galley Layout (Best for Narrow Rooms)
- Description: Appliances and storage run along two parallel walls, creating an efficient workflow.
- Benefits:
- Maximizes both wall spaces for storage and functionality.
- Provides an efficient flow for washing, drying, and folding tasks.
- Layout Suggestions:
- Use one side for appliances and the other for folding space or shelving.
- Add a drying rack on the wall to save floor space.
- Use upper cabinets to store infrequently used items.
3. L-Shaped Layout (Best for Corner Spaces)
- Description: Appliances and storage solutions are arranged along two adjacent walls, forming an L-shape.
- Benefits:
- Makes use of corner spaces efficiently.
- Allows for clear separation between laundry tasks.
- Provides ample space for countertops and storage.
- Layout Suggestions:
- Install a utility sink in the corner for pre-wash treatments.
- Use open shelving to store baskets and detergent jars.
- Add a fold-out drying station on one side for convenience.
4. U-Shaped Layout (Best for Large Laundry Rooms)
- Description: Appliances and storage wrap around three walls, offering maximum organization and workspace.
- Benefits:
- Ideal for larger households with heavy laundry needs.
- Provides designated zones for washing, drying, folding, and storage.
- Layout Suggestions:
- Use base cabinets with countertops for folding areas.
- Add task lighting under shelves for improved visibility.
- Include pull-out laundry hampers for easy sorting.
5. Laundry Closet Layout (Best for Small Homes or Apartments)
- Description: A compact design that fits within a closet space, typically with stackable or side-by-side appliances.
- Benefits:
- Keeps the laundry area hidden when not in use.
- Maximizes storage with shelves and organizers.
- Layout Suggestions:
- Use bi-fold or sliding doors to save space.
- Install wall-mounted shelves above appliances.
- Utilize vertical space with over-the-door storage solutions.
Smart Storage Solutions for Your Layout
Once you’ve chosen the ideal layout, incorporating the right storage solutions can enhance functionality and maintain organization.
- Wall-Mounted Shelving:
- Utilize vertical space by installing floating shelves above appliances to store laundry detergents, softeners, and cleaning supplies.
- Pull-Out Drawers:
- Install slide-out drawers to organize smaller items like lint rollers, stain removers, and extra supplies.
- Fold-Down Ironing Board:
- Incorporate a wall-mounted or pull-out ironing board to save space and increase convenience.
- Built-in Hampers:
- Use pull-out or built-in hampers to sort clothes efficiently while keeping them hidden from view.
- Hanging Rods and Hooks:
- Install rods above the washer and dryer for hanging freshly laundered clothes or drying delicates.
Budget-Friendly Tips for Smart Laundry Layout Planning
You don’t need to spend a fortune to design an efficient laundry room. Here are some cost-effective tips to consider:
- Repurpose Existing Furniture:
- Use an old dresser or shelving unit to create functional storage without buying new pieces.
- DIY Shelving Solutions:
- Build simple shelves using affordable wood and brackets to maximize vertical space.
- Use Tension Rods:
- Install tension rods for hanging items like spray bottles, laundry bags, or drying clothes.
- Install Stick-On Hooks:
- Affordable adhesive hooks can provide quick and easy storage for lightweight items.
- Label Storage Bins:
- Group items in labeled containers to maintain organization and reduce clutter.
Final Thoughts
With smart layout planning, your laundry room can become a highly efficient and stylish space that caters to your household needs. By strategically placing appliances, maximizing storage options, and incorporating practical organization solutions, you can create a functional and beautiful laundry area that simplifies your daily routine. Whether you’re working with a small or large space, thoughtful planning will ensure that your laundry room remains clutter-free and efficient.
Transforming Your Laundry Room with Smart Decor Ideas
Your laundry room doesn’t have to be a dull, purely functional space—by incorporating laundry room decor ideas, you can transform it into an inviting, stylish, and highly efficient area. Whether you have a spacious utility room or a compact corner, the right design elements can maximize storage, enhance organization, and reflect your personal style. From budget-friendly DIY paint makeovers and repurposed furniture to smart layout planning and stylish decorative accents, there are endless ways to create a laundry space that is both beautiful and practical.
By focusing on smart storage solutions, such as wall-mounted shelves, over-the-door organizers, and multifunctional furniture, you can keep your laundry essentials neatly arranged and easily accessible. Adding personal touches, like handmade decorations, thrift store finds, or creative labeling systems, can infuse warmth and personality into the space, making laundry chores more enjoyable. Thoughtful lighting upgrades, cohesive color schemes, and functional layouts will further enhance the ambiance, turning your laundry room into a space you actually enjoy spending time in.
Ultimately, decorating your laundry room is about finding the perfect balance between function and style. With the right ideas and creative solutions, you can design a laundry room that not only meets your practical needs but also enhances your home’s overall aesthetic. Whether you opt for a farmhouse charm, modern elegance, or minimalist simplicity, your laundry room can become a stylish and organized haven that adds value and convenience to your everyday routine.