
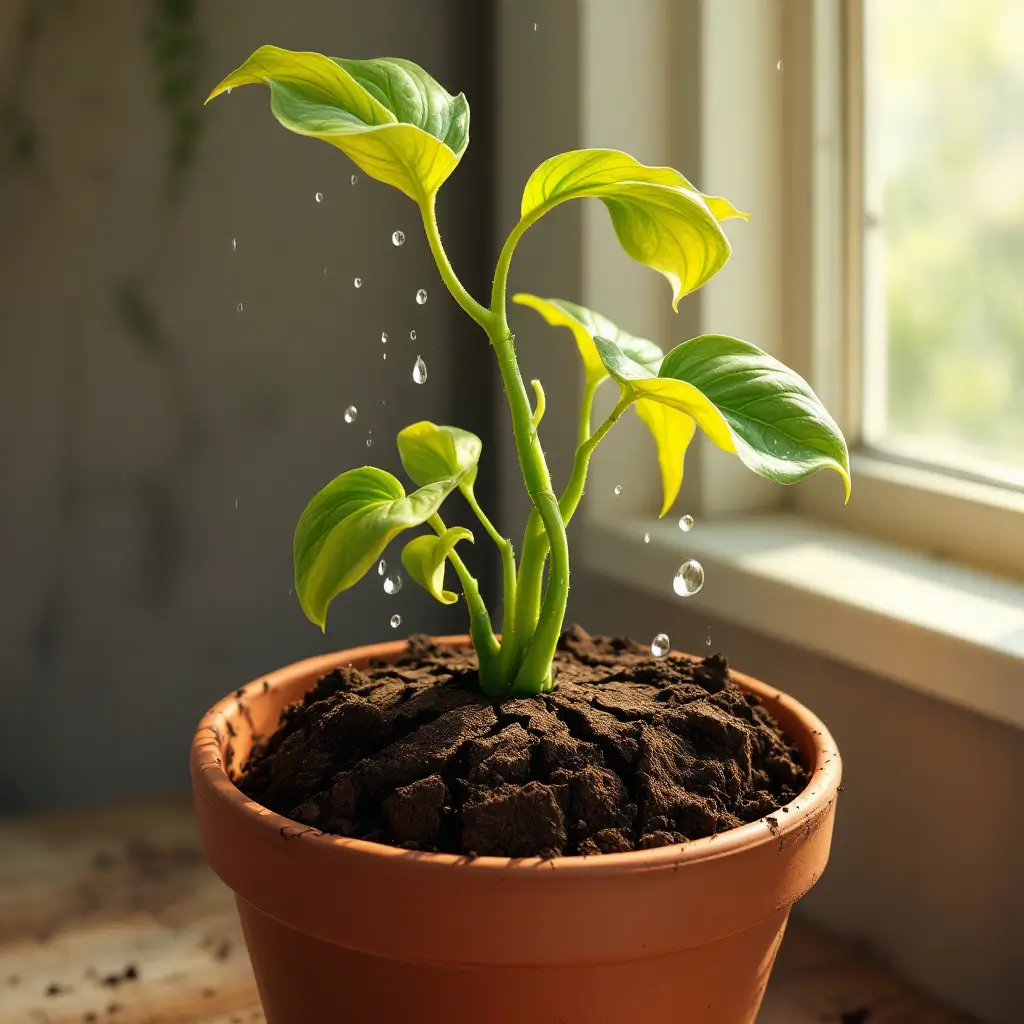
Why do my houseplants become hydrophobic?” If water rolls off your plant’s soil instead of soaking in, dehydrated organic matter or compacted, peat-heavy mixes are likely to blame. Over time, these create a water-repellent layer, starving roots and stressing plants. But fear not! This guide reveals quick fixes like bottom watering, soil aeration, and repotting with moisture-retentive mixes. Learn to spot early signs (dry patches, pooling water) and prevent hydrophobia for good. Let’s revive your thirsty houseplants!
Understanding Hydrophobic Soil in Houseplants
Definition and characteristics of hydrophobic soil
Hydrophobic soil is a condition where the soil repels water instead of absorbing it, causing moisture to bead up on the surface rather than penetrating the soil layer. This phenomenon primarily affects the top layer of soil but can have deeper implications for plant health and soil structure.
What is Hydrophobic Soil?
At its core, hydrophobic soil occurs when the soil particles develop a water-repellent coating. This coating is often made up of organic compounds that have decomposed from plant material, such as waxes and oils, which naturally repel water. The condition is exacerbated in soils that dry out completely and then remain dry for extended periods, which is why it’s commonly seen in potted plants that experience fluctuating watering schedules.
Physical Characteristics
- Water Beading: One of the most noticeable signs of hydrophobic soil is water beading on the surface, similar to how water droplets form on a waxed car.
- Dry Patches: Even after watering, hydrophobic soil will have dry patches where the water has not penetrated.
- Dustiness: The soil may appear dusty or powdery when dry, indicating a lack of moisture retention.
- Difficulty Re-wetting: Hydrophobic soil can be hard to re-wet once it has dried out, often requiring specific techniques or additives to manage water absorption.
Impact on Soil Structure
Hydrophobic conditions can lead to a breakdown in the soil structure. When water does not penetrate evenly, it causes uneven soil moisture levels, which can lead to the development of hard, compacted areas. These compacted areas restrict root growth and limit the ability of roots to access nutrients effectively, potentially stunting plant growth.Understanding these characteristics helps in diagnosing hydrophobic soil conditions accurately and implementing the right solutions to alleviate the issue, ensuring that your houseplants can thrive in a healthy, moist soil environment.
Reasons Why Soil Becomes Hydrophobic
Hydrophobic soil can be a perplexing issue for many gardeners and houseplant enthusiasts. Understanding why soil becomes water-repellent is crucial for effectively managing and preventing this condition. Several factors contribute to the development of hydrophobicity in soil, ranging from natural soil composition to environmental influences and gardening practices.
Organic Matter Decomposition
One of the primary reasons for the development of hydrophobic soil is the decomposition of organic matter. As plant materials like leaves, bark, and roots break down, they release various organic compounds. Certain compounds, particularly waxes and fats from plant cuticles, are inherently water-repellent. These substances can coat soil particles, forming a hydrophobic layer that repels water instead of absorbing it.
Frequent Drying and Wetting Cycles
Soil that undergoes frequent cycles of drying out completely and then being re-wetted is more prone to becoming hydrophobic. Each time the soil dries, the organic compounds can coalesce and bond more tightly to the soil particles, enhancing their water-repellent properties. This cycle is particularly common in container plants and in regions with sporadic rainfall, where soil moisture levels can fluctuate dramatically.
Use of Certain Potting Mixes
The components of your potting mix can also influence the development of soil hydrophobicity. Mixes that contain a high proportion of peat or bark, which are both rich in hydrophobic organic materials, are especially prone to developing water-repellent conditions as they age and decompose. Additionally, over time, the physical breakdown of these components can lead to compaction, further reducing soil permeability and exacerbating hydrophobic conditions.Understanding these key reasons why soil becomes hydrophobic not only helps in diagnosing the issue but also informs the strategies for amending the soil and adjusting care routines to prevent future occurrences. By addressing these factors, gardeners can maintain healthier, more water-efficient soil environments for their houseplants.
mpact of Hydrophobic Soil on Plant Health
Hydrophobic soil can significantly affect plant health, undermining the well-being of houseplants and challenging even the most diligent gardener. Understanding the consequences of water-repellent soil on plant vitality is crucial for identifying symptoms early and taking corrective actions. Here are several ways in which hydrophobic soil impacts plant health:
Water Stress and Root Health Issues
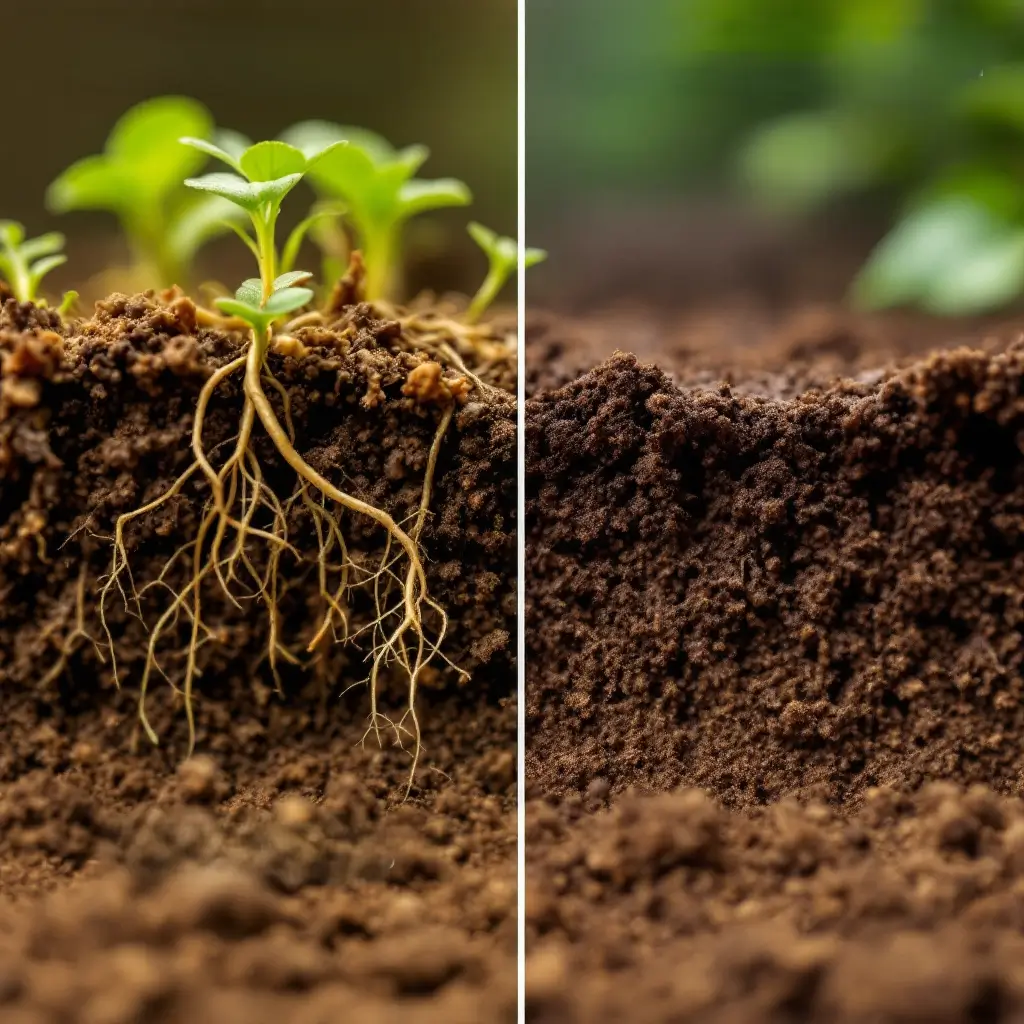
The most direct impact of hydrophobic soil is water stress. Since water does not penetrate the soil evenly or adequately, plants cannot absorb the moisture they need. This results in water stress, which can manifest as wilting, leaf drop, or stunted growth. Over time, chronic water stress can weaken a plant, making it more susceptible to diseases and pest infestations.Roots in hydrophobic soil also suffer greatly. They may begin to grow near the surface in search of moisture, which makes them more vulnerable to damage and less effective at anchoring the plant. Additionally, roots may die back or become dysfunctional if they are unable to access sufficient water, further compromising plant stability and nutrient uptake.
Nutrient Uptake Problems
Water is a crucial medium for transporting nutrients from the soil to the plant. In hydrophobic soil, the uneven distribution of water means that nutrients are not dissolved and distributed evenly. This results in nutrient hotspots and deficiencies, which can lead to various nutrient-related disorders like chlorosis (yellowing leaves due to lack of chlorophyll) or necrosis (death of plant tissue).Moreover, the inability to access adequate water reduces a plant’s ability to uptake and transport essential nutrients, leading to malnutrition even if the soil is technically rich in nutrients. This can exacerbate the effects of any existing imbalances in soil fertility, making it harder to correct them simply by adding fertilizers.
Signs of Distress in Houseplants
Recognizing the signs of distress caused by hydrophobic soil can help in early intervention. Aside from the obvious symptoms of dehydration such as droopy, dry, or brittle leaves, there are other indicators. Plants may show slower growth rates, reduced vigor, and a diminished capacity to recover from environmental stresses. Flowers and fruits may be fewer, smaller, or fail to develop entirely.Additionally, you might observe that water runs off the soil surface or pools on top rather than soaking in. This can sometimes be mistaken for overwatering, as the plant shows signs of water stress despite apparent adequate watering.Understanding the impacts of hydrophobic soil on plant health enables gardeners to take proactive steps in managing their plant care routines to mitigate these issues. This involves not only treating the hydrophobic soil but also adjusting watering practices and soil management strategies to promote a more resilient growing environment.
Common Causes of Soil Hydrophobicity
Natural soil properties
Understanding the inherent properties of soil is crucial in assessing why certain soils become hydrophobic. The natural composition and texture of soil can significantly influence its tendency to repel water. Here are key aspects of natural soil properties that contribute to hydrophobic conditions:
Soil Composition
Soil is composed of a mixture of minerals, organic matter, air, and water. The balance of these components greatly affects soil behavior towards water.
- Mineral Content: Soils with high sand content tend to be more prone to hydrophobicity because sand particles are larger and have less surface area for water to adhere to compared to clay particles. Additionally, sandy soils drain water quickly, which can lead to frequent drying and the development of water-repellent organic coatings on the soil particles.
- Organic Matter: While organic matter is critical for soil health, providing nutrients and improving soil structure, certain types of decomposed organic matter can lead to hydrophobic conditions. For example, soils rich in decomposed plant waxes and oils can naturally repel water.
Soil Texture
Soil texture refers to the size distribution of the mineral particles within the soil. This texture directly influences how easily water can penetrate and be retained within the soil.
- Clay, Silt, and Sand Ratios: Clay soils, while typically good at retaining moisture, can become extremely hard and compact when dry, potentially leading to surface hydrophobicity when water is finally applied. Conversely, sandy soils, which allow rapid water drainage, may develop dry pockets that resist water penetration.
- Loam Soils: Ideally, loamy soils, which are a balanced mix of sand, silt, and clay, offer better moisture retention and less tendency towards hydrophobicity. However, even loam soils can develop hydrophobic conditions under certain environmental or management conditions.
Presence of Hydrophobic Organic Compounds
Naturally occurring hydrophobic organic compounds in soil, such as long-chain fatty acids, waxes, and resins from plant materials, can coat soil particles and make them water-repellent. These compounds are more likely to accumulate in soils that:
- Have a high content of organic material: Forest floors or soils underlain by dense organic layers often exhibit significant hydrophobic characteristics.
- Experience periodic wildfires: Fire can cause organic compounds to chemically alter and become hydrophobic, affecting soil hydrology and plant recovery post-fire.
Understanding these natural soil properties helps in identifying potential risks for developing hydrophobic conditions and informs better soil management practices to mitigate these effects. By adjusting gardening and land-use strategies according to the specific properties of the soil, gardeners and landscapers can effectively manage water infiltration and retention, promoting healthier plant growth.
Cultural Practices Impacting Hydrophobic Soil
Cultural practices in gardening and agriculture significantly influence soil health, including its ability to absorb and retain water. When it comes to managing or preventing hydrophobic soil, understanding the role of these practices is crucial. Here’s how certain cultural practices can lead to or mitigate the development of hydrophobic conditions in soil:
Improper Watering Techniques
Watering practices have a profound impact on soil hydrophobicity. Over-watering can lead to soil compaction, especially in clay-rich soils, reducing soil aeration and promoting the development of a water-repellent layer. Conversely, under-watering can cause organic matter to dry out and become hydrophobic. Maintaining a consistent watering routine helps prevent the extremes of moisture that contribute to soil hydrophobicity.
Use of Organic Matter
Regularly adding organic matter to soil is generally beneficial as it improves soil structure, aeration, and nutrient content. However, the type of organic matter used is key. Materials rich in lignin and waxy substances can increase soil hydrophobicity as they decompose. It’s important to choose the right kind of organic amendments and to integrate them properly into the soil to avoid contributing to water repellence. Composts that are fully decomposed and free of large, undecomposed plant materials are ideal.
Soil Tilling and Aeration
Tilling the soil can have dual effects. On one hand, it can help integrate organic matter deeply into the soil, breaking up compact layers and enhancing moisture penetration. On the other hand, excessive tilling, especially when the soil is wet, can lead to compaction and structural damage, which may promote hydrophobic conditions. Light, timely tilling and proper aeration can help maintain an optimal soil structure that supports water infiltration and retention.
Mulching Practices
Mulching is a beneficial cultural practice that helps conserve soil moisture and regulate soil temperature. However, using certain types of mulches, such as those with high oil or wax content, can contribute to the development of hydrophobic soil if not managed correctly. Organic mulches that decompose into humus without leaving water-repellent residues are preferable. Additionally, mulches should be refreshed or turned over regularly to prevent the formation of a water-repellent barrier on the soil surface.
Crop Rotation and Cover Cropping
Rotating crops and using cover crops can greatly enhance soil structure and health. Different plants contribute various organic materials to the soil, which can help break down existing hydrophobic materials and prevent the soil from becoming overly dry or compacted. Cover crops, in particular, help maintain soil moisture and organic content during off-seasons, reducing the risk of hydrophobicity.
By understanding and adjusting these cultural practices, gardeners and farmers can significantly reduce the risk of developing hydrophobic soil, ensuring that their plants receive adequate water and nutrients. This proactive approach not only enhances plant health but also contributes to the overall sustainability of gardening and agricultural systems.
Environmental Factors Impacting Hydrophobic Soil
Environmental factors play a significant role in the development of hydrophobic soil conditions. These factors, both abiotic and biotic, influence the soil’s physical and chemical properties, affecting its ability to absorb and retain water. Understanding these environmental influences can help gardeners and landscapers better manage soil health and prevent hydrophobic conditions.
Temperature and Sunlight Exposure
Temperature fluctuations and high levels of sunlight exposure can increase the likelihood of soil becoming hydrophobic. High temperatures can cause soil to dry out more quickly, especially in exposed, unshaded areas. This rapid drying can lead to the formation of water-repellent substances as organic matter decomposes without adequate moisture. Additionally, prolonged exposure to direct sunlight can bake the soil, further entrenching the hydrophobic properties by hardening the surface layer and reducing its permeability.
Air and Wind
The presence and movement of air, including wind, can also affect soil hydrophobicity. Wind can rapidly dry out soil surfaces, especially in areas without protective coverings such as mulch or vegetation. This drying effect is compounded in environments with low humidity, where the air itself pulls moisture from the soil, accelerating the development of dry, hydrophobic conditions.
Soil pH and Chemical Composition
The pH level of the soil, which is a measure of its acidity or alkalinity, can influence how organic compounds within the soil interact and stabilize. Soils with extreme pH values, either too acidic or too alkaline, can hinder the breakdown of organic materials, potentially leading to the accumulation of hydrophobic organic compounds. Additionally, the chemical composition of the soil, including the presence of certain minerals and salts, can affect its texture and structure, thereby influencing its water retention capabilities.
Water Quality and Availability
The quality of water used for irrigation can contribute to soil hydrophobicity. Water that contains high levels of dissolved minerals or salts can lead to soil salinization, which not only affects plant health but can also impact soil structure and its ability to absorb water. Furthermore, inconsistent water availability, whether due to erratic watering practices or natural rainfall patterns, can exacerbate the cycle of wetting and drying that leads to the development of hydrophobic conditions.
By considering these environmental factors, gardeners can adopt more holistic approaches to soil and water management. Strategies such as providing shade, using windbreaks, adjusting soil pH, and ensuring consistent and appropriate watering can mitigate the impact of these environmental factors, helping to maintain soil health and prevent the occurrence of hydrophobic conditions.
How to Test for Hydrophobic Soil
Water Droplet Test: Evaluating Soil Hydrophobicity
The Water Droplet Test, also known as the Water Drop Penetration Time (WDPT) test, is a simple yet effective method for assessing soil hydrophobicity. This test is particularly useful in field studies, especially following events like wildfires that can significantly alter soil properties.
Understanding Soil Hydrophobicity
Soil hydrophobicity occurs when soil particles repel water instead of absorbing it. This condition often arises when waxy, organic substances coat the soil particles, creating a water-repellent layer. This layer can be found at or just below the surface and may vary in thickness and extent. Hydrophobic soils can have major repercussions for plant growth, water infiltration, and soil erosion.
Conducting the Water Droplet Test
The Water Droplet Test involves placing a small amount of water on the soil surface and observing the time it takes for the water to infiltrate the soil. Here’s how to perform the test effectively:
- Preparation: Select a flat area of soil where you suspect hydrophobicity might be an issue. Clear away any loose debris or vegetation to expose the soil surface.
- Applying Water Droplets: Place a small droplet of water (about the size of a standard droplet from a pipette or dropper) on the soil surface.
- Observation: Watch the droplet to see how quickly it is absorbed by the soil. In hydrophobic soils, the water droplet will not infiltrate the soil within the first five seconds.
Interpreting Results
- Rapid Infiltration: If the water droplet is absorbed by the soil almost immediately, the soil is not hydrophobic.
- Delayed Infiltration: If the droplet sits on the soil surface for more than five seconds before infiltrating, the soil exhibits signs of hydrophobicity.
Implications of Soil Hydrophobicity
Understanding whether soil is hydrophobic is crucial for managing its health and fertility. Hydrophobic soils can hinder plant growth by preventing water from reaching plant roots effectively. Additionally, these soils can affect surface and subsurface hydrology, leading to increased runoff and potential erosion.
Addressing Hydrophobic Soils
If soil hydrophobicity is identified, several strategies can be employed to manage and mitigate its effects:
- Organic Amendments: Incorporating organic matter such as compost can help reduce hydrophobicity by breaking down the waxy substances coating the soil particles.
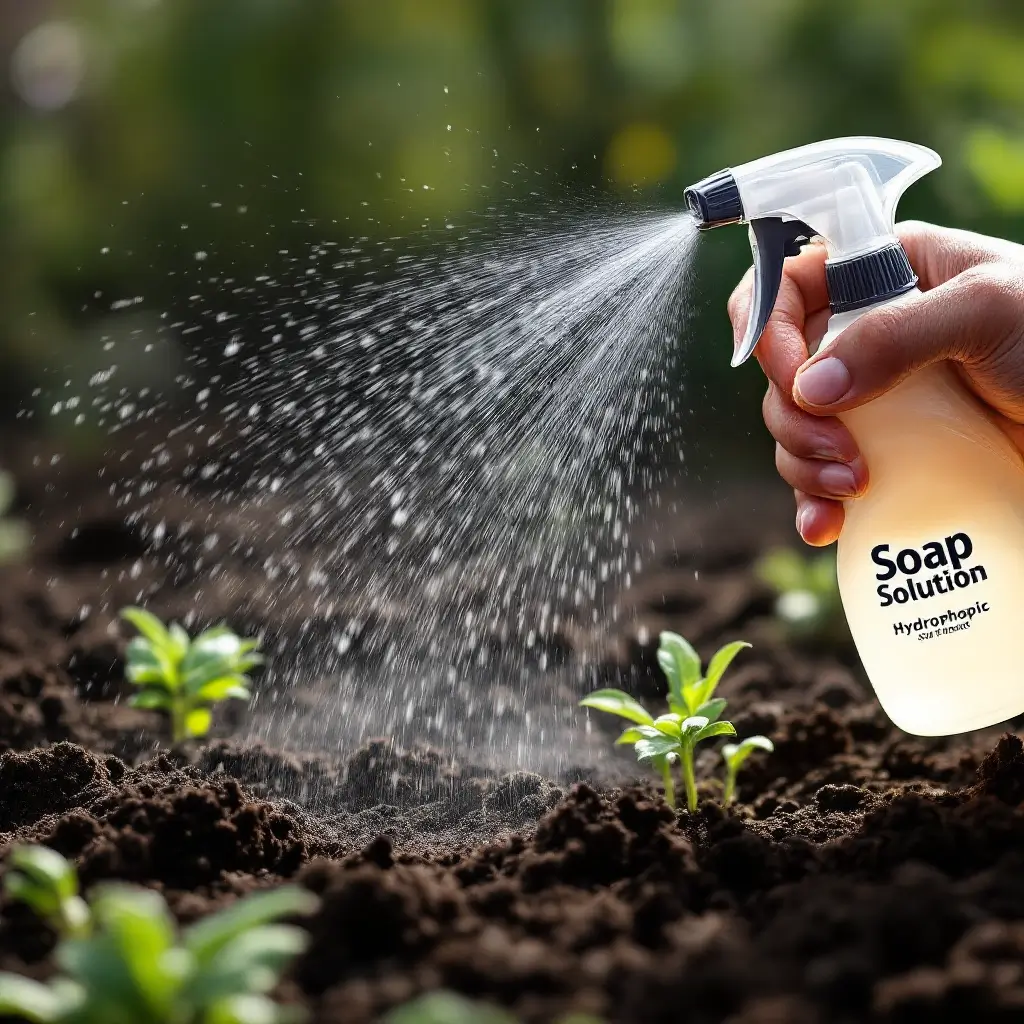
- Wetting Agents: Applying soil wetting agents can temporarily reduce water repellency, allowing for better water infiltration.
Soil Feel and Appearance: Indicators of Soil Health and Hydrophobicity
The physical characteristics of soil, such as its feel and appearance, are critical indicators of its health, structure, and functionality. These properties can also provide valuable insights into whether the soil is hydrophobic, which is essential for diagnosing and managing soil conditions effectively.
Texture and Consistency
Soil texture refers to the size distribution of the mineral particles that make up the soil. These particles include sand, silt, and clay, each contributing differently to the soil’s overall behavior and feel. For instance, sandy soils feel gritty, clay soils are sticky and plastic when wet, and silty soils have a smooth, flour-like texture
1. The texture affects water retention, drainage, and the ease with which roots can penetrate the soil. In the context of hydrophobicity, sandy soils, due to their large particle size and low cohesion, are more prone to becoming hydrophobic as they dry out quickly and resist water penetration.
Moisture Content and Water Interaction
The moisture content of soil significantly influences its physical properties and appearance. Healthy, non-hydrophobic soil should feel moist and be able to form a loose ball when squeezed in the hand. If the soil is dry and crumbly, or if water forms beads on the surface instead of being absorbed, it may indicate hydrophobic conditions. The “feel and appearance method” is a practical approach to estimate soil moisture levels by manually assessing the soil’s texture and moisture state
2. This method involves collecting soil samples from different depths and feeling them to determine their moisture content, which helps in identifying whether the soil is adequately hydrated or if it has developed hydrophobic properties.
Color and Structure
The color of soil can provide clues about its composition and condition. Darker soils typically have higher organic matter content, which generally improves water retention and soil fertility. However, if the soil appears unusually light or has a grayish tone, it might suggest poor drainage or the presence of compacted layers that could be contributing to hydrophobic conditions. Additionally, the structure of the soil—how soil particles are grouped together into aggregates—can affect its appearance and susceptibility to hydrophobicity. Well-aggregated soil allows for better water infiltration and air circulation, which are crucial for preventing hydrophobic conditions.
Practical Application
For gardeners and landscapers, regularly assessing the soil’s feel and appearance is a straightforward and effective way to monitor its health and functionality. This hands-on approach not only helps in detecting early signs of hydrophobicity but also aids in evaluating the effectiveness of applied treatments like wetting agents or organic amendments. By understanding and observing the changes in soil texture, moisture content, color, and structure, one can make informed decisions about watering practices, soil amendments, and overall plant care strategies.
In summary, the physical feel and appearance of soil are more than just superficial attributes; they are vital diagnostics tools that reflect the soil’s health, its ability to support plant life, and its current state regarding water absorption and retention. Regular monitoring and understanding of these characteristics can help prevent the development of hydrophobic conditions, ensuring a healthy growing environment for plants.
Professional Soil Analysis: Understanding Its Importance and Process
Professional soil analysis is a critical tool for gardeners, farmers, and landscapers who seek to optimize plant health and soil management. This type of analysis goes beyond simple DIY testing kits by providing a comprehensive assessment of soil health, nutrient levels, and other important parameters. Here’s a detailed look at what professional soil analysis involves and why it’s beneficial.
What is Professional Soil Analysis?
Professional soil analysis involves sending soil samples to a laboratory where experts conduct detailed tests to determine a wide range of soil properties. These properties include nutrient content (such as nitrogen, phosphorus, and potassium), pH levels, organic matter content, and other essential elements that affect plant growth. The analysis can also assess soil texture, structure, and potentially toxic elements.
Types of Tests Performed
- Basic NPK Test: This test measures the levels of nitrogen, phosphorus, and potassium in the soil, which are critical for plant growth.
- Complete Soil Analysis: A more comprehensive test that includes NPK, pH, organic matter content, and detailed information on micro-nutrients and other soil characteristics.
- Potting Soil Analysis: Specifically designed for potting mixes, this test assesses the suitability and nutrient content of soils used in container gardening.
Process of Professional Soil Analysis
- Sample Collection: The first step involves collecting soil samples from your garden or landscape. It’s important to follow specific guidelines for sampling to ensure that the samples accurately represent the area being tested.
- Sending Samples to the Lab: Once collected, the samples are sent to a professional testing laboratory. Some services provide mail-in kits where you collect the soil and send it back to them for analysis.
- Laboratory Testing: At the lab, soil scientists perform various tests to analyze the soil’s chemical and physical properties. This might include spectrometry, chromatography, and other advanced techniques.
- Receiving Results: The results are typically sent back to you via email or through an online portal. These results include detailed readings of nutrient levels, pH, and other vital data.
Interpreting the Results
Understanding the results of a soil test can be complex. Most professional soil testing services include a consultation or a detailed report that explains the findings and provides recommendations for amendments or changes to your cultural practices. This might include specific fertilizer recommendations, suggestions for adjusting pH, or tips for improving soil structure and moisture retention.
Benefits of Professional Soil Analysis
- Accurate Nutrient Management: By knowing the exact nutrient status of your soil, you can apply fertilizers more effectively and economically, avoiding overuse or underuse.
- Tailored Recommendations: Professional analysis often comes with customized advice for your particular soil type and plant needs, which can greatly enhance plant health and yield.
- Problem Diagnosis: If you’re experiencing issues with plant growth, a soil test can help diagnose underlying problems related to soil chemistry or deficiencies.
Professional soil analysis is an invaluable tool for anyone serious about gardening or agriculture. It provides a scientific basis for decision-making and helps ensure that soil management practices are both effective and sustainable. By regularly conducting such analyses, gardeners can maintain optimal soil conditions, leading to healthier plants and more productive gardens.
Effective Fixes for Hydrophobic Soil
Effective Fixes for Hydrophobic Soil
Amending the Soil: Enhancing Soil Health and Plant Growth
Amending the soil is a crucial practice in gardening and agriculture that involves adding materials to the soil to improve its physical properties. The primary goal is to create a more favorable environment for plant roots, which can lead to healthier plants and more robust growth.
Purpose and Benefits of Soil Amendments
Soil amendments aim to enhance the soil’s water retention, permeability, water infiltration, drainage, aeration, and structure. By improving these aspects, amendments help ensure that roots have an optimal environment to grow, access nutrients, and exchange gases. Effective soil amendment practices can lead to significant improvements in plant health and yield.
Common Types of Soil Amendments
A variety of materials can serve as soil amendments. Organic options include compost, manure, wood chips, and straw, each offering unique benefits such as nutrient enrichment and improved soil structure. Inorganic amendments like lime are used to adjust soil pH and improve the chemical balance within the soil, making nutrients more available to plants.
How to Use Soil Amendments
The process of amending soil typically involves several key steps:
- Identify the Need: Conduct a soil test to determine the deficiencies and needs of your soil. This test will reveal what nutrients are lacking and what amendments are necessary to balance the soil for optimal plant health.
- Select the Right Amendments: Based on the soil test results, choose the appropriate amendments. For instance, if the soil is too acidic, lime might be necessary to raise the pH. If the soil lacks organic matter, adding compost or manure can improve its structure and nutrient content.
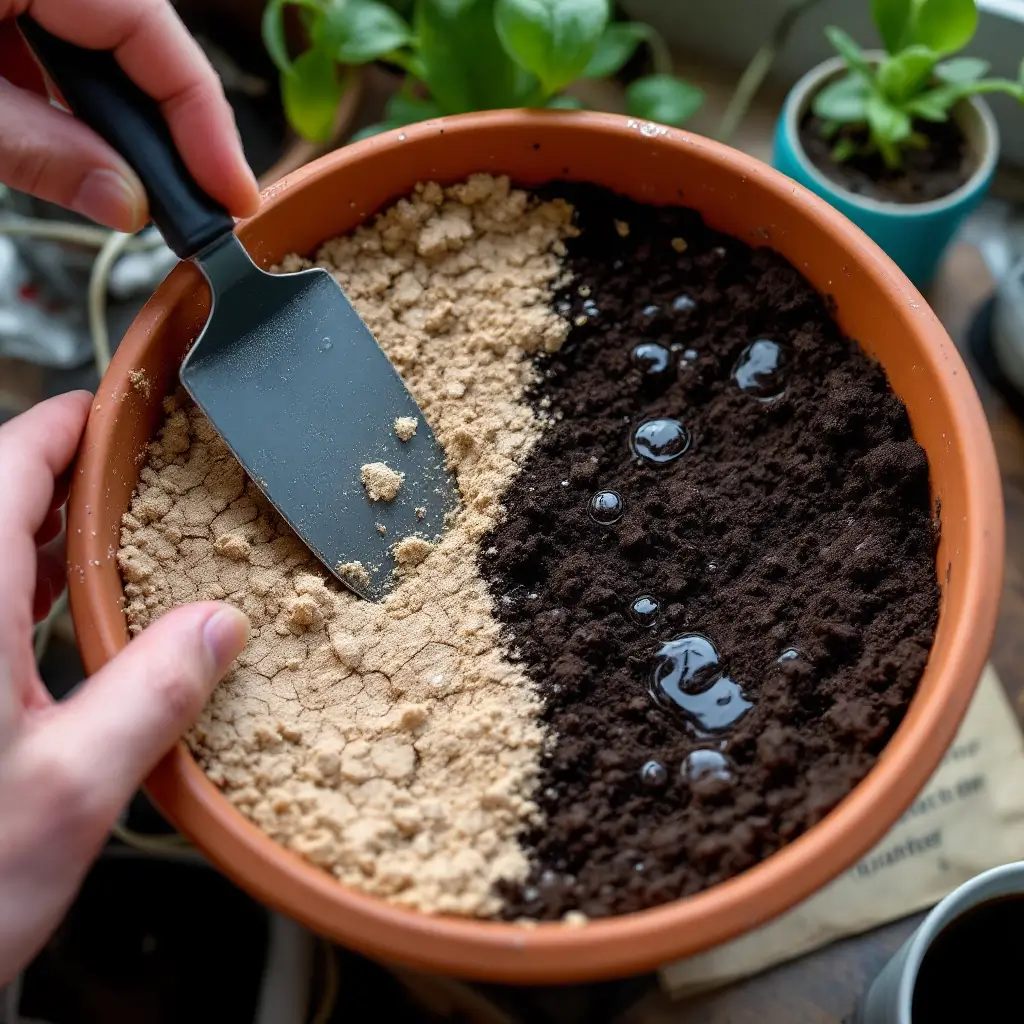
- Application: Integrate the amendments into the soil. For organic materials like compost, this usually involves spreading the amendment over the soil and mixing it in to a depth of several inches. For lime or other mineral amendments, follow specific guidelines regarding the quantity and method of application to avoid over-application, which can be harmful.
- Monitor and Adjust: After amending the soil, continue to monitor soil health and plant response. Additional soil tests may be necessary to ensure that the amendments have successfully improved the soil conditions and to make further adjustments as needed.
Timing and Maintenance
The best time to amend soil is typically before planting new gardens or when preparing beds at the beginning of a growing season. This timing allows the amendments to integrate and stabilize within the soil. Regular maintenance, including annual re-testing of soil and additional amendments, ensures that the soil remains healthy and supportive of plant growth.
By understanding and implementing soil amendments, gardeners and farmers can significantly enhance the quality of their soil, leading to healthier plants and more productive gardens. This proactive approach not only improves the immediate environment for plants but also contributes to the long-term sustainability of gardening and agricultural practices.
Adjusting Watering Practices: Enhancing Plant Health and Soil Efficiency
Adjusting watering practices is essential for maintaining healthy plants and preventing soil issues such as hydrophobicity. Proper watering techniques can significantly influence plant growth, soil health, and water conservation. Here’s a detailed look at how to optimize watering practices for different types of gardens and plants.
Understanding Plant and Soil Needs
Each plant has unique watering needs, which can vary based on its type, size, age, and the local climate conditions. Similarly, the type of soil—whether sandy, loamy, or clay—affects how water is retained and how often plants need to be watered. For instance, sandy soil drains quickly and requires more frequent watering, whereas clay soil retains moisture longer and may need less frequent watering.
Effective Watering Techniques
- Deep Watering: This technique encourages deeper root growth and ensures that water reaches the root zone of plants. It is particularly effective for deep-rooted plants and helps in establishing a strong root system.
- Watering at the Right Time: Watering early in the morning or late in the evening minimizes evaporation and allows water to penetrate deeper into the soil, making it more available to plants.
- Use of Tools: Employing tools like a watering wand with a shut-off valve can help in precisely targeting water delivery, reducing waste, and preventing damage to plants from a harsh water stream.
Monitoring Soil Moisture
Regularly checking the soil moisture is essential to determine if plants need water. This can be done by feeling the soil, using a soil moisture meter, or observing plant signals such as wilting or yellowing leaves. It’s important to water plants only when necessary to avoid overwatering, which can lead to root rot and other issues.
Adjusting to Environmental Conditions
Environmental factors such as temperature, humidity, and wind can affect watering needs. During hot or windy days, plants may need more frequent watering, while cooler or humid conditions might reduce the need for water. Adjusting watering schedules based on the current weather conditions and seasonal changes is crucial for efficient water use and plant health.
Avoiding Common Watering Mistakes
- Uniform Watering: It’s important to avoid watering at only one root point, which can lead to uneven root growth and reduced nutrient absorption. Instead, water around the plant to cover the entire root zone.
- Preventing Water Stress: Observing plants regularly for signs of water stress and adjusting watering practices accordingly can prevent severe damage and improve plant resilience.
By implementing these adjusted watering practices, gardeners can ensure that their plants receive the right amount of water at the right time, promoting healthier growth and preventing soil-related issues like hydrophobicity. This proactive approach not only enhances plant vitality but also contributes to more sustainable gardening practices by optimizing water use.
Mulching and Other Protective Measures: Enhancing Soil Health and Plant Growth
Mulching and other protective measures are essential practices in gardening and landscaping that help maintain soil health and promote robust plant growth. These methods involve covering the soil or employing techniques that protect the soil from erosion, temperature extremes, and moisture loss.
Mulching: A Key Strategy for Soil and Plant Health
Mulching is the process of covering the soil surface around plants with a layer of material, either organic or inorganic, to create favorable conditions for crop growth
1. Here’s how mulching actively benefits the garden:
- Moisture Conservation: Mulch reduces surface evaporation and helps maintain soil moisture, which is crucial during dry periods.
- Temperature Control: By insulating the soil, mulch keeps the soil cooler in the summer and warmer in the winter, protecting roots from temperature fluctuations.
- Weed Suppression: A layer of mulch inhibits weed germination and growth by blocking light access to the soil surface, reducing the need for frequent weeding.
- Soil Structure Improvement: Organic mulches, such as wood chips or straw, gradually break down and contribute organic matter to the soil. This decomposition process enhances soil fertility and improves its physical structure.
Application Techniques for Mulching
To effectively apply mulch:
- Choose the Right Material: Organic mulches like bark, straw, and leaves are beneficial for improving soil fertility, while inorganic mulches like stones or landscape fabric are more durable and suitable for controlling weeds without the need for replacement.
- Apply at the Right Depth: Typically, a 2-4 inch layer of mulch is sufficient to suppress weeds and conserve moisture without suffocating plant roots. Ensure the mulch is not piled against plant stems or tree trunks to avoid moisture-related diseases.
- Refresh Mulch Regularly: Organic mulch decomposes over time and will need replenishing to maintain its benefits. Monitoring the condition and thickness of the mulch layer helps maintain its effectiveness.
Other Protective Measures
In addition to mulching, other protective strategies can be employed to safeguard soil and enhance plant health:
- Erosion Control: Techniques such as planting ground cover, using erosion control mats, and constructing retaining walls are effective in preventing soil erosion, especially in sloped areas.
- Use of Cover Crops: Planting cover crops like clover or ryegrass during the off-season can protect the soil from erosion, improve soil structure, and enhance its nutrient content by fixing nitrogen in the soil.
Monitoring and Adjusting Practices
Regularly inspecting the mulched and protected areas allows for timely adjustments based on observed conditions. For instance, if mulch is found to be retaining too much moisture, reducing the thickness or switching to a more breathable material might be necessary. Similarly, the success of erosion control measures should be evaluated periodically, especially after heavy rainfalls or at the end of the growing season.
By implementing mulching and other protective measures, gardeners and landscapers can significantly improve soil conditions, enhance plant health, and create more sustainable and low-maintenance gardens. These practices not only conserve water and reduce weed pressure but also contribute to a healthier and more vibrant garden ecosystem.
Preventing Hydrophobic Conditions in the Future
Regular Soil Maintenance: Ensuring Long-Term Soil Health and Fertility
Regular soil maintenance is a critical aspect of sustainable gardening and farming practices. It involves a series of proactive steps aimed at preserving soil health, enhancing its fertility, and ensuring it remains productive over time. Here’s a detailed look at how regular soil maintenance can be effectively implemented.
Monitoring Soil Health
Regularly assessing the soil’s physical, chemical, and biological properties is essential. This includes checking soil texture, structure, pH levels, and nutrient content. Soil testing is a valuable tool in this regard, as it provides detailed insights into the soil’s current condition and what amendments might be necessary to maintain or improve its health.
Incorporating Organic Matter
Adding organic matter to the soil is one of the most beneficial practices in soil maintenance. Organic materials such as compost, manure, or leaf mold improve soil structure, enhance nutrient content, and boost the soil’s moisture-holding capacity. These additions also encourage the activity of beneficial microorganisms, which play a crucial role in breaking down organic matter and making nutrients available to plants.
Implementing Crop Rotation and Cover Crops
Crop rotation and the use of cover crops are effective strategies for maintaining soil health. Rotating crops helps prevent the depletion of specific nutrients, reduces the buildup of pests and diseases, and can improve soil structure and fertility. Cover crops, such as legumes, grasses, or brassicas, are planted during off-seasons to cover the soil. These crops help prevent erosion, suppress weeds, and can fix nitrogen in the soil, enhancing its fertility for future crops.
Managing Water Efficiently
Efficient water management is crucial for maintaining soil health. Overwatering can lead to soil compaction and nutrient leaching, while under-watering can stress plants and lead to soil degradation. Implementing efficient irrigation practices, such as drip irrigation or soaker hoses, ensures that water is delivered directly to the root zone where plants need it most, minimizing waste and reducing evaporation.
Controlling Erosion
Erosion control is vital for preserving topsoil and maintaining soil health. Techniques such as mulching, establishing windbreaks, or using erosion control fabrics can significantly reduce soil loss due to wind or water runoff. These practices are particularly important in areas prone to heavy rains or on sloped lands.
Regular Weeding
Weeds compete with crops for nutrients, water, and light. Regular weeding helps ensure that your plants aren’t fighting for these essential resources. This can be done manually, mechanically, or through the use of mulches that suppress weed growth by blocking sunlight.
Adjusting pH and Nutrient Levels
Based on soil test results, adjusting the soil pH and nutrient levels might be necessary. For soils that are too acidic, applying lime can raise the pH, making it more suitable for plant growth. If the soil is alkaline, sulfur or aluminum sulfate might be used to lower the pH. Additionally, specific nutrient deficiencies should be addressed with appropriate fertilizers, following the recommendations from a soil test report.
By actively engaging in these regular soil maintenance practices, gardeners and farmers can ensure their soil remains healthy and productive. This not only supports plant health and increases crop yields but also contributes to the broader environmental goal of sustainable land management.
Proper Plant Selection and Placement: Key to Successful Gardening and Landscaping
Proper plant selection and placement are fundamental to the success of any gardening or landscaping project. These practices ensure that plants thrive in their environment, contributing to a sustainable and aesthetically pleasing landscape.
Understanding Plant Requirements
Each plant species has specific environmental preferences and requirements including light, soil type, water, and temperature conditions. Selecting plants that are well-suited to the local climate and the specific conditions of your garden is crucial. For instance, plants native to your region are more likely to thrive as they are adapted to the local climate and soil conditions, requiring less water and fewer fertilizers, and are generally more resistant to local pests and diseases.
Assessing the Site
Before selecting plants, it’s important to assess the site thoroughly. This includes understanding the soil quality, pH, moisture level, and sun exposure. Areas of the garden that receive full sun versus those that are shaded will influence what types of plants should be placed there. For example, sun-loving plants will not thrive in shaded areas and vice versa.
Plant Functionality
Beyond aesthetic considerations, think about the functional aspects of plant placement. Plants can be used for various purposes such as providing shade, enhancing privacy, controlling erosion, or even for food production. For instance, trees can be strategically placed to provide shade to a home, reducing cooling costs in the summer.
Aesthetic Considerations
Aesthetics also play a significant role in plant selection and placement. Consider the mature size of the plants to avoid overcrowding and to maintain the visual balance and proportion in the landscape. Layering plants with varying heights, colors, and textures can create a visually engaging space. It’s also important to consider how the garden will look across different seasons and ensure that there are interesting visual elements throughout the year.
Long-Term Growth and Maintenance
Plan for the long-term growth of the plants and the maintenance they will require. Some plants might become too large for their initial space or might require more maintenance than initially anticipated. Selecting plants with growth habits and maintenance requirements that fit your lifestyle and gardening capabilities will ensure that the garden remains manageable and beautiful for years to come.
Implementing the Plan
Once the appropriate plants have been selected and their placement decided, proper planting techniques are crucial. This includes preparing the soil correctly, planting at the right depth, and providing adequate water and nutrients during the establishment phase. Regular maintenance, such as pruning, weeding, and additional watering, will also be necessary to support healthy growth and development.
By carefully selecting and placing plants according to their specific needs and the characteristics of the garden site, gardeners and landscapers can create sustainable, low-maintenance, and thriving gardens. This thoughtful approach not only enhances the beauty of the landscape but also supports local biodiversity and ecological balance.
Ongoing Education and Care Tips: Enhancing Plant Health and Longevity
Ongoing education and the application of effective care tips are essential for anyone looking to maintain healthy plants and create thriving gardens. Whether you’re a novice gardener or an experienced botanist, continuously learning about plant care and adapting your practices can lead to more robust plant growth and a more beautiful garden environment.
Understanding Basic Plant Needs
Every plant has fundamental needs that must be met for it to thrive. These include proper light, water, and nutrient levels. Learning the specific requirements of each plant in your garden is crucial. For instance, some plants may prefer bright, indirect light while others thrive in low-light conditions. Similarly, water requirements can vary widely; some plants may need moist soil at all times, whereas others might require a dry-out period between watering.
Regular Monitoring and Maintenance
Keeping plants healthy involves regular monitoring and maintenance. This includes checking for signs of distress such as yellow leaves, powdery mildew, strange spots, brown tips, and weak stems, which are indicators of potential health issues like nutrient deficiencies, pest infestations, or water imbalances. Addressing these signs early can prevent more serious problems and keep your plants healthy.
Educational Resources and Expert Advice
Leveraging resources like gardening blogs, videos, and books can provide valuable insights and tips. For example, learning from experienced gardeners or botanists through workshops or community gardens can enhance your understanding and skills. Inviting experts such as gardeners, botanists, or entomologists to share their knowledge can also be incredibly beneficial.
Practical Tips for Plant Care
- Proper Watering Techniques: Understanding the watering needs of your plants is crucial. Overwatering is a common issue that can lead to root rot, while under-watering can stress plants and stunt growth. Using tools like soil moisture meters can help you water correctly.
- Optimal Lighting Conditions: Ensuring your plants receive the right amount of light can significantly affect their health. Position plants so that they get the appropriate level of sunlight throughout the day.
- Humidity and Temperature: Some plants require specific humidity levels or temperatures to thrive. For indoor plants, using humidifiers or placing plants in groups can help maintain the necessary humidity levels.
- Regular Cleaning: Keeping your plants dust-free not only improves their appearance but also enhances their ability to photosynthesize efficiently.
Continuous Learning
The world of plant care is ever-evolving, with new techniques and products continually emerging. Staying updated with the latest gardening trends and scientific research can help you apply the most effective care strategies. Additionally, understanding how to read and apply the information presented on plant labels, as suggested by sources like Oklahoma State University, can make a significant difference in how you care for your plants.
By engaging in ongoing education and applying these care tips, gardeners can ensure their plants not only survive but thrive. This proactive approach not only enhances the beauty and productivity of gardens but also makes gardening a more enjoyable and rewarding experience.
Addressing Hydrophobic Soil in Houseplants
Understanding why houseplants become hydrophobic is essential for maintaining their health and ensuring they continue to thrive in their indoor environment. The primary causes of hydrophobic soil—organic matter decomposition, frequent drying out, and soil compaction—highlight the need for careful and consistent care practices. By recognizing these factors and responding proactively, gardeners can effectively manage soil conditions and prevent moisture-related issues.Implementing strategies such as regular soil rehydration, repotting with fresh, high-quality potting mix, using wetting agents, and ensuring proper soil aeration can dramatically improve water absorption and retention. These actions not only address hydrophobicity but also enhance the overall growing conditions, promoting healthier, more vibrant houseplants.Ultimately, the key to combating soil hydrophobicity lies in regular observation and maintenance. By staying attentive to the needs of your houseplants and adjusting care routines as necessary, you can create a thriving indoor garden that brings life and beauty to your home.